
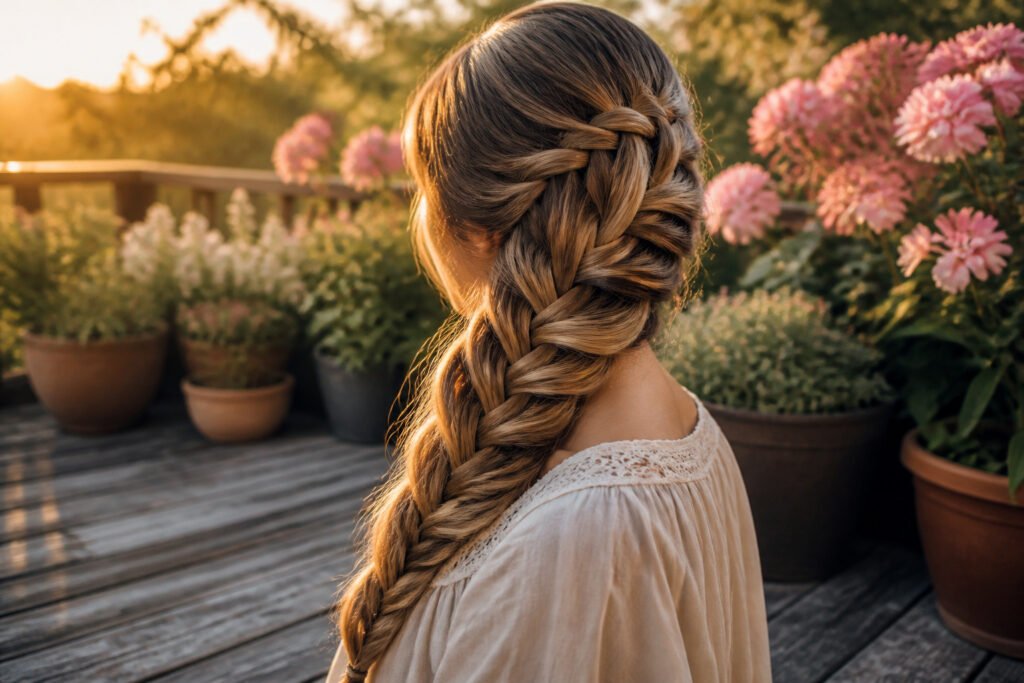
Cute braided hairstyles are plaited styles that range from quick side braids to elaborate updos, and the difference between the ones you finish and the ones you abandon usually comes down to whether you can see the back of your own head. The upside-down French braid bun, for example, demands that you braid from the nape upward while hanging your head forward; you will not see what you are doing, and the resulting messiness is exactly the point. Most of the easier styles, like the side braid bun, take under fifteen minutes once you learn the pinning order: braid first, sweep second, secure last.
1. Side Braid Bun
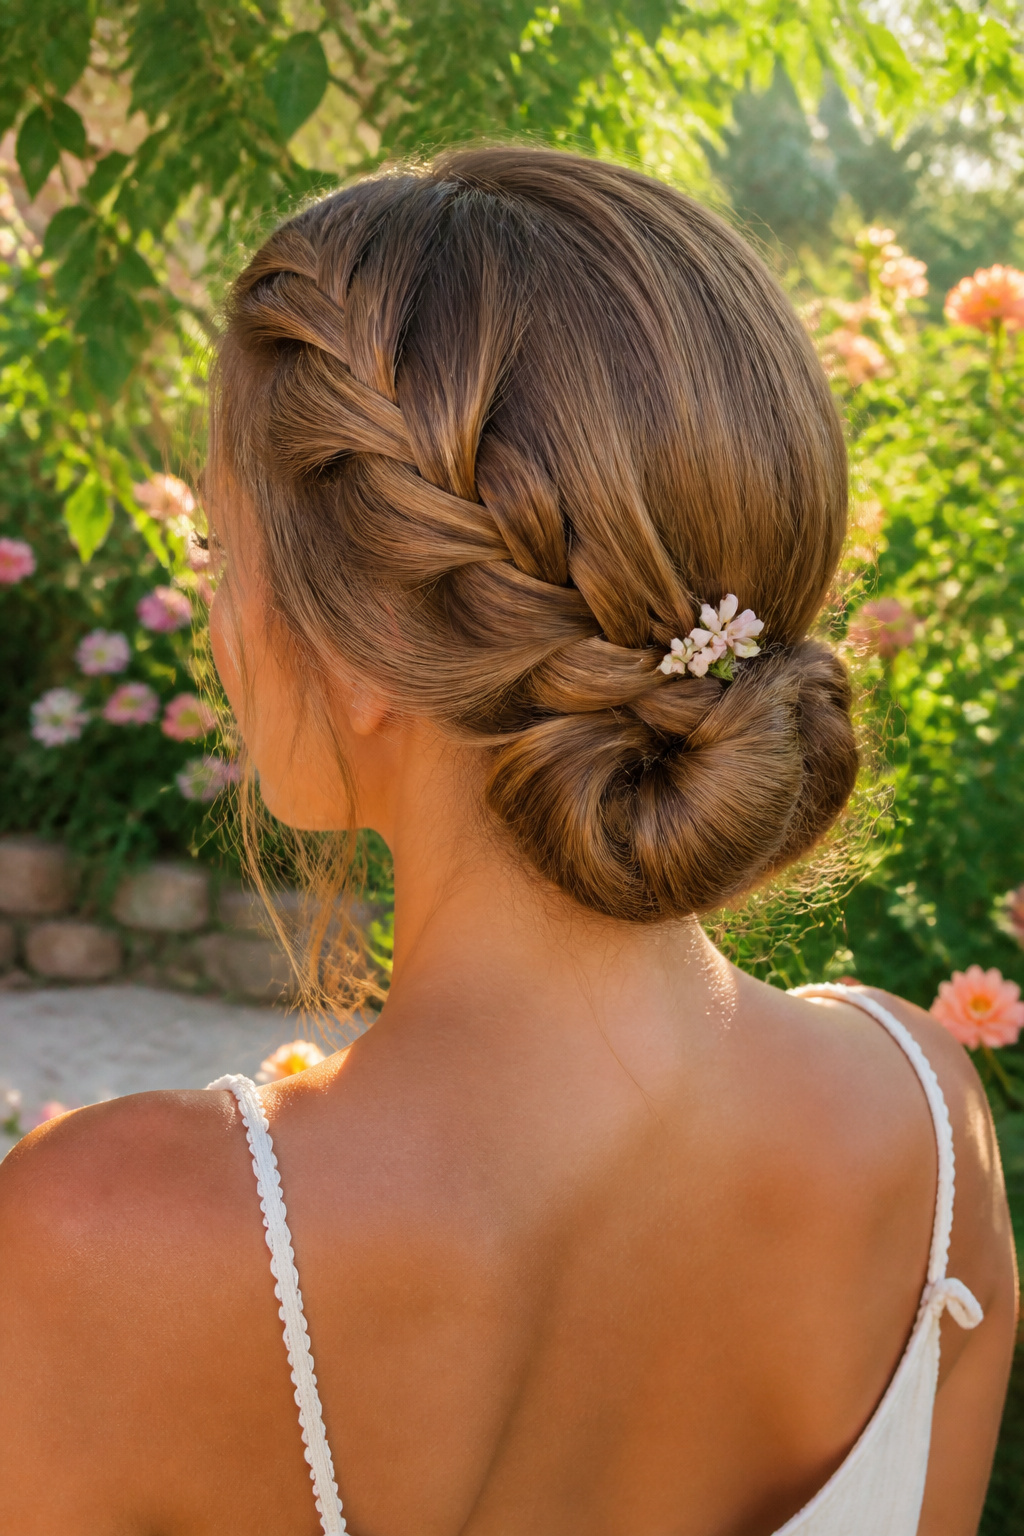
A single braid along one side gathers into a low bun at the nape, and that is all the braiding this style asks of you. The rest is a basic sweep and pin, which makes it one of the easiest braided updos to attempt if you are new to this. You can keep the braid tight for a wedding or loosen it for texture at a daytime event. Either way, the whole thing stays up off your neck, so it works for summer heat without looking casual. Add a pin or comb if the outfit needs it, or leave it plain. Most people finish in under fifteen minutes once they have the pinning order down: braid first, sweep second, secure last.
2. Upside Down French Braid Bun
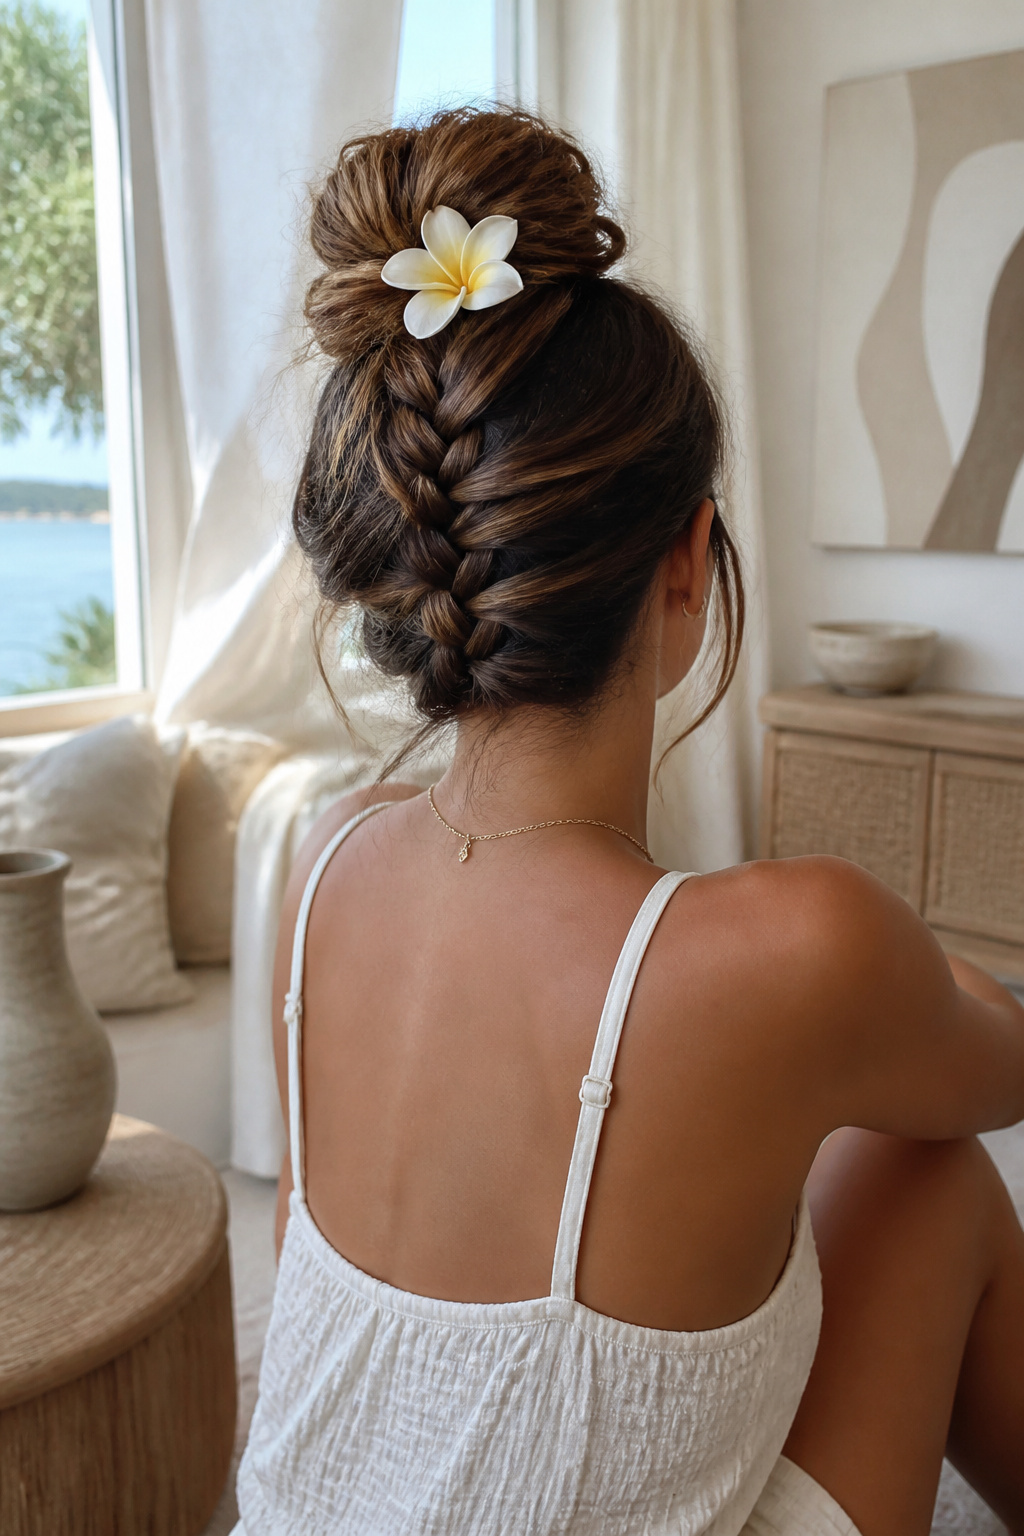
Braid from the nape upward and you get a bun that stays cool on a July afternoon. Most French braids start at the crown and work down. Flip that: hang your head forward, begin the plait at the hairline behind your neck, and work toward the crown. You will not see what you are doing. The result is a messier bun than a mirror-assisted version, which is exactly the point for a casual summer look. Once the braid reaches the crown, twist the remaining length into a bun and pin. The braid itself lifts the hair off your neck, and the bun sits high enough to clear a collar. Tuck a fresh flower behind the pin if you want the beach-picnic version. You can do it alone, but expect to fumble a few strands; the unevenness reads as texture, not error.
3. Side French Braid Bun
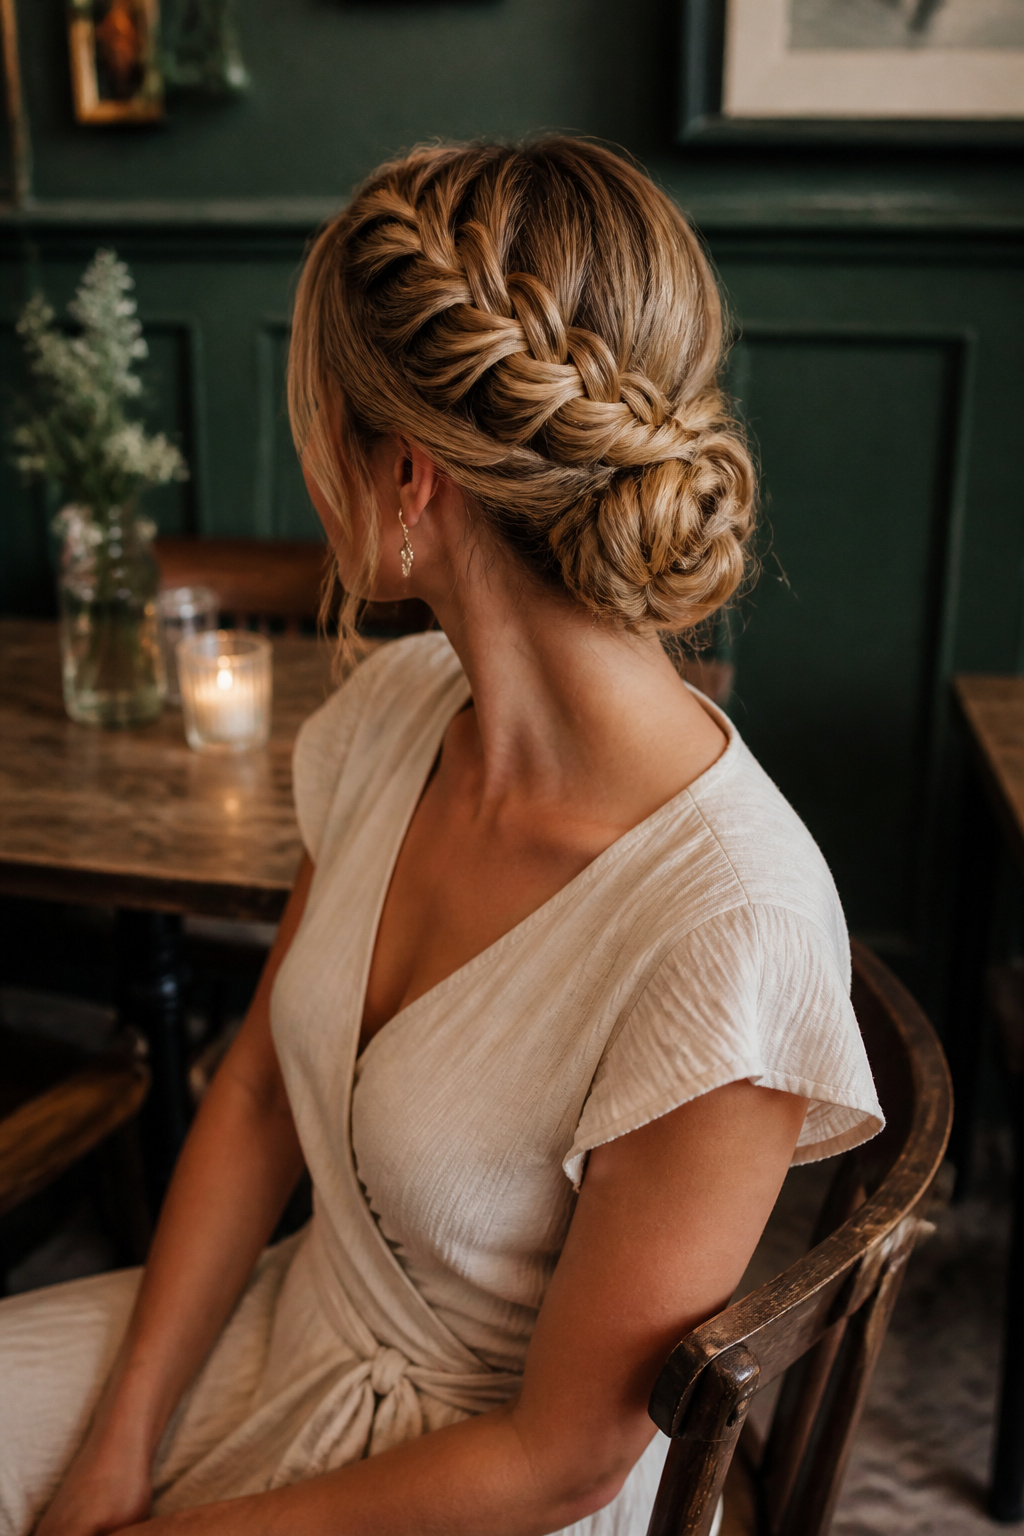
A side French braid bun keeps the braid integrated into the scalp all the way to the nape, which gives you a smoother line than a standard side braid bun where the plait hangs loose before it gets pinned. You start the French braid at your part, adding hair from underneath as you move toward the opposite ear, then coil the remaining length into a low bun at the side.
This one works best when you keep tension fairly tight through the braid itself; you can loosen the outer edges afterward if you want volume, but a slack base collapses the shape against your head. The tradeoff is time. A standard side braid bun takes less than fifteen minutes and you can manage it alone. The French version often goes smoother if someone else handles the back sections while you braid, since the line needs to stay close to the scalp where you cannot see it.
Wear this with a midi dress for a date, or try it with a striped shirtdress if you are out wine tasting with friends. It holds up in summer heat because every strand is off your neck, and you can pin in a small accessory at the bun if the occasion calls for it. Medium or long hair handles the style best; short hair makes the French braid portion difficult to finish cleanly.
4. Swedish Crown Braid

A Swedish crown braid wraps around your head like a headband, lifting everything off your neck and keeping you cool when the temperature climbs. It is the kind of style that turns a hot afternoon into something you do not have to think about.
The braid works especially well if your hair runs thick, since it distributes the weight evenly rather than pulling everything into one spot. You get the relief of an updo without the headache that sometimes follows.
The name comes from Scandinavian tradition, where women braided hair close to the scalp in continuous plaits for both practical and ceremonial wear. The execution matters more than the origin: you are building a rope of hair that circles from one ear to the other, tucked and pinned so the ends disappear. A few face-framing pieces can soften the line, or you can braid it tight and clean for something more severe.
Pair it with a sundress or a loose linen shirt and the look holds together without trying too hard. The braid does the work; your outfit just has to stay out of the way.
5. Loop Braid
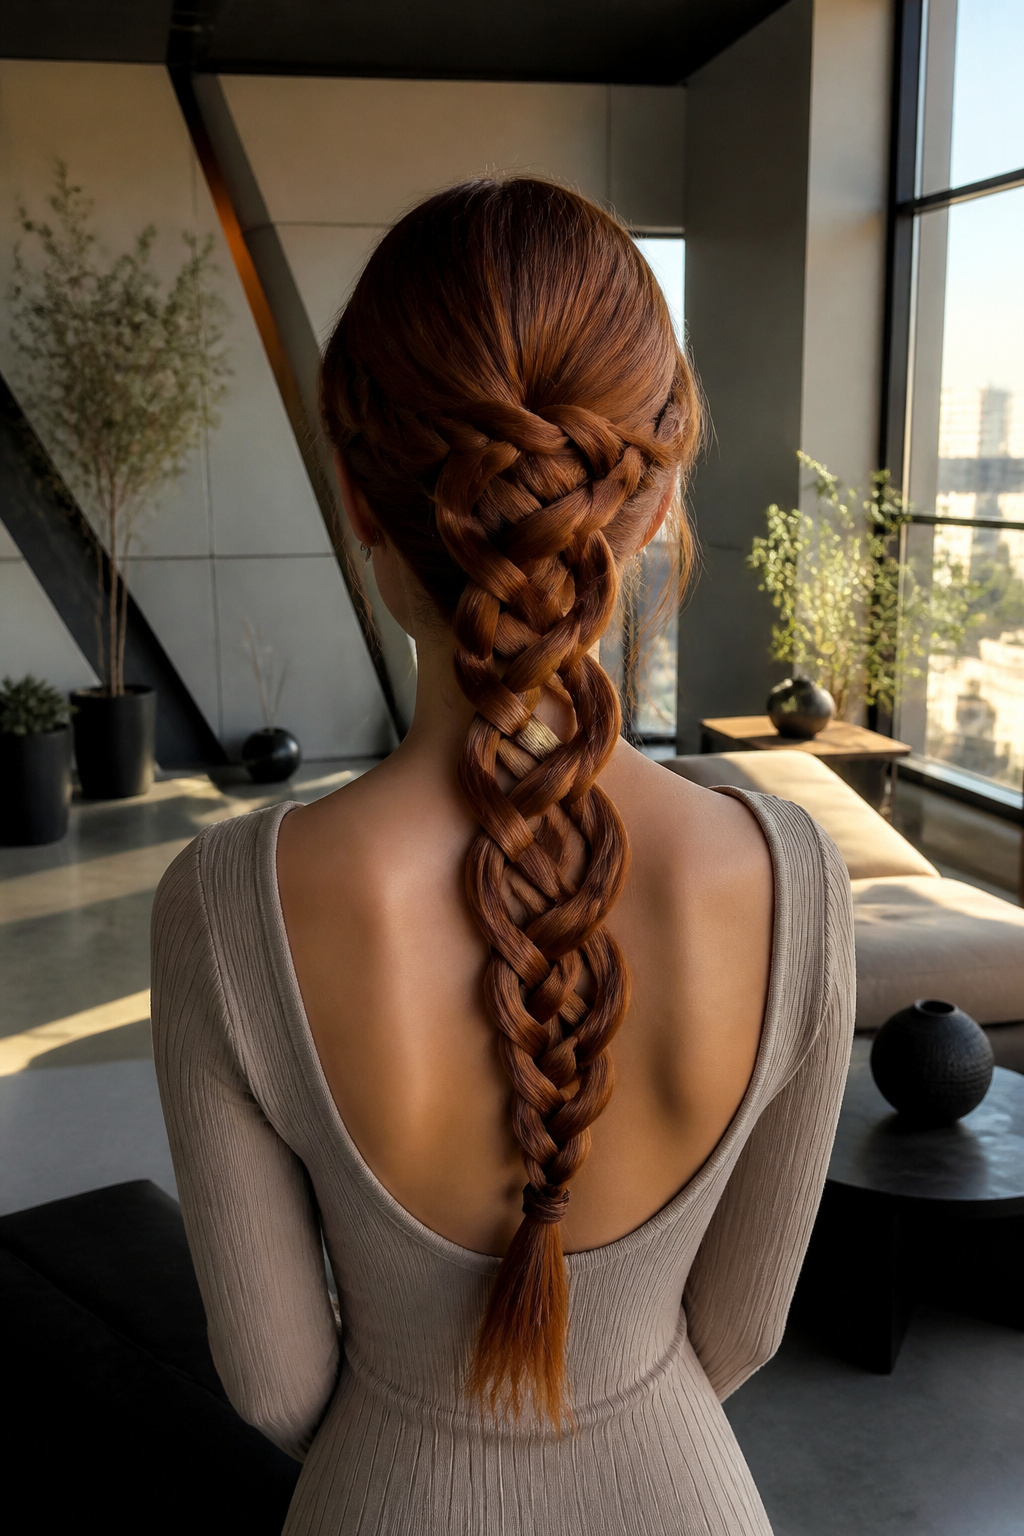
The loop braid is the one that looks like Celtic knotwork running down your back, and it earns every second of attention it gets. You braid thick and thin strands at the same time, with the heavier center braid framed by a thinner outer braid that wraps the whole thing in a continuous rope-like edge. The alternating strand sizes are what create that woven, almost architectural look; without the contrast, it would read as a single dense rope rather than something with depth and shadow.
This style demands very long hair to show the full pattern, and it sits among the more advanced braids in this list. You will need either solid practice with two-strand tension or a second pair of hands to keep the thin outer braid even while you manage the thick center section. The first time you try it alone, the thin strands tend to go slack or wander off center; that is normal, and it is why most people who wear this regularly either braid on a friend or have worked out a mirror setup that lets them check the back of their own head.
6. Big Side Braid
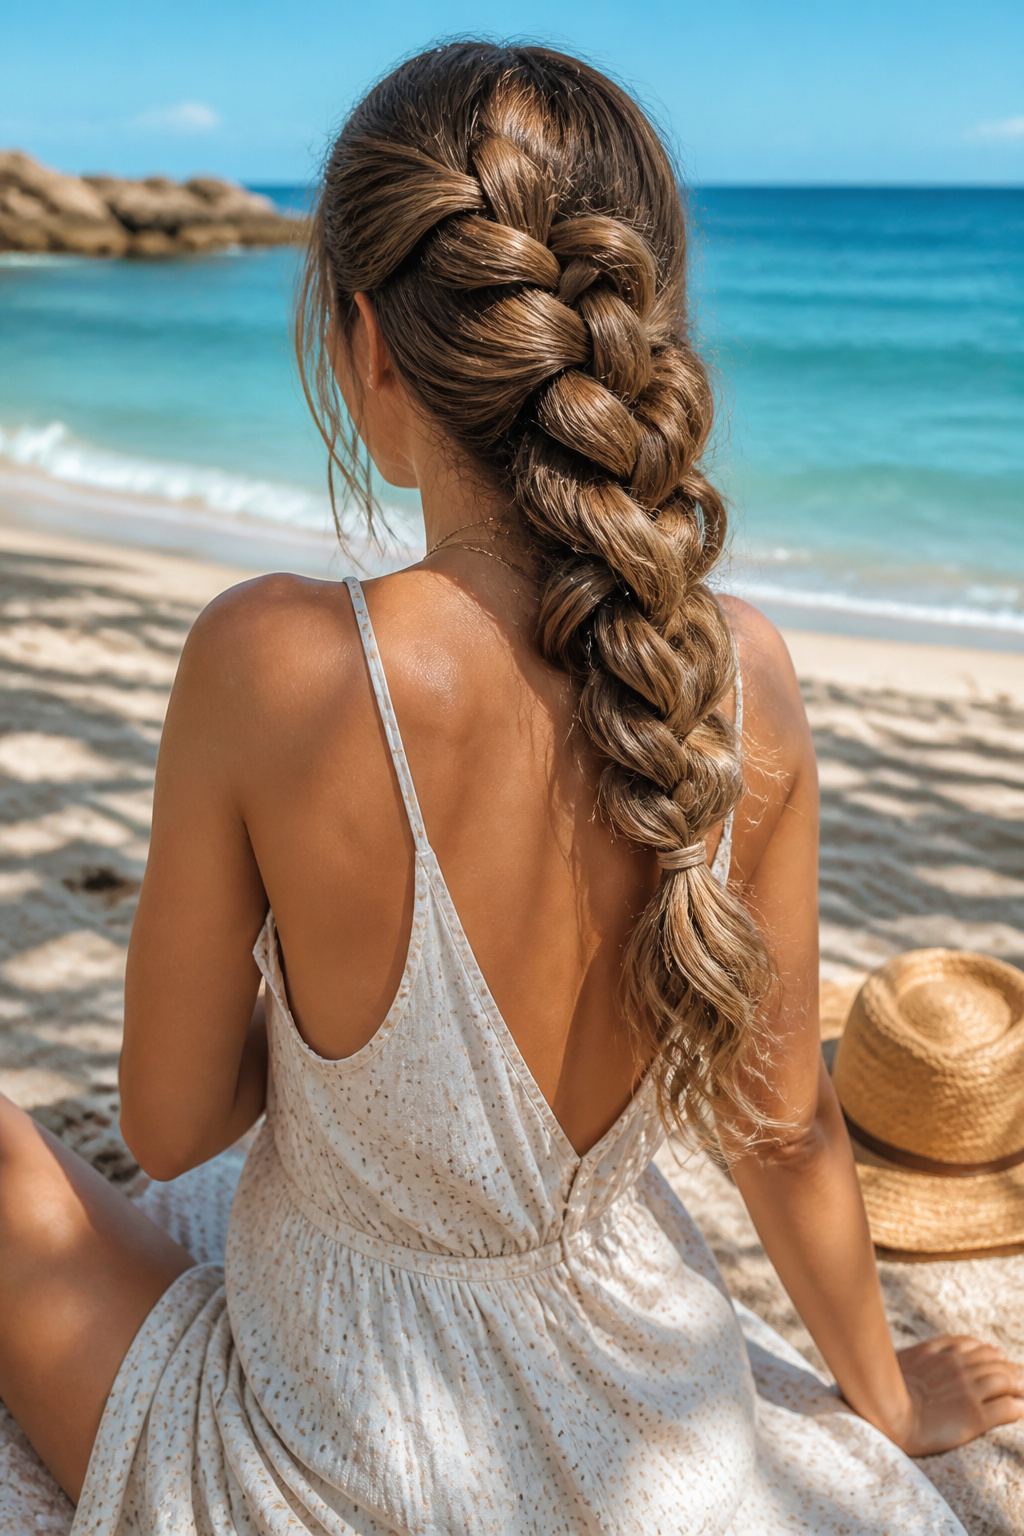
A big side braid works even when your hair is fine. The volume comes from pancaking, which is the move of tugging each braid loop outward after you tie the end. Do it gently and the braid widens without falling apart.
You can start with a Dutch braid or a traditional three-strand braid along one side. Once it is secured, use both hands to pull the loops in opposite directions. The braid flattens and spreads, which creates the illusion of thickness that makes this style stand out.
Texture balm helps if your hair is slippery or thin. Spray dry shampoo at the roots before you begin for grip that keeps the braid from sliding. This approach suits straight, wavy, and curly textures, since the pancaking step adapts to whatever density you start with.
For a finishing touch, curl any loose ends with a curling iron. The contrast between the wide braid and the soft curl at the bottom gives the style more presence than a plain tail would.
7. DIY Messy Fishtail Braid
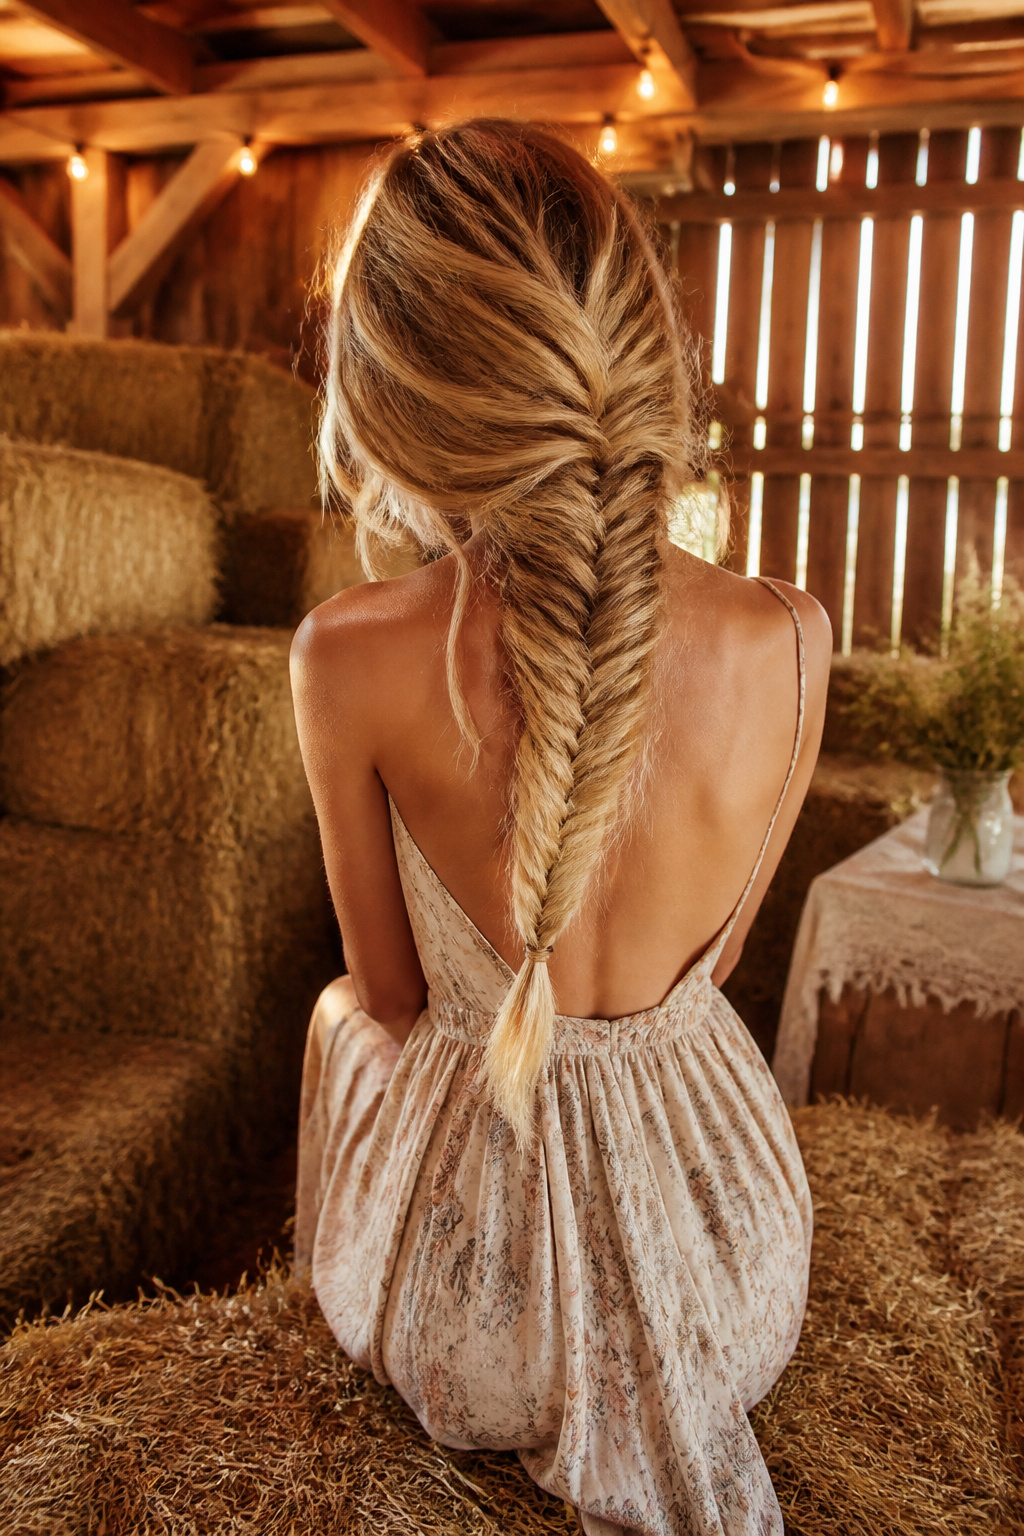
The messy fishtail braid is the style you reach for when you want the credit without the pressure. Uneven tension actually improves the look, so a slightly loose pull or an errant strand falling out reads as intentional, not sloppy.
It works on thin hair and thick hair alike. The structure comes from two equal sections rather than three, which means you are crossing skinny strands from the outside of one section over to the other side, repeating back and forth until you run out of length. Pull the strands tight if you want neatness, or leave them soft for the finished rumpled effect.
If you want to push further, cross this technique with a French braid start and you get the mermaid braid, but the basic two-strand version needs no upgrade to hold its own.
8. Waterfall Braid
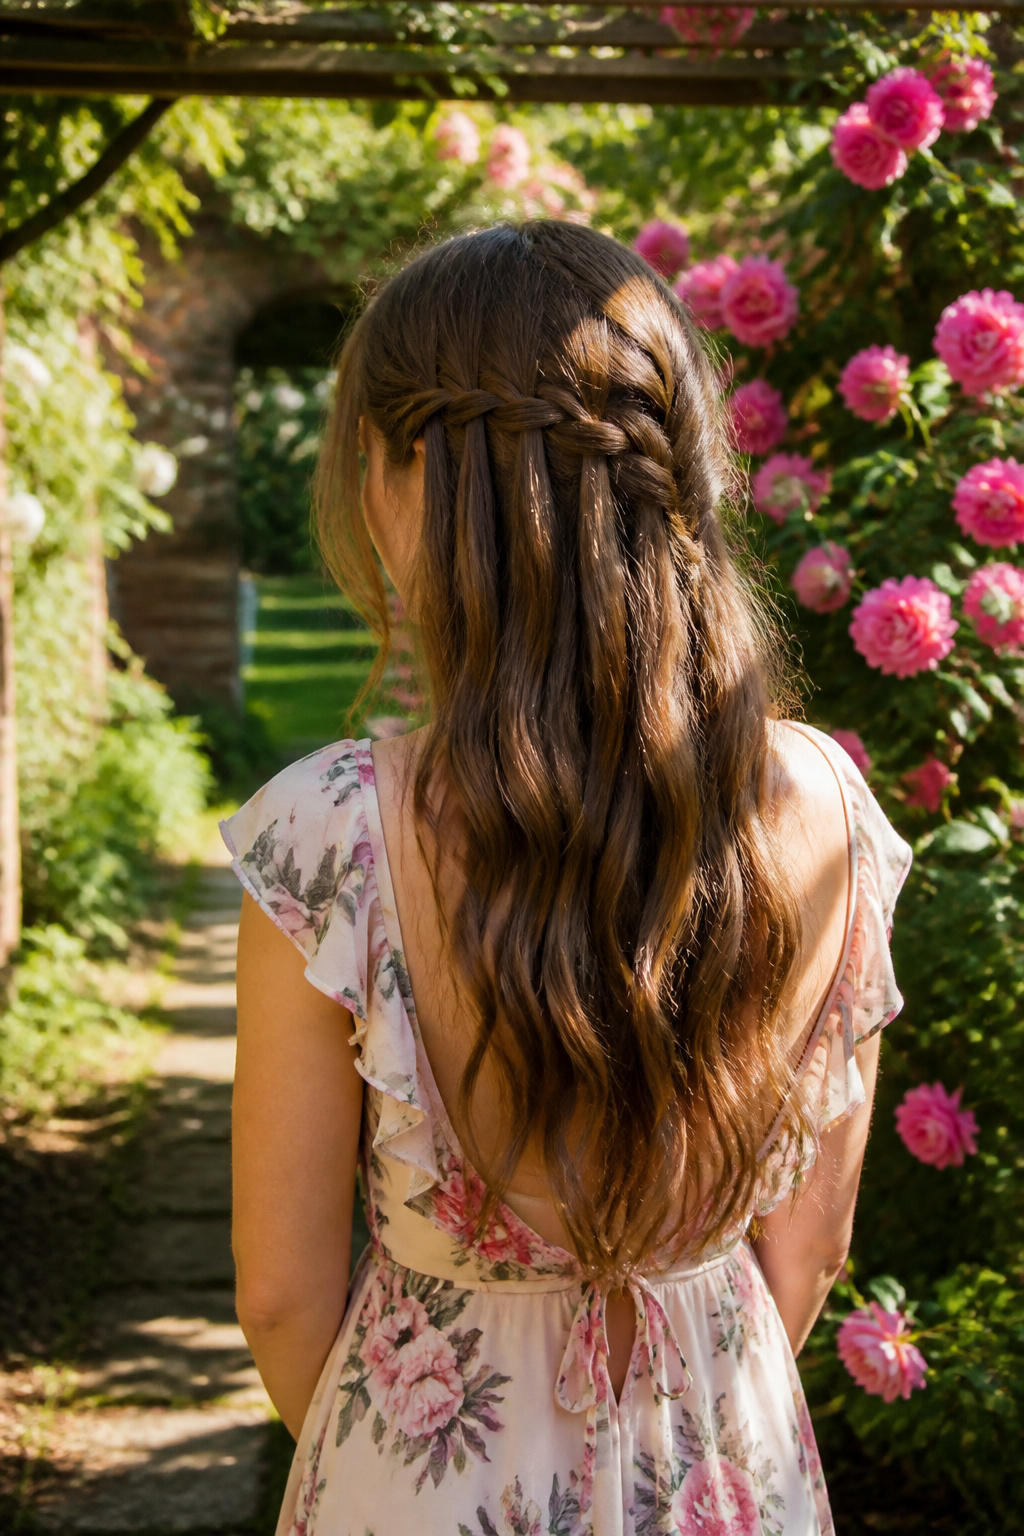
The waterfall braid keeps most of your hair loose and flowing, which is why it works so well for summer weddings or any formal occasion where you want elegance without an updo. You start with a deep side part and take two sections from the hairline. Cross the front section over the other, moving it away from your face. Then pick up a new section from the top of your head, let it fall across that crossed piece, and drop the original section so it falls through the twist. That falling strand creates the cascade that gives this style its name. Replace it with another section from below, cross over, and repeat.
The technique reads as decorative rather than functional. Unlike a French braid that locks hair in, you are continuously releasing strands while replacing them, so nothing gets pulled tight against the scalp. Most of your hair stays down, free to curl or straighten underneath the woven band. The whole process takes under 25 minutes and needs only a few bobby pins to secure the trailing end underneath unbraided hair. Jennifer Morrison has worn this look, if you need a reference for how it sits on camera. One side works, or mirror it on both. Either way, the braid functions more like hair jewelry than structure.
9. Interwoven 3-Strand Braid
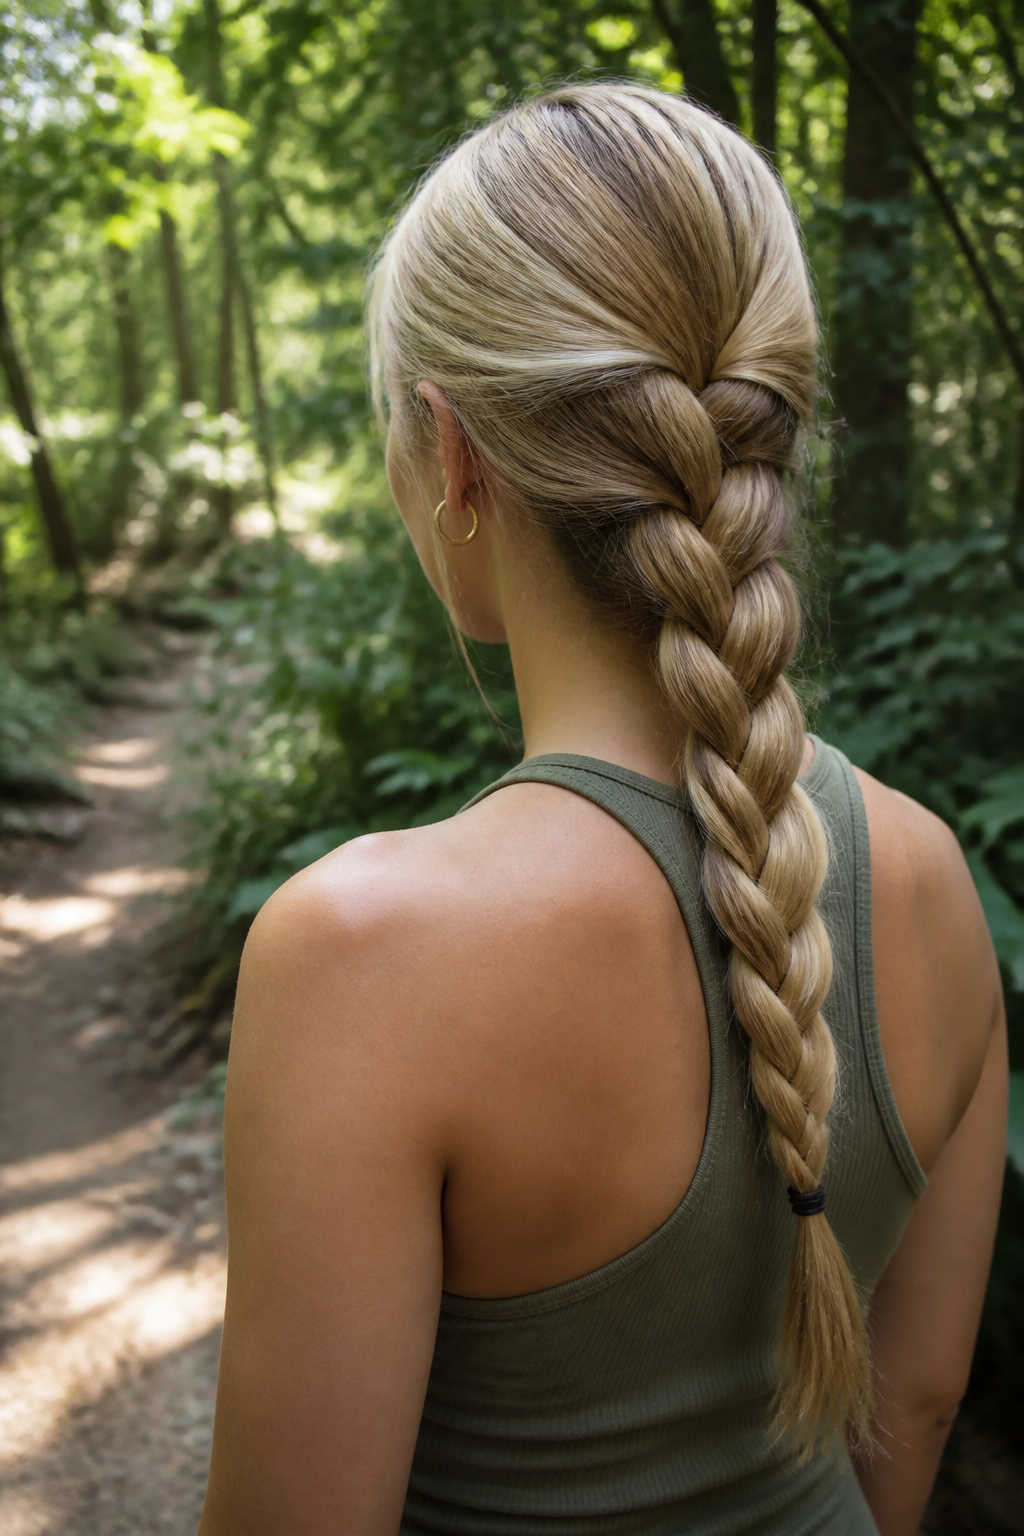
The interwoven 3-strand braid is the first technique most people learn, and it stays useful long after you’ve moved on to fancier styles. Tension control alone decides whether you look polished or relaxed: pull each crossover tight and smooth for a sleek finish, or keep the grip loose and let strands wander for something more casual.
A few clips at the roots help you work without the sections collapsing, especially on longer hair. If your hair is thick, dark, or naturally textured, the individual strands can disappear into each other and flatten the braid’s dimension. A light mist of hairspray and a touch of shine product on the surface strands fixes this, catching light so the weave reads clearly from a few feet away.
Flyaways are the other enemy. On a long braid they break the clean line, so smooth them down as you go or smooth them after with a small drop of serum. The same braid done tight at 8 a.m. can look office-appropriate; the same braid loosened with your fingers by 6 p.m. works for dinner. That is the whole trick, and it costs nothing but attention to how hard you pull.
10. Rope Braid Updo
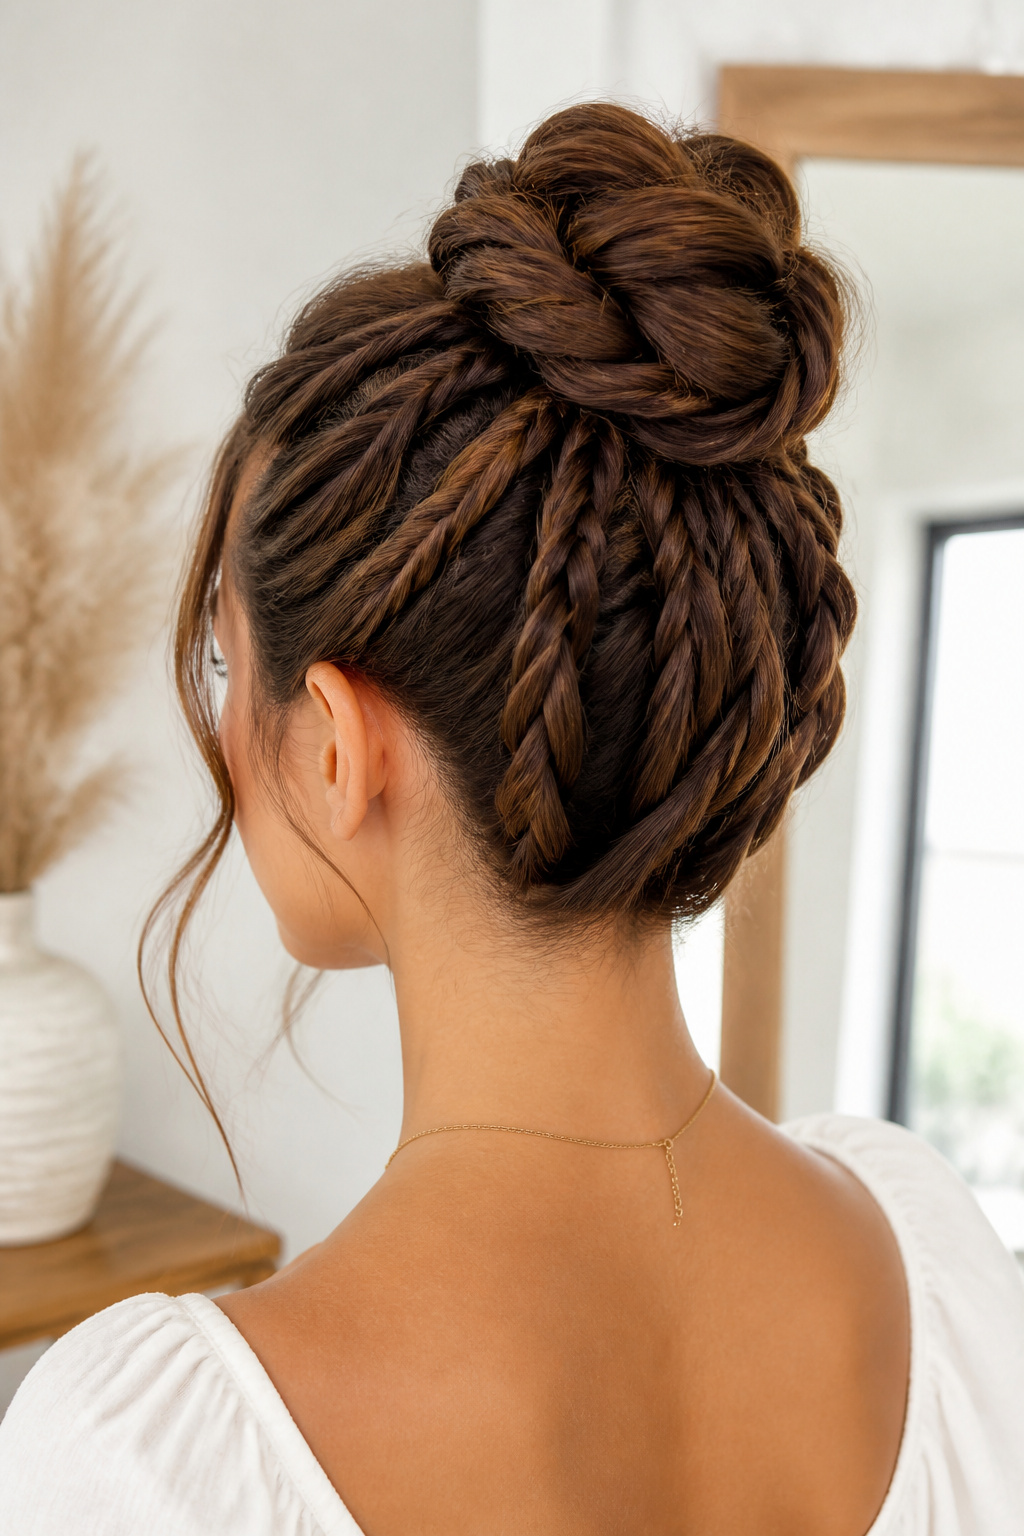
The rope braid updo works because it looks intricate while the actual technique is simple. You split the hair into two sections, twist both strands clockwise, then wrap them around each other counterclockwise. That opposite tension is what locks the braid so it holds without elastic at every turn.
For this style, you make several of these rope braids along each side of the head, sweeping them back toward the crown. The trick is keeping the tension even; if one braid is pulled tighter than its neighbor, the bun sits crooked. Gather all the rope braids into a ponytail base, then coil them into a low or mid-height bun and pin.
The rope braid wants to untwist if you wrap both strands the same direction, so check your hands. Two clockwise twists, then counterclockwise wrap. The bun itself benefits from the rope braids’ natural tube shape; they stack neatly and create a ribbed texture around the bun’s perimeter that a standard three-strand braid flattens out. Fine hair sometimes needs texturizing spray before you start, or the twists slip against each other and the volume collapses by midday.
11. Braided French Twist
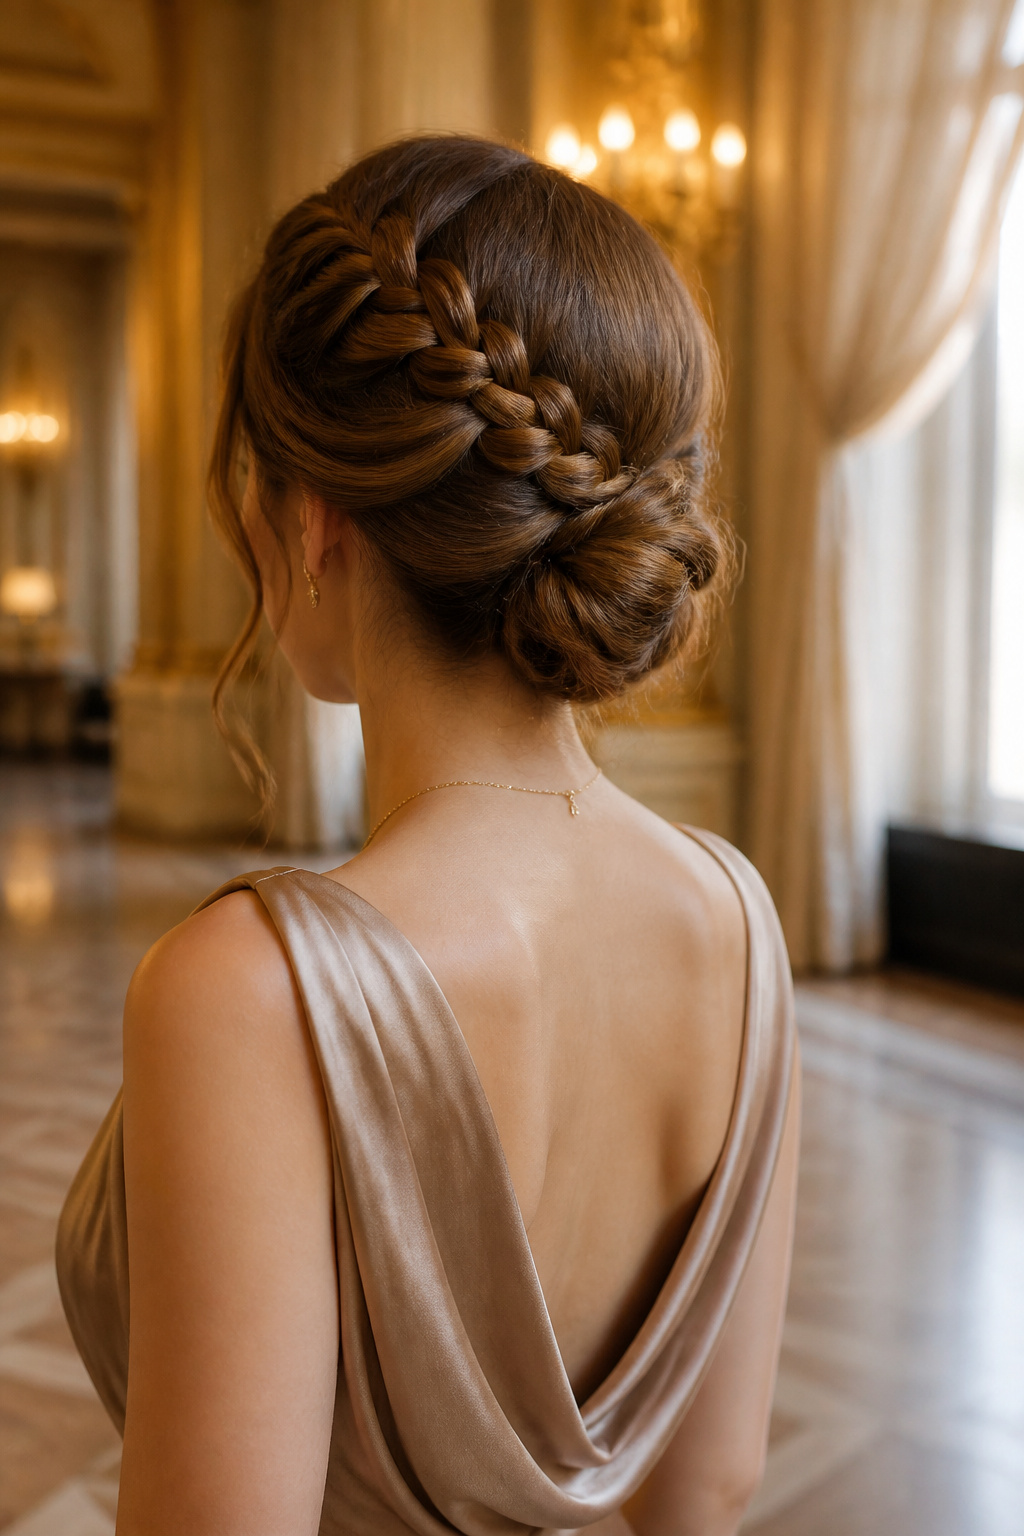
A traditional French twist demands smooth, scraped-back hair rolled into a severe column. The braided version trades that polish for texture and you do the work yourself without an extra pair of hands.
Place the braid where the roll would sit, low at the nape and off to one side rather than centered. That offset softens the silhouette the same way a loose tendril would on a formal updo, but the braid keeps it deliberate. Small braids woven in from each temple and drawn back into the twist add even more variation without breaking the line.
Leave the surface slightly messy. The sources describe this as easy and slightly messy by design, not by accident, and the effect holds with a few bobby pins. A sleek finish here would fight the braid rather than flatter it.
12. Tucked Braided Bun
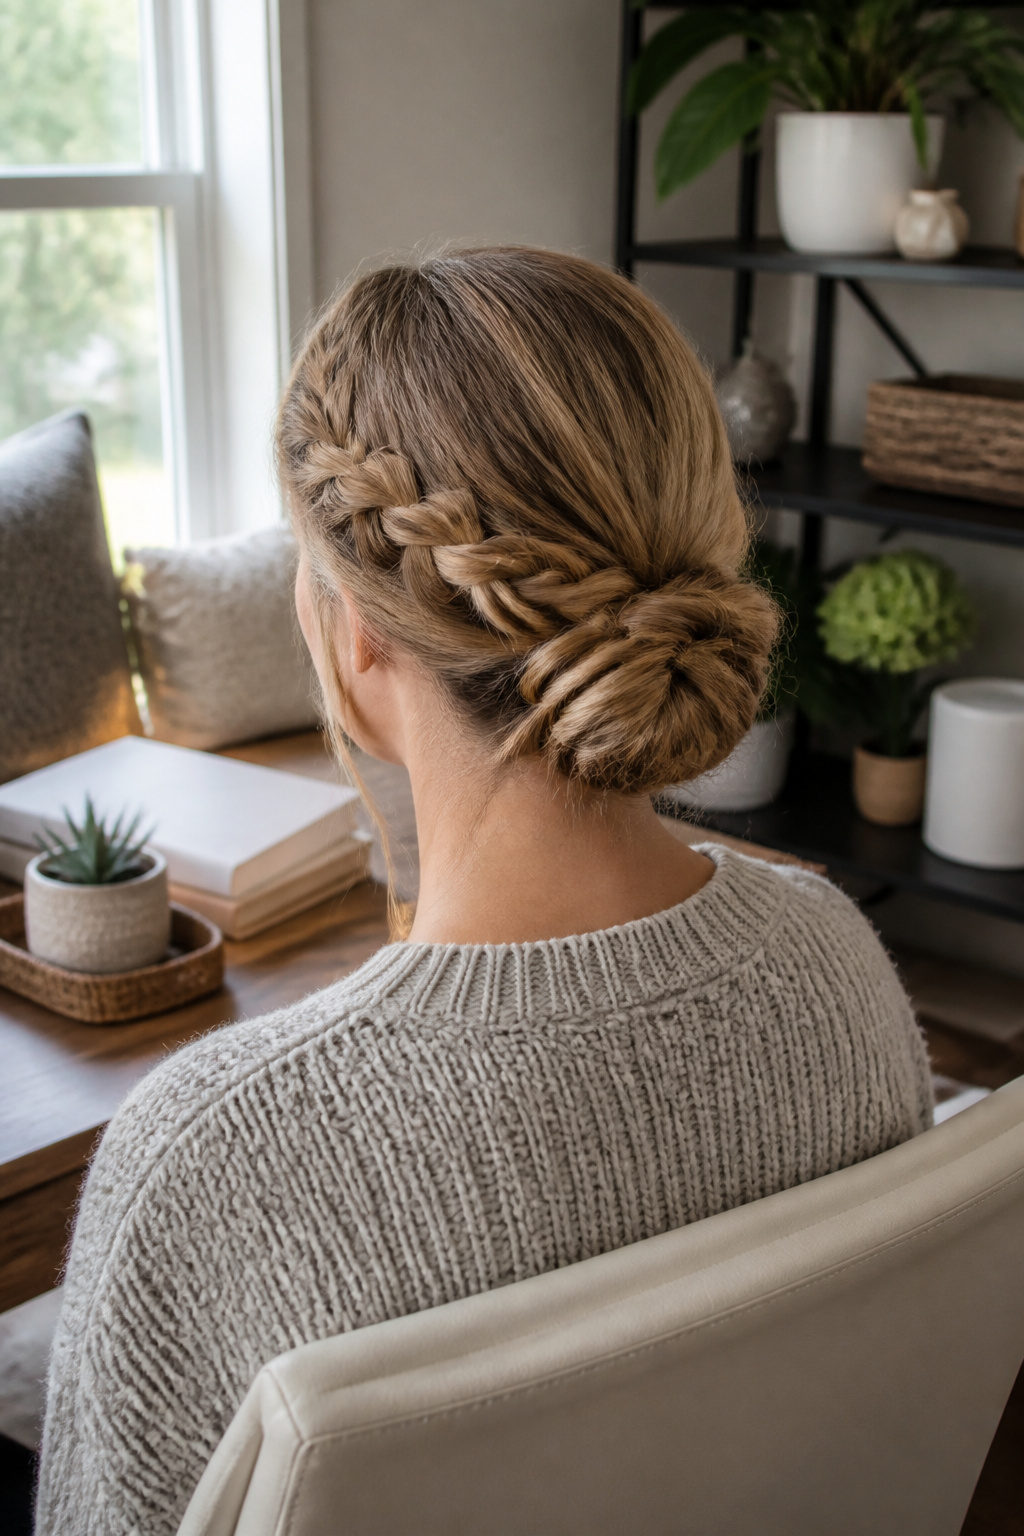
You braid a section at the side or crown, then coil the tail into a low bun at the nape. The ends disappear inside the coil rather than pinning flat against the scalp, which changes everything about how finished the style looks. Visible pins read as salon-fresh; tucked ends read as something that happened on its own hours ago and settled in.
The braid itself should be loose enough to pull slightly at the roots after you secure it. That tension, plus the soft perimeter of the bun where strands escape, gives the grown-in quality that makes this style hold up from morning to evening. If you braid too tightly and pin the ends with precision, you lose the effect entirely.
A small elastic at the braid tip helps you thread it through the bun center, but remove it once the tuck is secure. The bun holds better with a few crisscrossed pins from underneath than with a net or donut, which would force a roundness that fights the organic shape. Fine hair sometimes needs texturizing spray before braiding to keep the tuck from sliding out by midday.
13. Simple Braided Chignon

A low bun pinned right at the nape carries more polish than you would expect from something this easy to secure. Two small braids pulled back from the temples frame the face before they disappear into the twist, which is what keeps the style from reading as too formal or too casual. That balance is why it works for the office, a weekend market, or a dinner out without changing a thing.
The braids do the softening. They break up the line between the face and the bun, so the chignon sits as an anchor rather than a statement. You can leave them tight against the hairline for control, or loosen the tension so a few shorter pieces slip free. Bangs or none, the braids create the same framing effect; with bangs, you just start them slightly farther back so the two textures do not compete at the forehead.
On hot days, this is the style that keeps the neck clear while still looking finished. Straight hair holds it cleanly, and a soft wave gives it a slightly bohemian weight. Either way, the placement at the nape is what matters. Too high and it becomes a different style entirely; too low and it unravels against the collar. Pin it where the skull curves inward, and it stays put.
14. French Braid Ponytail
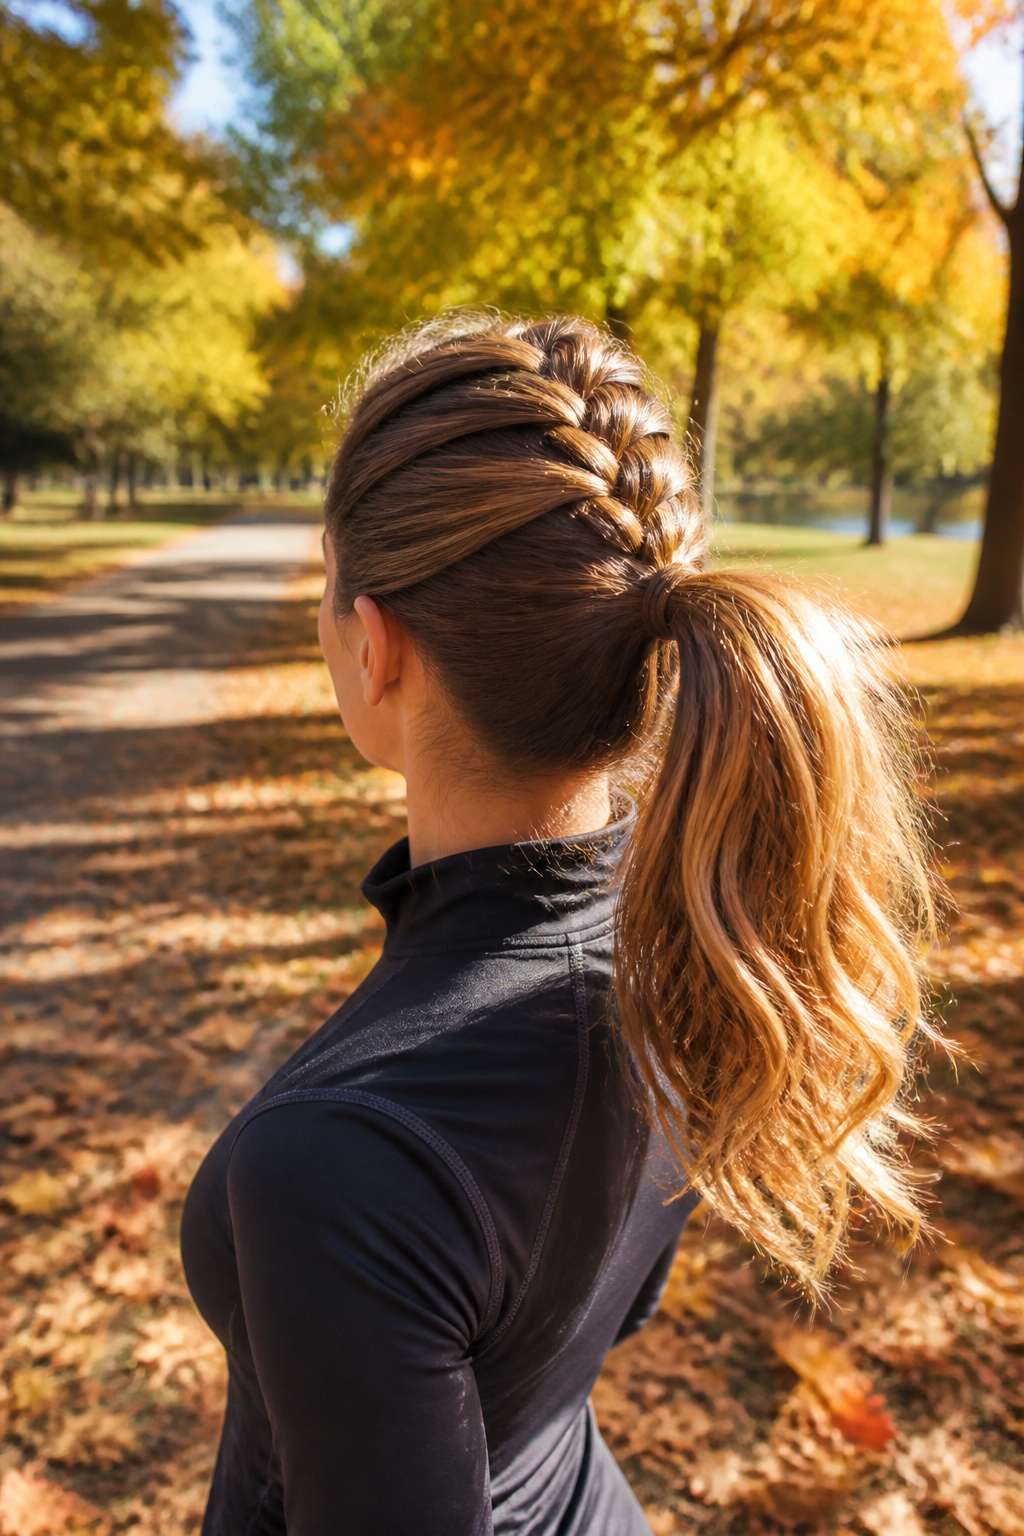
This is where you stop overthinking the morning routine. You can finish a French braid ponytail in under fifteen minutes, which makes it the right call for days when the commute is already cutting close.
Start the French braid at the crown, not lower down where the shape gets bulky. Work back toward where you want the ponytail to sit, high or mid-height depending on what flatters your length. Once the braid reaches that point, gather everything, braided section included, into the elastic. The braid keeps the crown neat while the ponytail keeps the rest off your neck.
Medium or long hair carries this best. Short hair makes the gather difficult and the proportion turns wrong. A comb and a hair tie are the only tools you need; hairspray helps if flyaways fight the finish, but the braid itself does most of the holding work. The look reads professional enough for a meeting and relaxed enough for errands afterward, which is why it earns its spot in the rotation. Emily Blunt has worn versions of this repeatedly, if you want a reference for how it moves from day to evening.
15. Simple Knot Braid
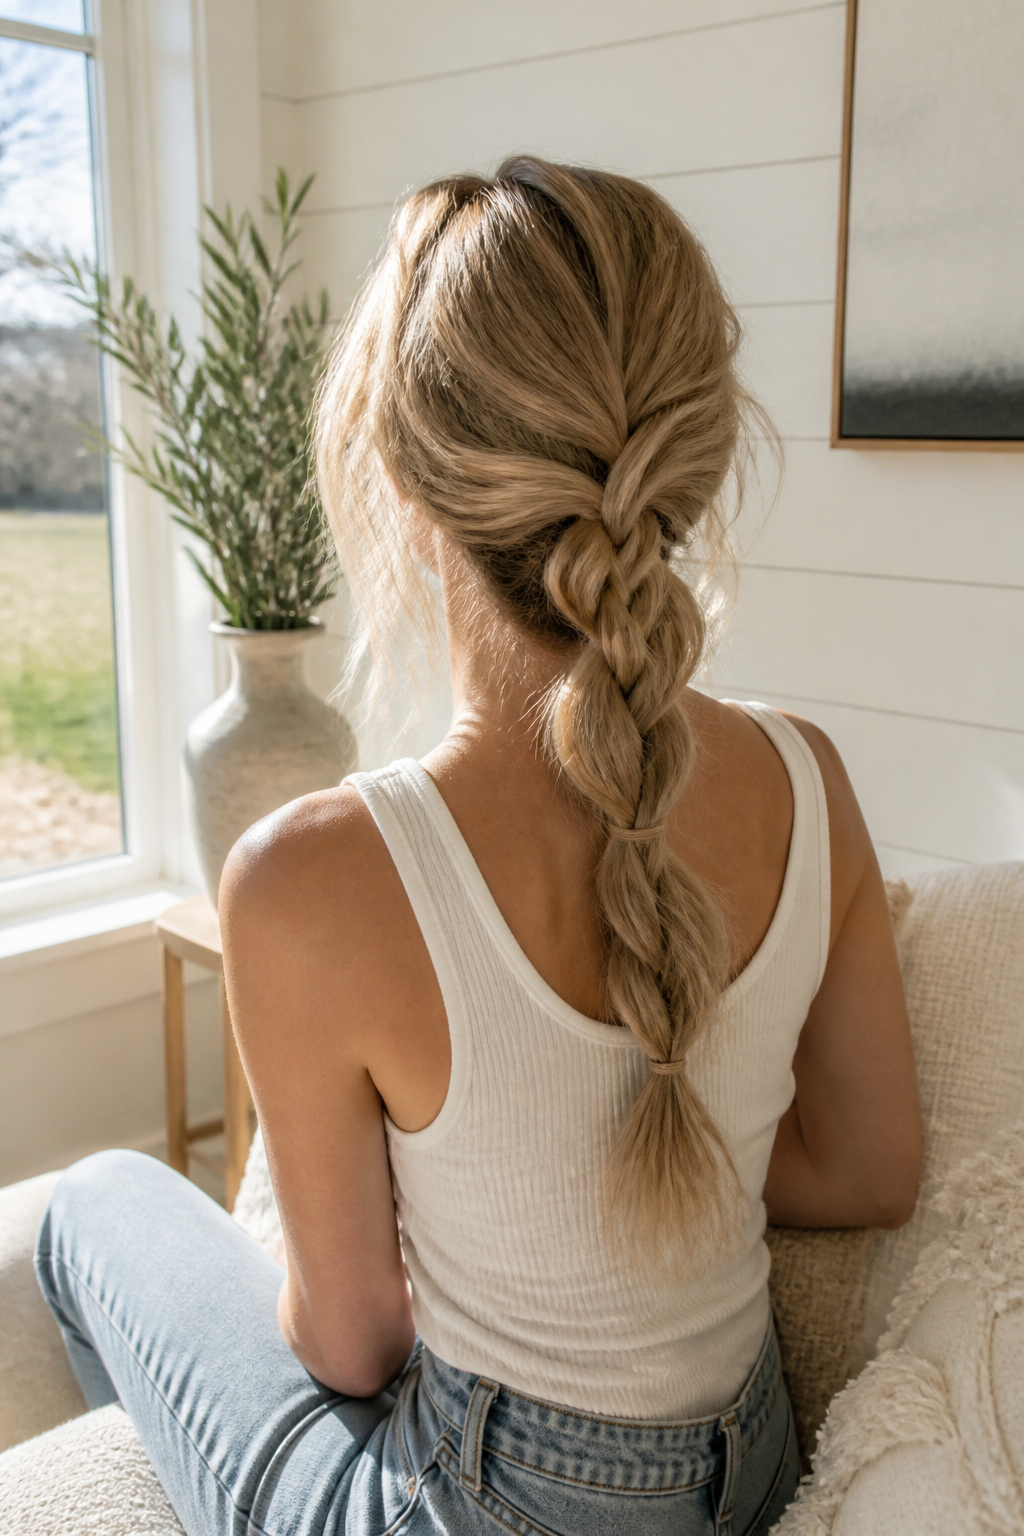
The simple knot braid is built from knots, not woven strands, which gives fine hair the bulk a standard three-strand braid usually lacks. You work small sections into overhand knots down the length, pulling each tight before adding the next bit of hair. The whole style finishes in under 15 minutes once your hands learn the rhythm, and the slightly irregular surface reads as texture rather than mistake. After you tie off the end, you can go back and gently tug the sides of each knot outward to widen the whole braid, the same way you would loosen a fishtail. That widening step is optional, but it helps if you want the style to read fuller from the front. It holds well for most occasions, from a workday to a dinner out, and the knots stay put without the tension a French braid needs at the scalp.
16. Ribbon Halo Braid
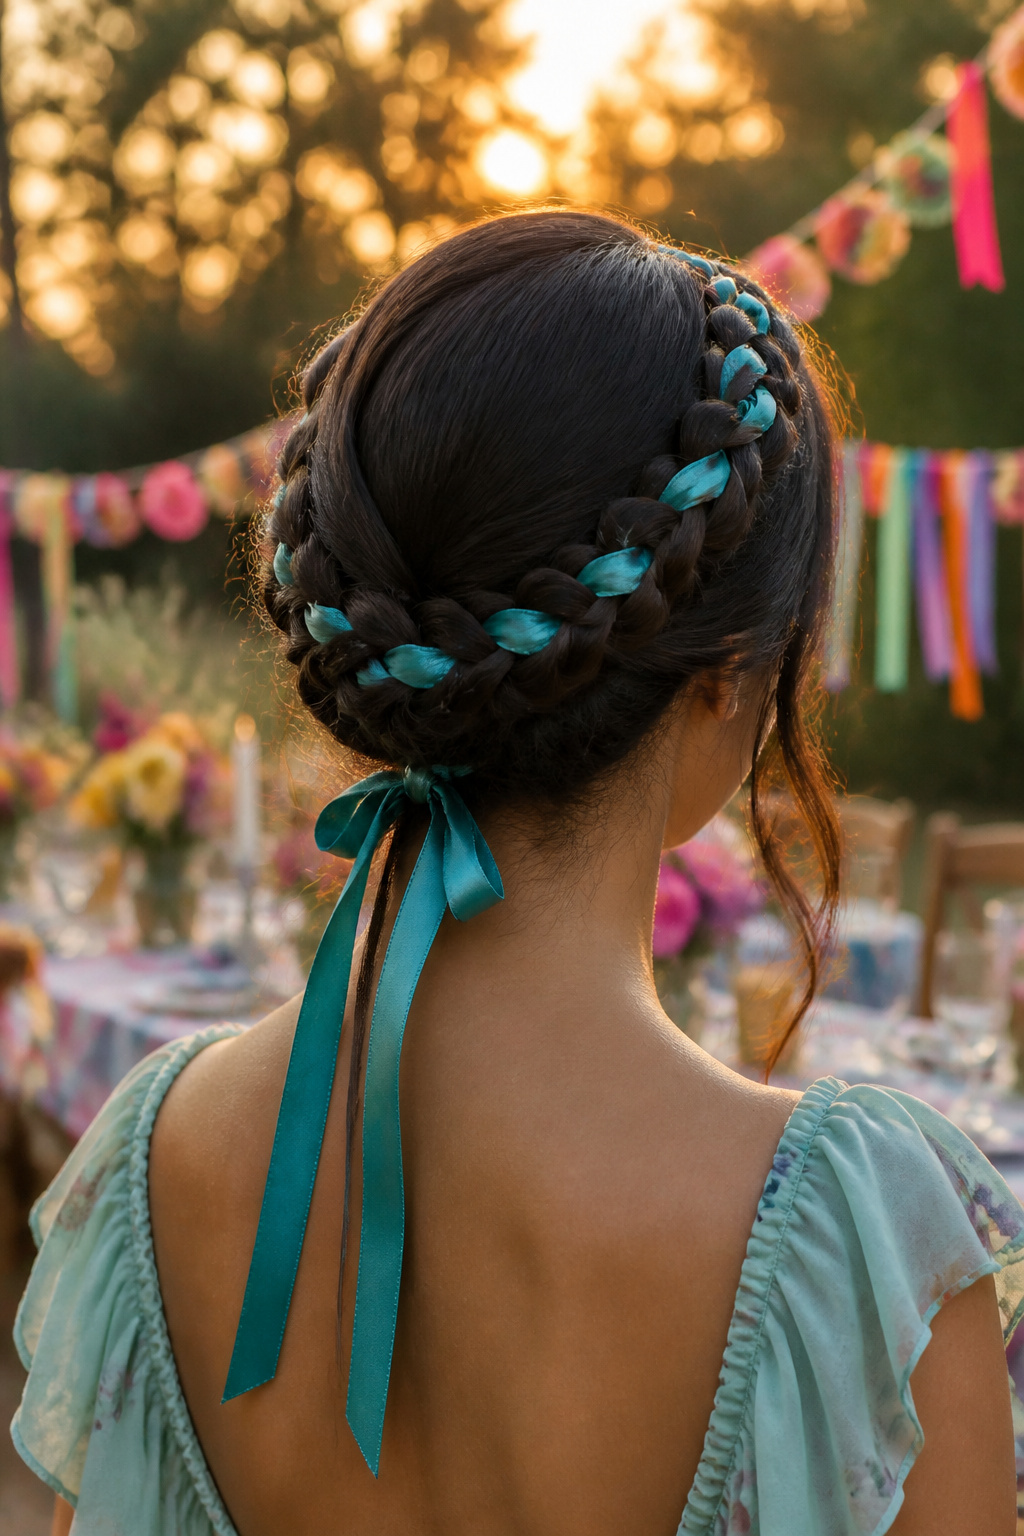
A ribbon halo braid works best when the ribbon is woven into the strand itself from the first cross, not looped through a finished braid like an afterthought. Start with a satin or grosgrain strip about two yards long, folded so one tail runs short. Lay the fold at your part line and treat the ribbon ends as two of your three sections, hair as the third. The ribbon twists into the Dutch or French pattern with every pass, so the color shows on the inside curve of the halo rather than dangling loose.
Garden-party light flatters ribbon differently than hair alone. Match the ribbon to a tone in your dress and the braid reads as texture; pick a sharp contrast, mustard against dark brown or navy against blonde, and the shape of the halo becomes architecture. Satin catches sun and moves in wind. Grosgrain stays cleaner in humidity and grips better if your hair is fine.
The common mistake is pulling the ribbon too tight. Tension that looks neat in a mirror flattens the crown and gives you a headache by the second glass of punch. Keep the ribbon slightly looser than the hair sections; the halo should lift a finger’s width off the scalp all the way around.
17. Low Twisted Bun with Braid Accent
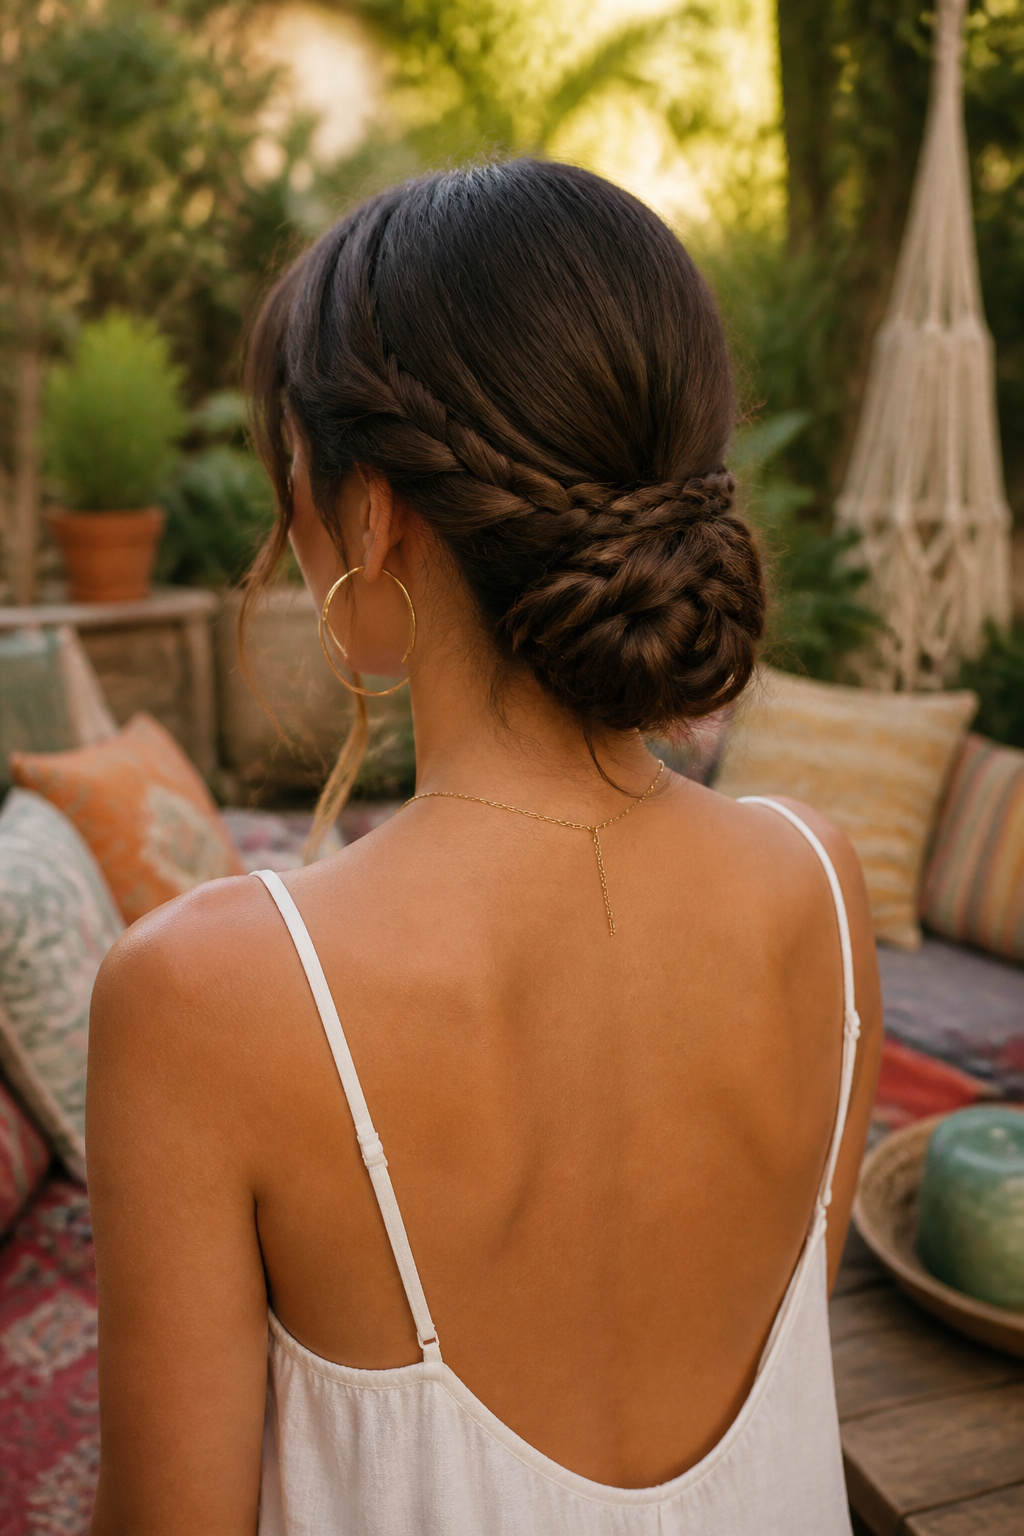
A small braided headband frames an easy low bun for a slightly boho look. This style works on straight hair or with simple wavy curls. The braid sits as an accent rather than wrapping full crown coverage, which is what separates it from a Swedish Crown Braid. You are building a low bun at the nape, then pinning a separate headband braid across the top to add texture. The braid is typically pinned across, not woven in, so you get the visual interest without the time investment of a full crown. It is the kind of style that reads as effortful but actually comes together fast once the bun is set. For the cleanest finish, secure the braid ends underneath the bun itself so nothing shifts as you move.
18. Double Dutch Braid
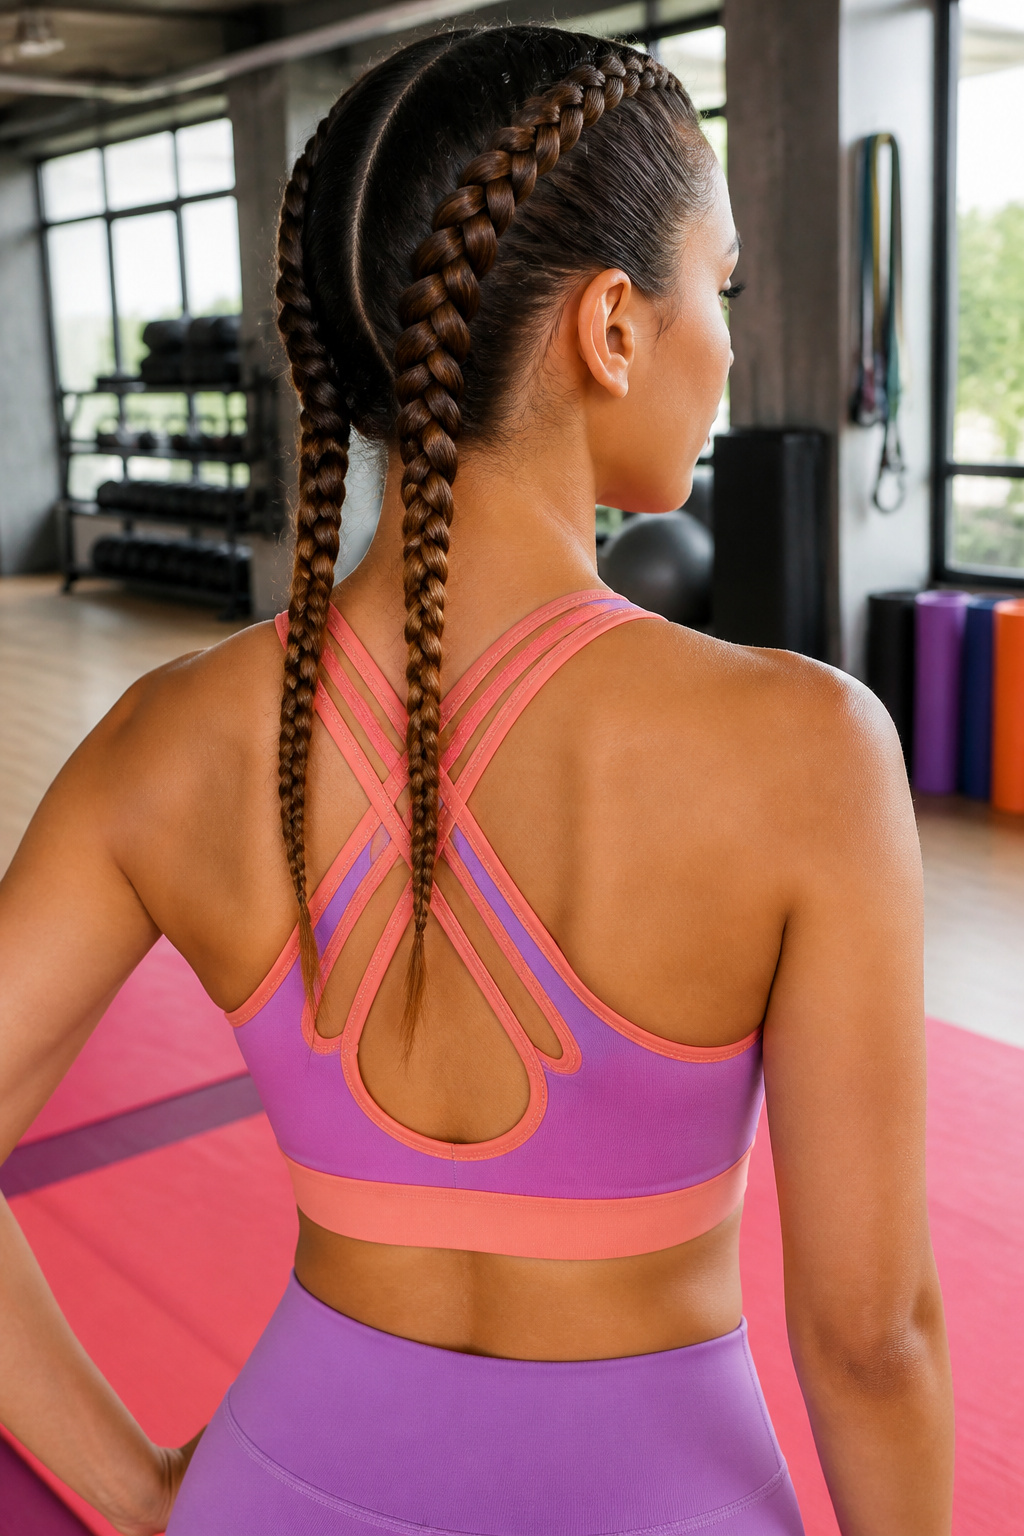
The first thing that goes wrong with a Dutch braid is accidentally crossing over instead of under. You think you have the rhythm, then halfway down your head you realize the braid is sitting flat against your scalp, not raised, and you have done a French braid by reflex. Pass strands under the center one every single time; that is what lifts the braid into a 3D ridge and makes it Dutch.
Two of these braids, running parallel from hairline to nape, give you the double Dutch version. Part your hair down the middle, braid each side underhanded, and you have a style that works for a 9:00 meeting or a 3:00 gym session. The whole thing takes under fifteen minutes once your hands learn the motion. Hailey Baldwin has worn it with winter dresses and with bohemian outfits; the braid itself does not force you toward one look.
Medium or long hair handles it best. Short hair is possible, though you will be picking up very small sections and fighting flyaways the whole way. If you want more polish, coil the two finished braids into twin buns and pin them; the 3D structure of the Dutch braid gives the buns more visible texture than a flat French braid would. Set with hairspray after you pin.
19. Double Twist Fish Tail Long Hair Braid
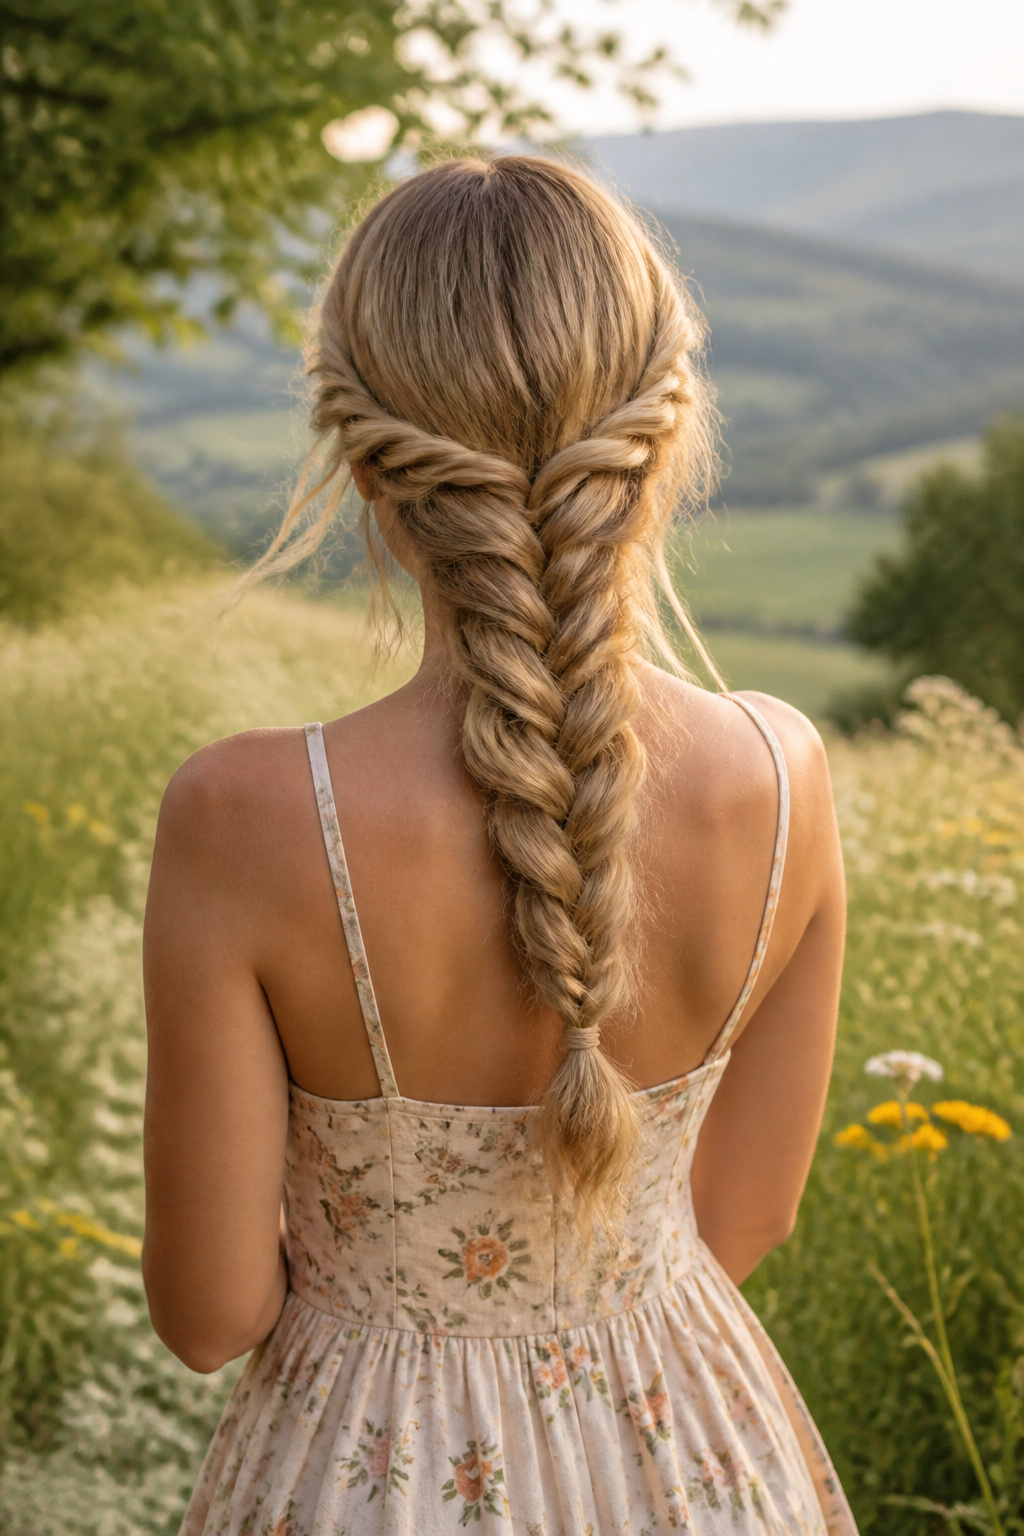
This one reads dressed-up without trying too hard. You twist two sections from each side of your head, pulling them back to meet at the crown, then secure them so the twists hold. The rest of your hair stays down. From that meeting point, you work a fishtail braid through the remaining length.
The style needs hair past your shoulders to carry the full effect. Shorter layers will slip out of the fishtail or leave the twist looking stubby rather than deliberate. The half-up construction keeps hair off your face while the fishtail gives you something to show from behind. It takes longer than a standard three-strand braid, but the twist buys you structure that a plain half-up lacks.
20. Long Hair Side Braid
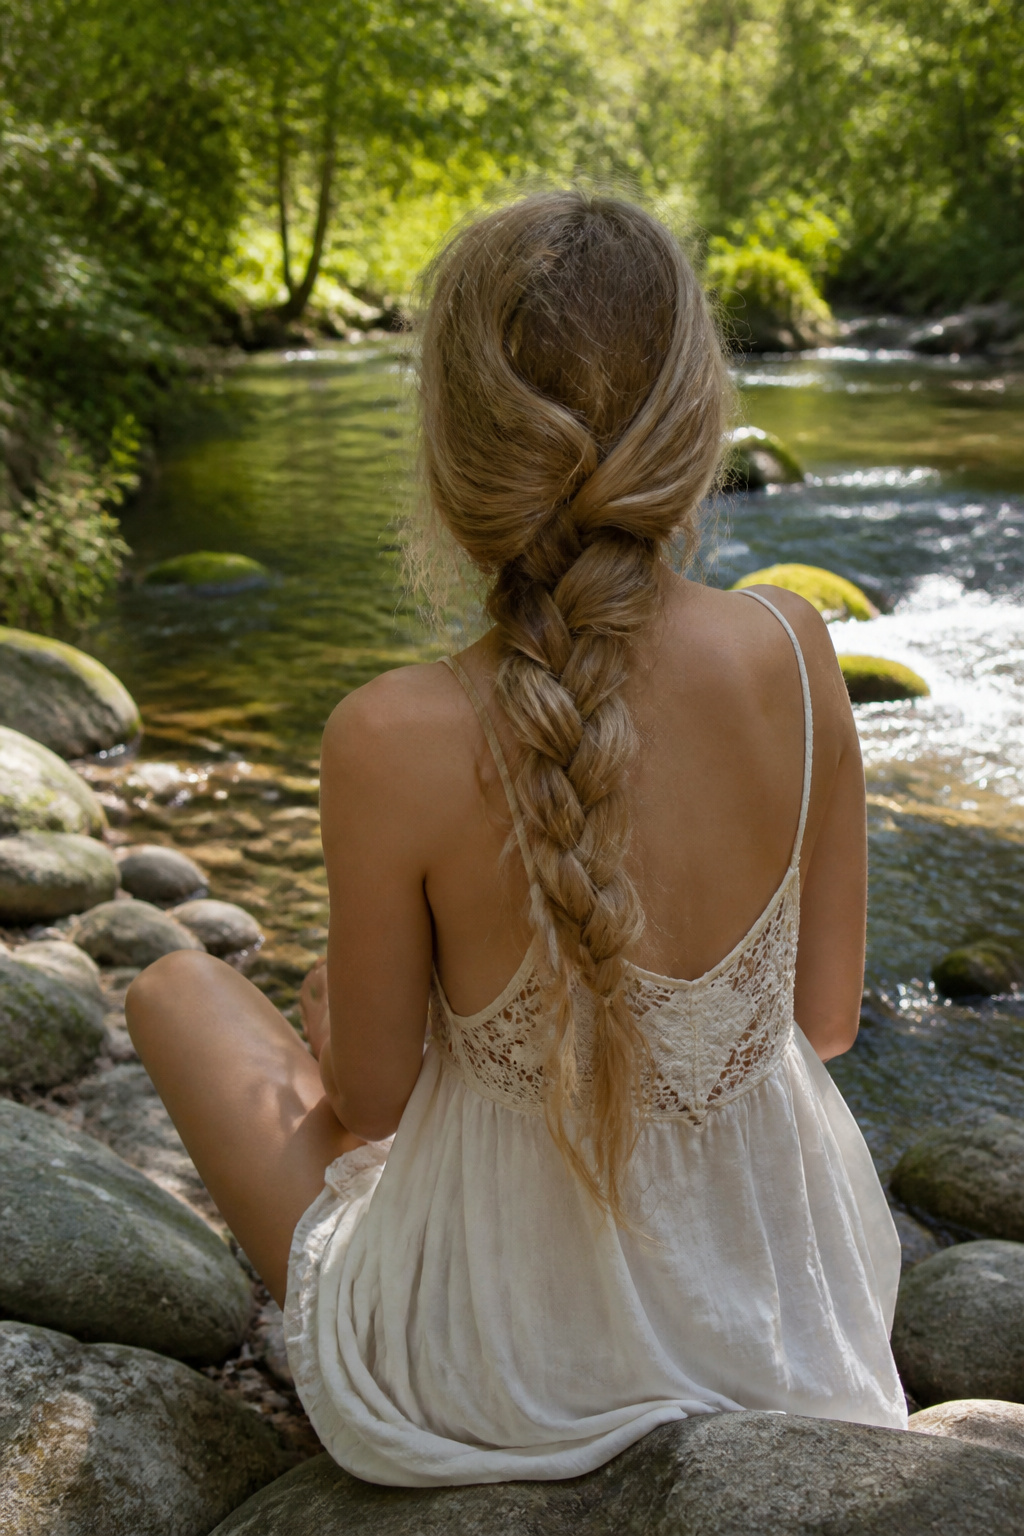
A fishtail braid worn along one side of the head gives you a different silhouette than the usual center-down-the-back style. The diagonal path from temple to shoulder consumes more length than a straight center braid would, so the finished tail lands higher, sometimes at the collarbone rather than the waist. That is why this look asks for genuinely long hair; anything shorter and the braid stops awkwardly mid-chest or requires pinning up to hide the shortfall.
The fishtail weave itself takes longer than a standard three-strand braid, though not dramatically so. Most people budget under fifteen minutes once the sectioning is clean. The trade is worth it if you want the extra visual weight the fishtail pattern gives you, especially against formal fabrics like lace where the dense, rope-like texture reads as finished rather than casual.
Pair it with a simple hair tie at the end and a light mist of spray to keep flyaways from fraying the edges. The side placement also means you feel it against your shoulder through the day, something to remember if you are not used to hair sitting there.
21. Cross Long Hair Braid
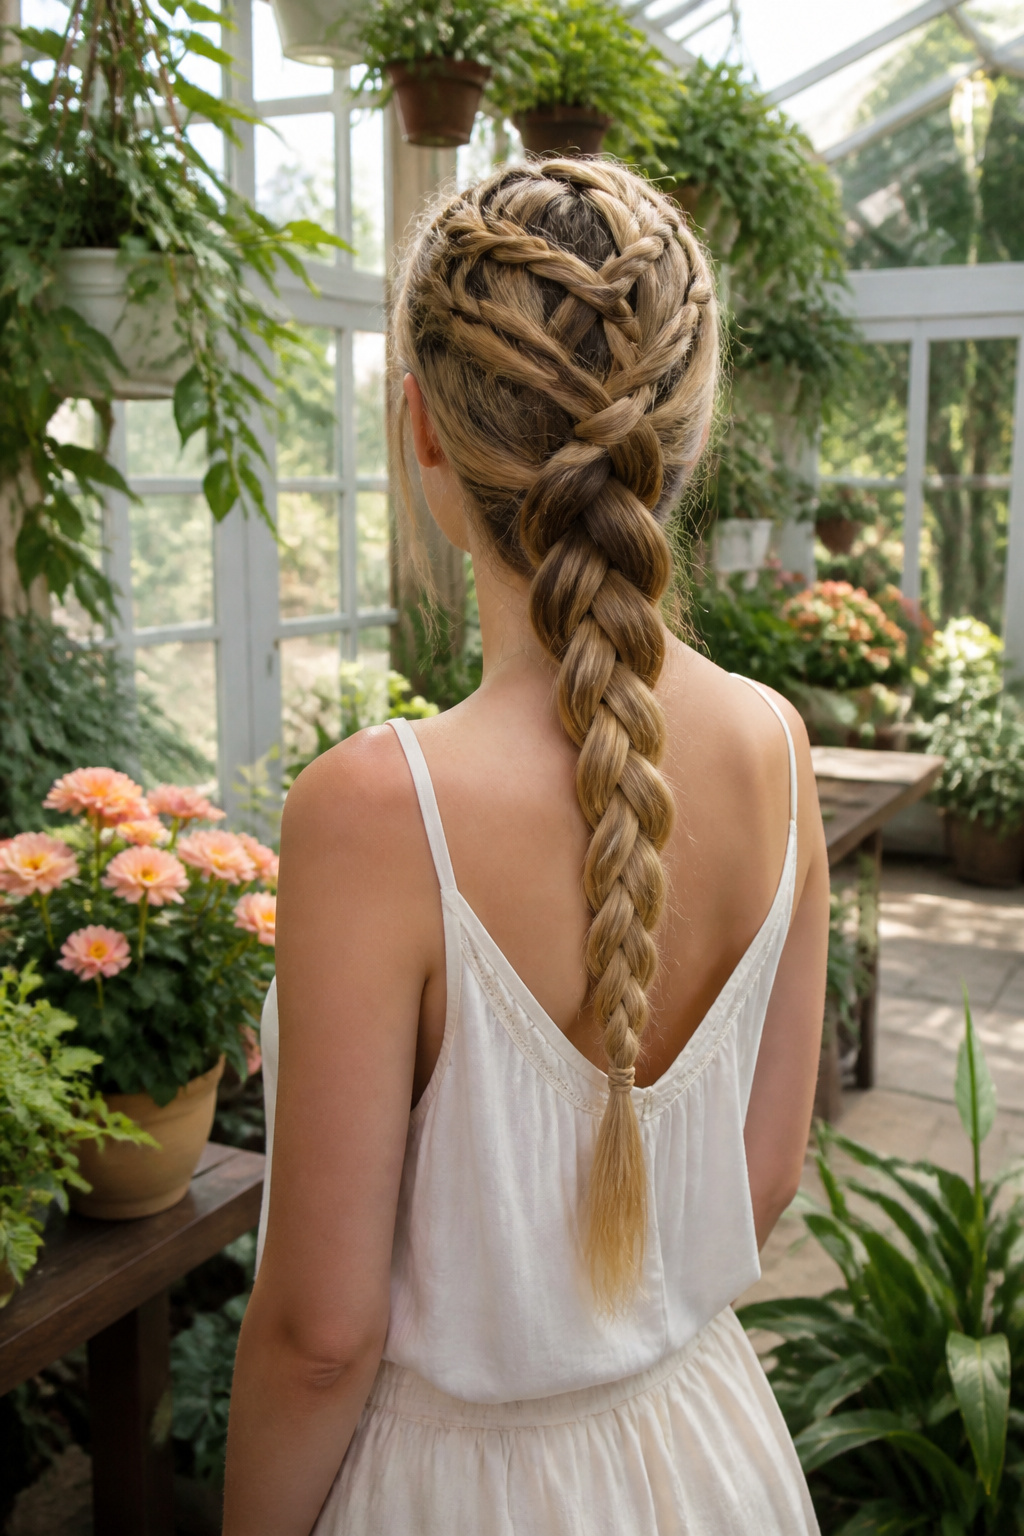
The criss-cross sections at the crown are what set this apart from a standard side braid. You start by taking a small section from the front hairline on your left, cross it over to the right, and pin it loosely. Then take a matching section from the right and cross it to the left. Repeat this two or three times, working back toward the crown, before gathering everything into a regular three-strand braid that falls over one shoulder.
The pattern reads as a lattice against your scalp while the rest of your length stays loose and free. It is subtle from straight on, more striking in profile or when you turn your head. The sections need to be roughly equal in thickness or the symmetry falls off and the whole thing looks accidental rather than intentional.
This works best on hair that reaches at least to the shoulder blades, since you need enough length for the crossover sections to lie flat without pulling. If your layers are short around the face, the front pieces may escape; smooth them back with a small amount of pomade before you begin braiding, or let them frame the style deliberately.
22. Ponytail Long Hair Braid
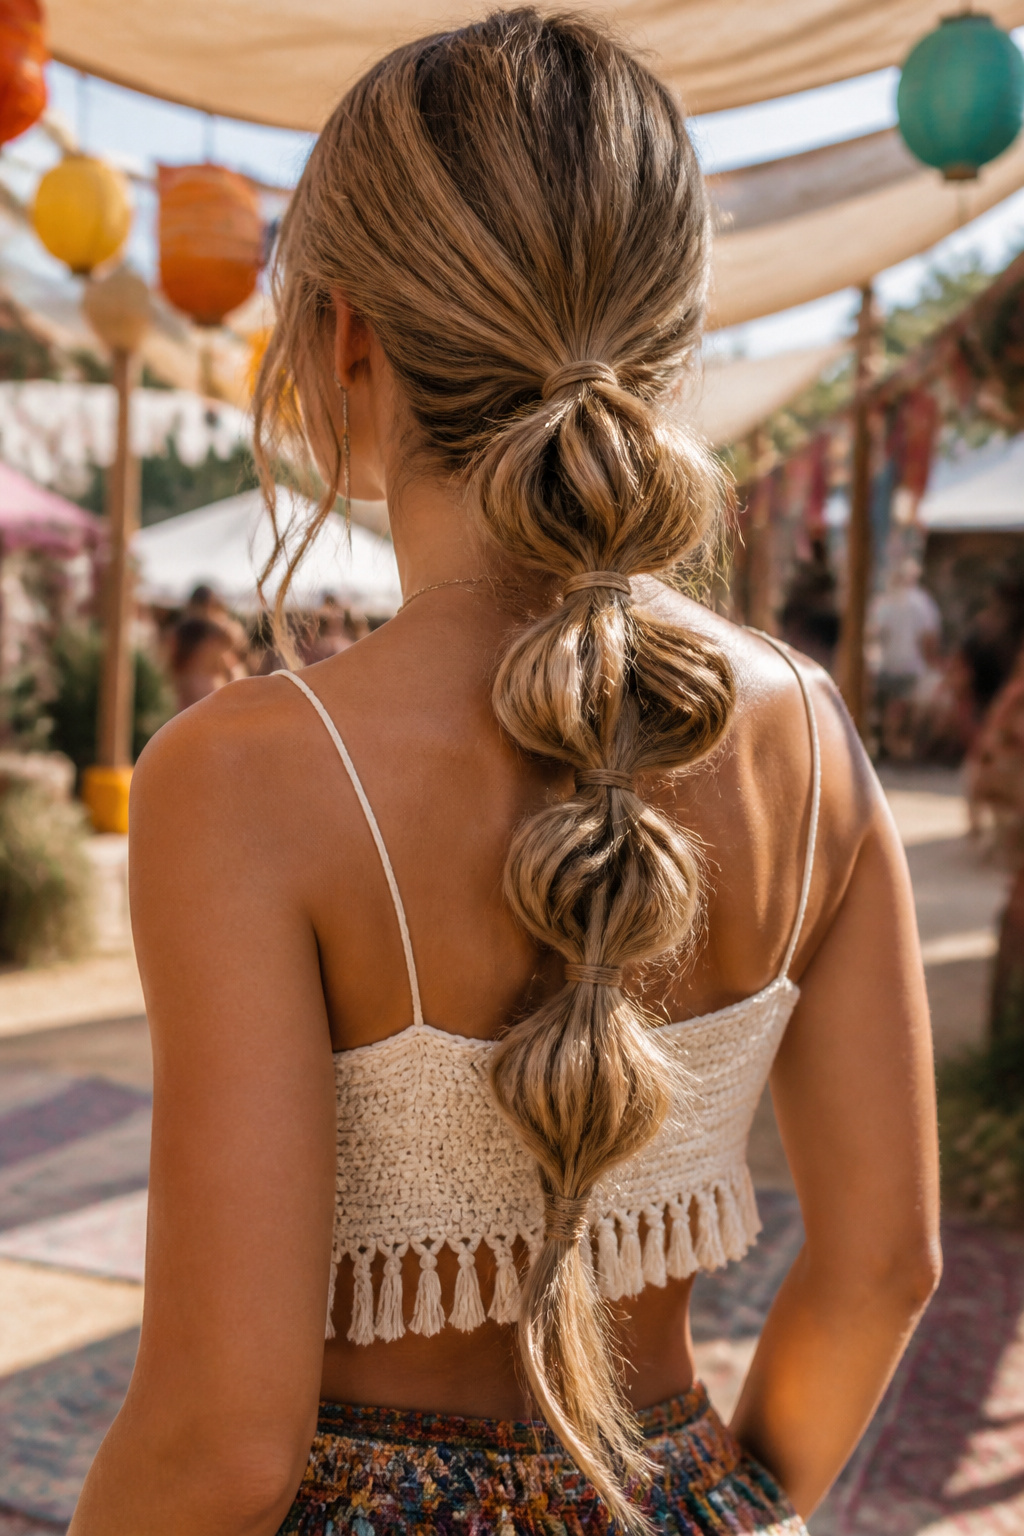
A low ponytail braid earns its place among cute braided hairstyles by breaking one rule on purpose: the loops are deliberately uneven. You start with a standard ponytail at the nape, then work the braid so thin, tight loops alternate with larger, looser ones pulled out on either side. That variation in loop size is what creates the texture. The effect reads casual but intentional, not messy by accident. Pull too hard on the larger loops and they collapse into the braid; too little and the shape looks accidental rather than styled. The sweet spot is a visible difference in scale, with the thin sections framing the fuller ones like ribbing on a sweater.
Hair Products for Braids
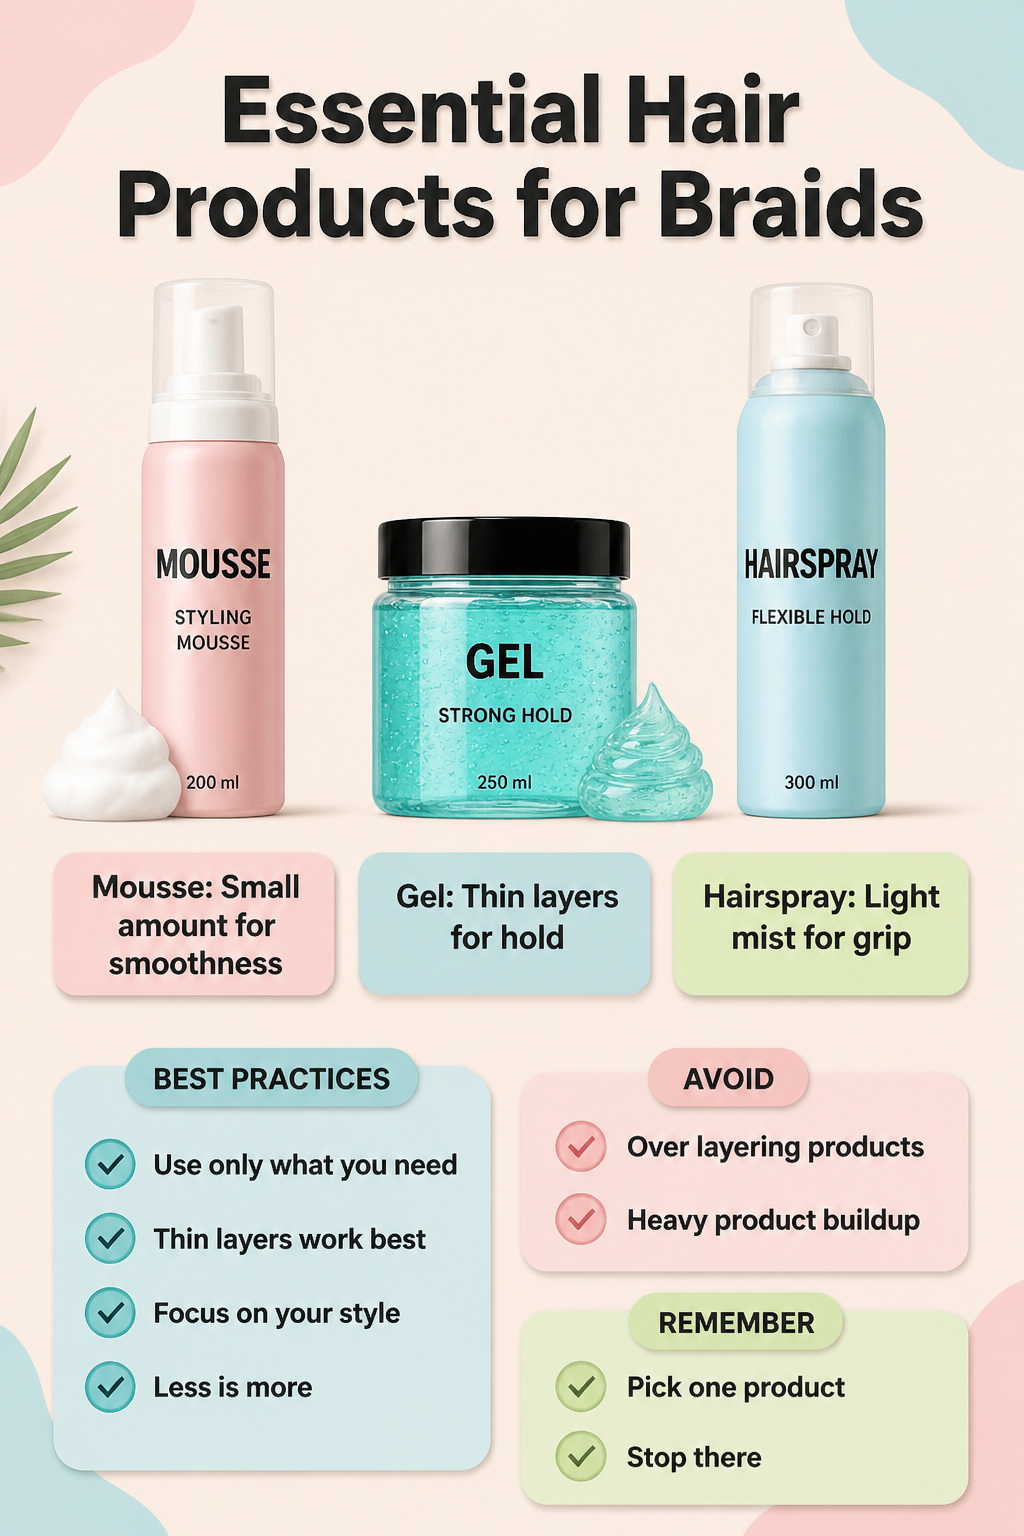
Mousse keeps braids smooth and controls flyaways, but you only need a small amount worked through damp hair before you start. Too much leaves the surface tacky and attracts lint by day two, which defeats the purpose of a neat style. Gel gives the hold and definition you want for edges and for braids that need to stay crisp, though a heavy hand will flake and turn white where the strands meet, so build in thin layers instead of one thick coat. Hairspray matters most for softer hair types that slip out of plaits within hours; a light mist over finished braids, held at arm’s length, adds grip without the helmet look. The common mistake is layering all three at once: mousse, then gel, then spray, which leaves braids stiff and waxy by evening. Pick the one product your hair actually needs for the style you are doing, and stop there.
Braids by Occasion
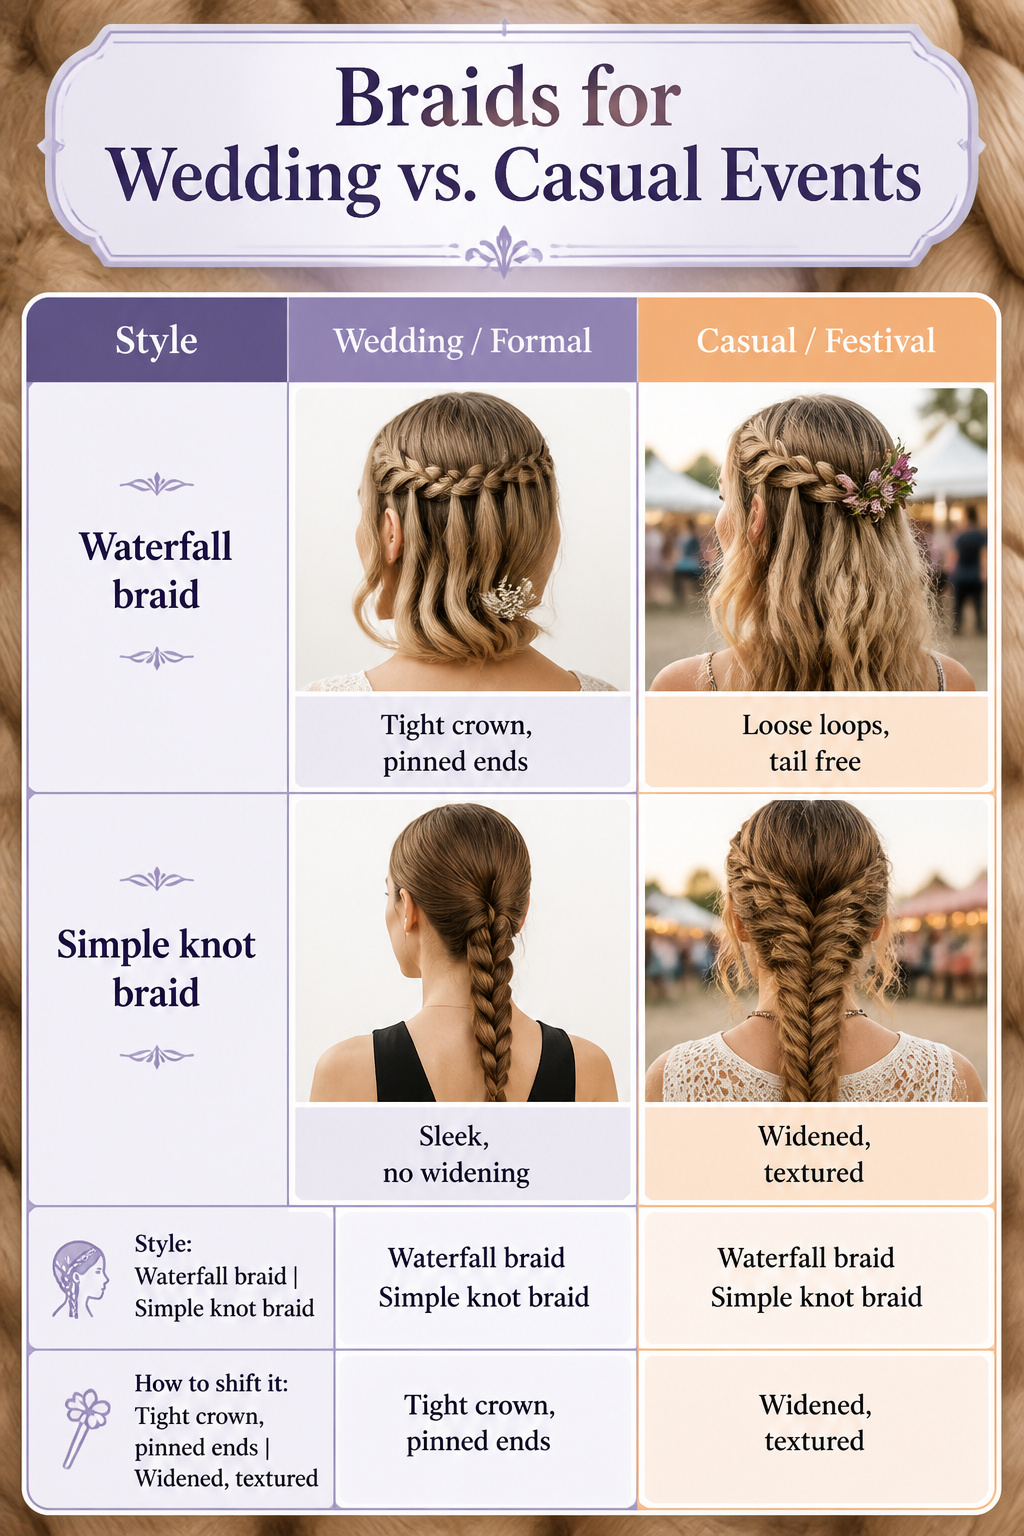
The same braid can read formal or casual depending on how you finish it. A waterfall braid, for example, works at a summer wedding when you keep the tension tight and the ends pinned clean; loosen the loops and leave the tail down, and it suits a Saturday market or a hike. Tension and finish are what shift the occasion, not the braid itself.
| Style | Wedding / Formal | Casual / Festival | How to shift it |
|---|---|---|---|
| Waterfall braid | Tight crown, pinned ends | Loose loops, tail free | Pull the loops wider, skip the pins |
| Simple knot braid | Sleek, no widening | Widened, textured | Gently stretch the knots after securing |
The simple knot braid follows the same rule. Sleek and narrow, it passes at a dinner or an office; widened out like a fishtail, it reads playful and works for almost anything else. You get two moods from one technique, which saves time when you are packing for a trip or dressing in a hurry.
Braid Difficulty Levels
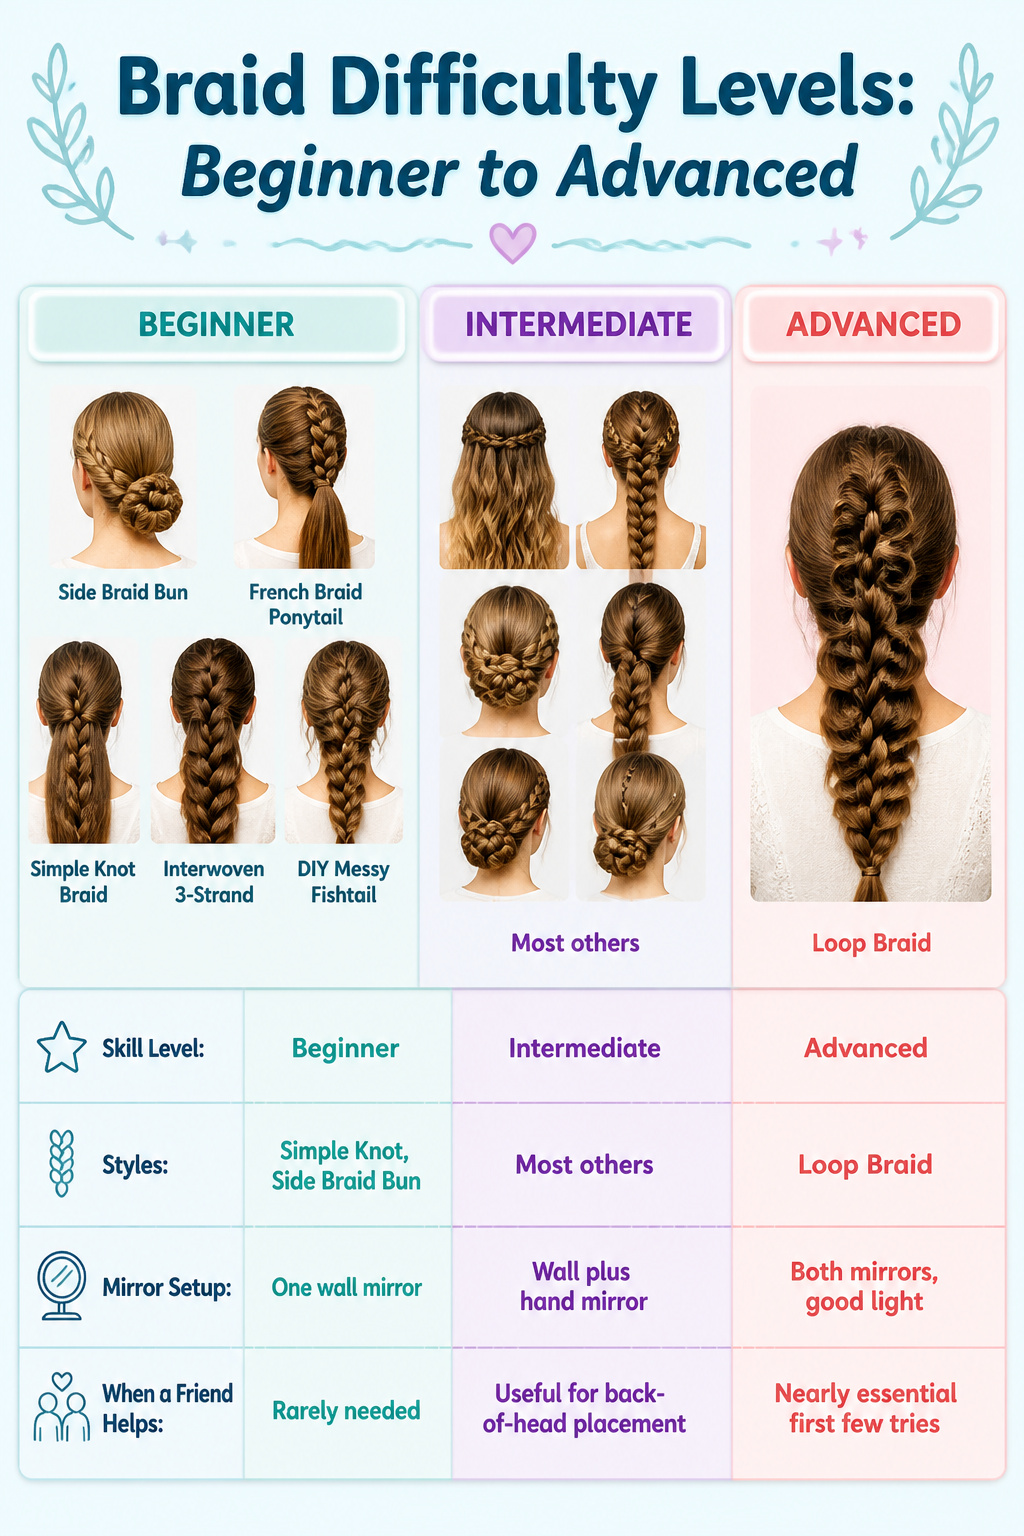
Not every cute braided hairstyle asks the same of your hands. Some builds take under ten minutes and forgive a wandering strand; others need you to hold tension in three places at once and still manage a pin.
The five styles you can tackle cold are the Side Braid Bun, French Braid Ponytail, Simple Knot Braid, Interwoven 3-Strand, and DIY Messy Fishtail. The Messy Fishtail is the one to start with if you have never braided at all, since the whole point is imperfection. The other four reward a little patience but nothing you cannot correct mid-run.
Most of the remaining styles sit at intermediate level. They add elements, inverted sections, or placement that matters, like keeping a crown braid level as you circle the head. You will want a mirror you can walk around, and a second set of eyes helps more than most tutorials admit.
The Loop Braid stands alone as advanced. The structure depends on feeding hair through itself in sequence, and one loose grip collapses the pattern three rows back. Plan on practice hair, not appointment day, for this one.
| Skill Level | Styles | Mirror Setup | When a Friend Helps |
|---|---|---|---|
| Beginner | Side Braid Bun, French Braid Ponytail, Simple Knot Braid, Interwoven 3-Strand, DIY Messy Fishtail | One wall mirror | Rarely needed |
| Intermediate | Most others | Wall plus hand mirror | Useful for back-of-head placement |
| Advanced | Loop Braid | Both mirrors, good light | Nearly essential first few tries |
Frequently Asked Questions
What are the easiest braided hairstyles?
The Side Braid Bun and French Braid Ponytail are among the easiest braided hairstyles to attempt if you are new to braiding. The Side Braid Bun asks only a single braid along one side that gathers into a low bun, with the rest being a basic sweep and pin that most people finish in under fifteen minutes. The French Braid Ponytail also clocks in under fifteen minutes and uses just a comb and hair tie, with the braid itself doing most of the holding work at the crown before everything gathers into a ponytail.
How long do Goddess Braids last?
Goddess Braids can last up to two weeks with proper care, including sleeping with a scarf around your head and the length of your braid, keeping hair tightly covered in the shower, and using products like Jam and mousse on blown-out hair. By the third and fourth week you will probably start seeing some frizz, and one week is more realistic if you are less careful with maintenance. The bigger the braid, the less tension on each strand and the shorter the lifespan.
What products should I use for braids?
Recommended products for braids include mousse, gel, and hairspray. Texture balm or dry shampoo at the roots helps fine or slippery hair grip before braiding, and a light mist of hairspray plus shine product on surface strands keeps thick or dark hair from flattening dimension. Texturizing spray before starting helps fine hair hold styles like rope braids or tucked buns that might otherwise collapse by midday.