
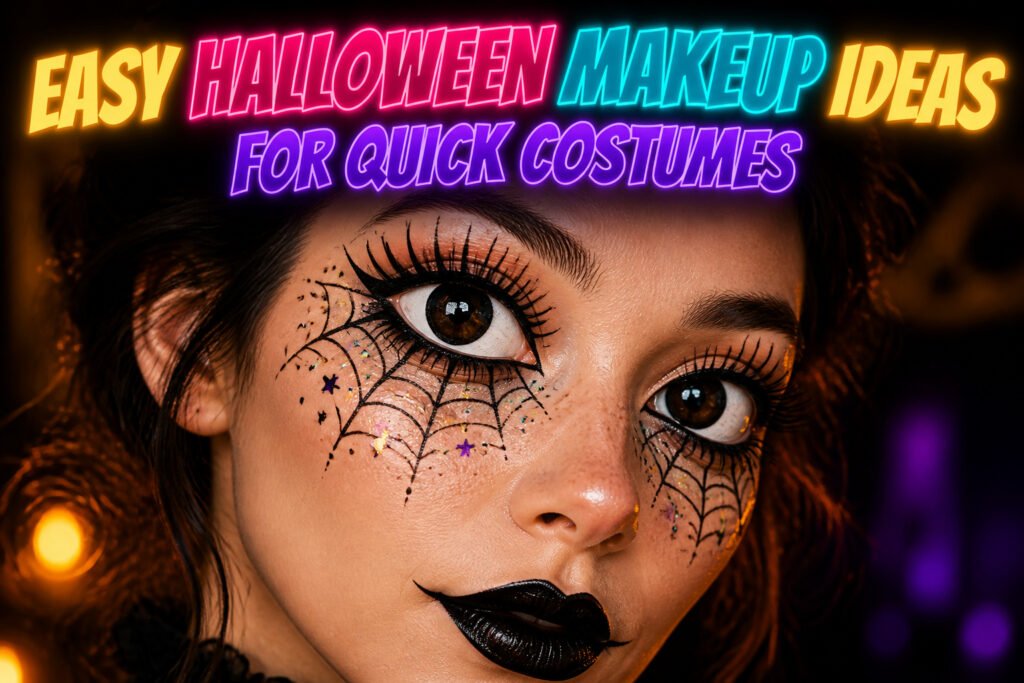
The gap between "I have eyeliner" and "I have a costume" is smaller than most people think. These 19 looks run from a two-minute spider at your temple to a forty-minute pop-art face, and the only real variable is how steady your hand is tonight. A smudge that would ruin weekday eyeliner is exactly what makes the goth or the clown read as intentional after dark.
1. Goth
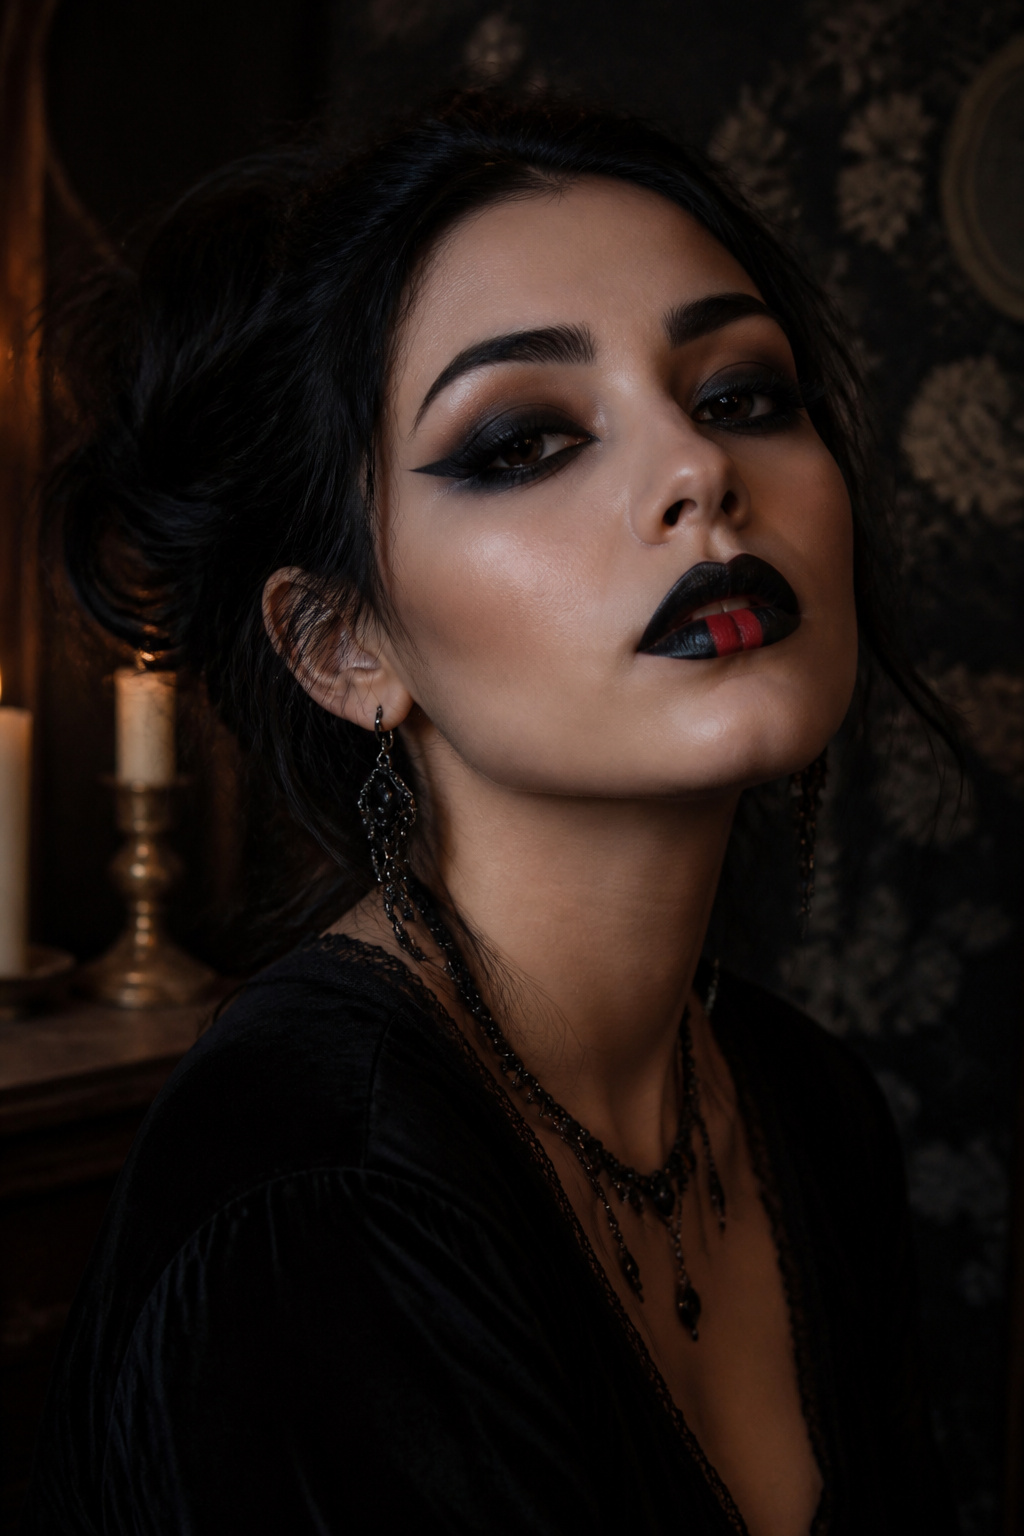
Black makeup and a single red accent do most of the work here. Start with any black pencil or gel liner you already own and smudge it past the lash line with a fingertip so the edge softens into shadow rather than drawing a hard shape you have to get right. Run the same smudged line along the lower lashes and let it travel a quarter inch down; precision ages this look, messiness saves it. Press a dark berry or blackened plum lipstick on with a finger instead of applying from the bullet, then blot so the finish looks worn in rather than painted on. For the red placement that reads as goth rather than generic dark, pick one spot only: the center of the lower lip tapped over the dark base, a single streak drawn from the corner of the mouth and deliberately blurred, or a small dot at the inner eye where liner meets tear duct. One red element has impact; three look like you are trying. The whole look takes under five minutes and survives a night of talking and drinking because smudged liner that travels a little only looks more deliberate.
2. Clown
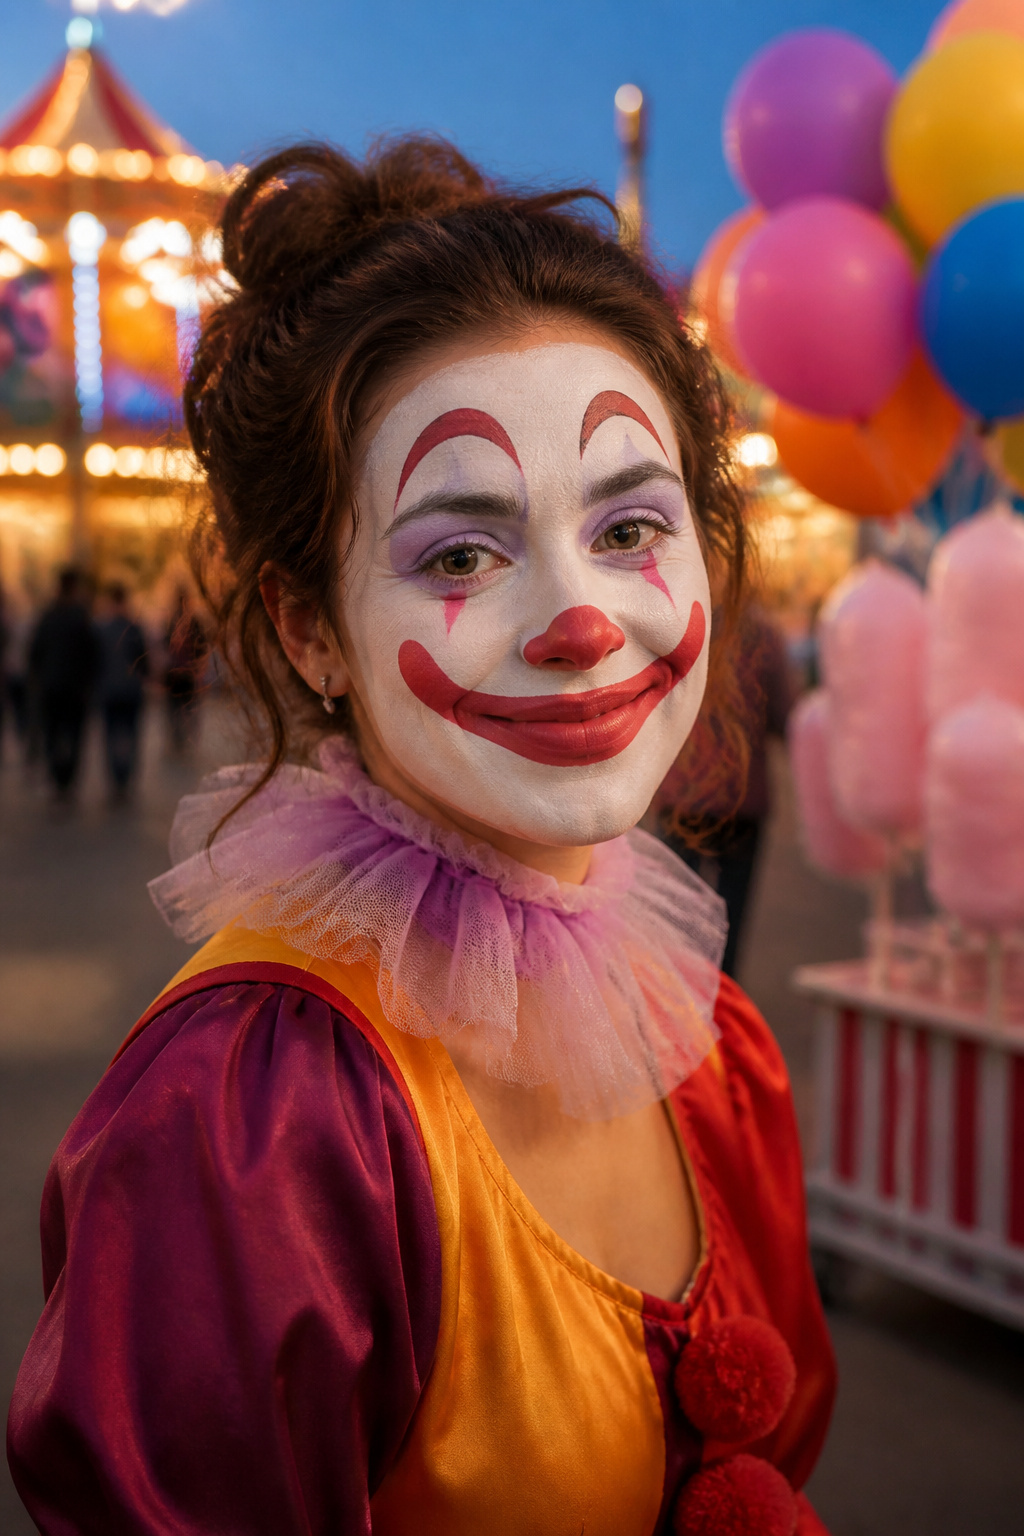
Two kinds of clown makeup carry the look, and the difference is mostly in how much mercy your hands need.
The traditional white-base clown starts with a full coating of white paint or greasepaint, then builds from there: red arches far above the natural brow, a wide red smile that extends past the corners of the mouth, and a red nose that is best applied with a round sponge for even coverage. Every edge wants a clean, deliberate line. Shaky work shows immediately, so keep a pointed cotton swab and your original base color nearby for corrections before anything sets. A sad clown uses the same structure but lets the mouth curve downward instead, and the eyes carry heavy, darkened lower lids.
The cake-clown look asks less of your technique. You work in soft pinks, lavenders, and mint greens instead of stark white and primary red. The edges stay smudged on purpose; a finger or a dry sponge blends the border until it disappears into the skin. The nose becomes a muted coral blob, the eyes get soft gray circles, and nothing needs to match precisely from side to side. Where the classic clown punishes a slipped line, this one absorbs it. You finish in roughly the same time, but the cake-clown version forgives the midnight application when you have already missed two trains home.
3. Vampire
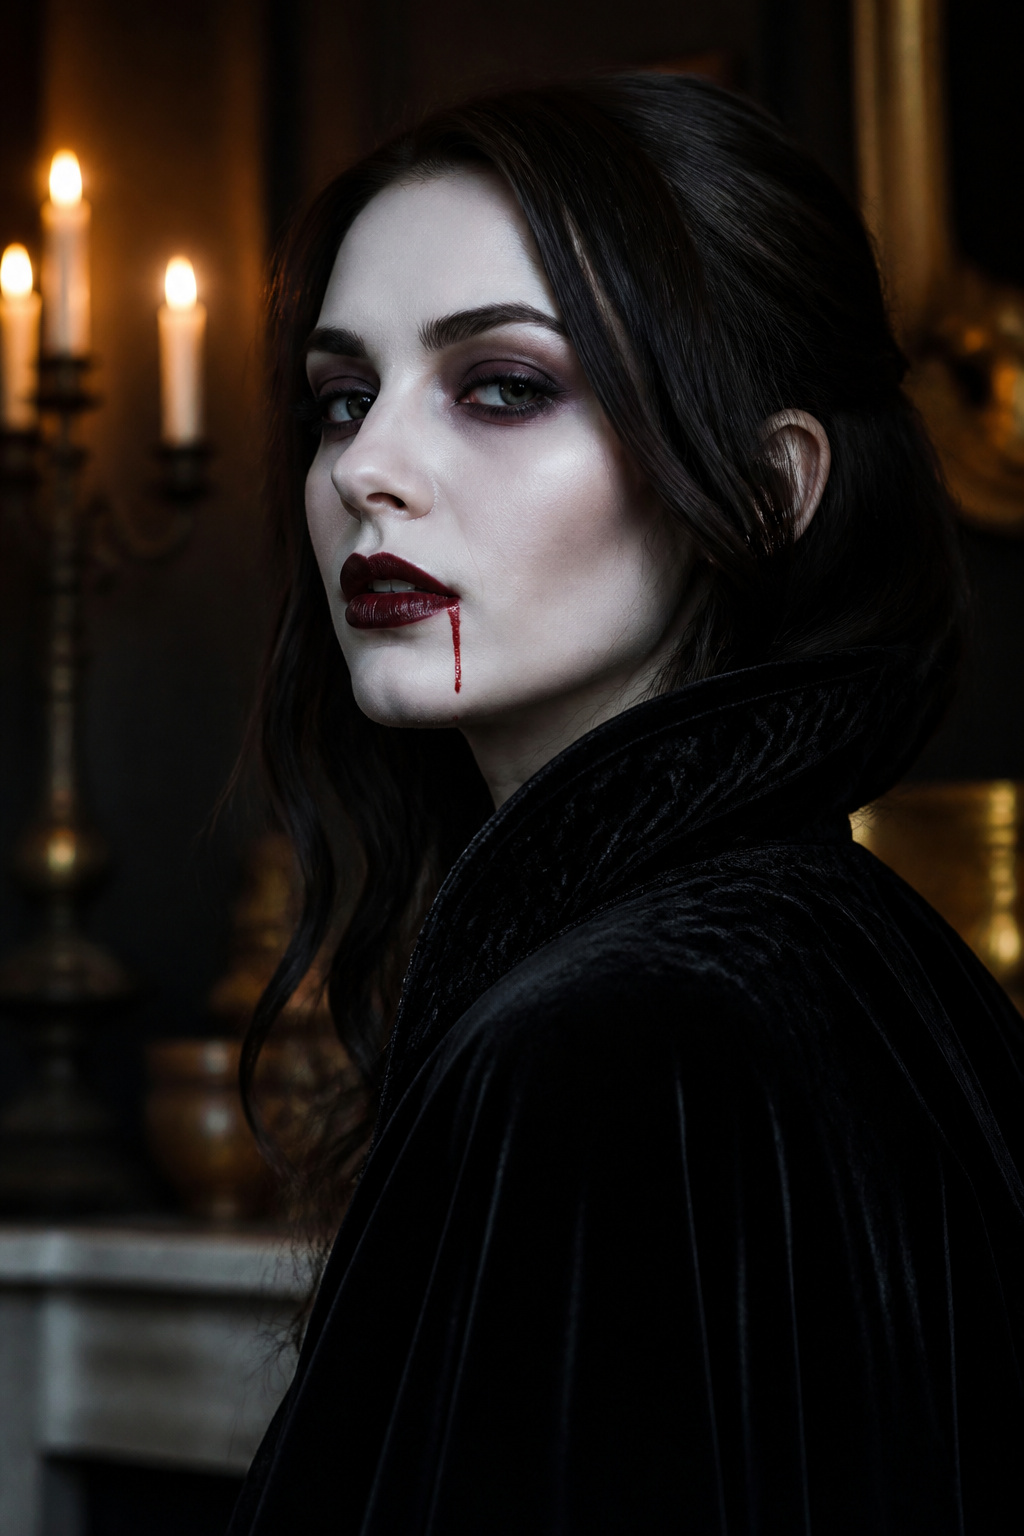
The classic vampire look lives or dies on whether the blood looks placed or accidental. Start with a pale base one shade lighter than your skin, then hollow the cheeks by sweeping contour from the ear toward the corner of the mouth, stopping short of the lip so the shadow looks sunken, not dirty. A dark lipstick, something in a deep berry or near-black, gives the mouth its weight. Sources disagree on the blood: one keeps it minimal, a thin line across the bottom lip, while another goes heavier around the mouth or under the eyes. The safer play is restraint. Dab a small amount at the corner of the mouth and let it trail slightly downward, as if you have just fed, rather than spattering it like a crime scene. Red liquid lipstick works in place of commercial fake blood if that is what you already own. The whole thing pairs with whatever you are already wearing, which is why this one keeps coming back as a last-minute save.
4. Zombie
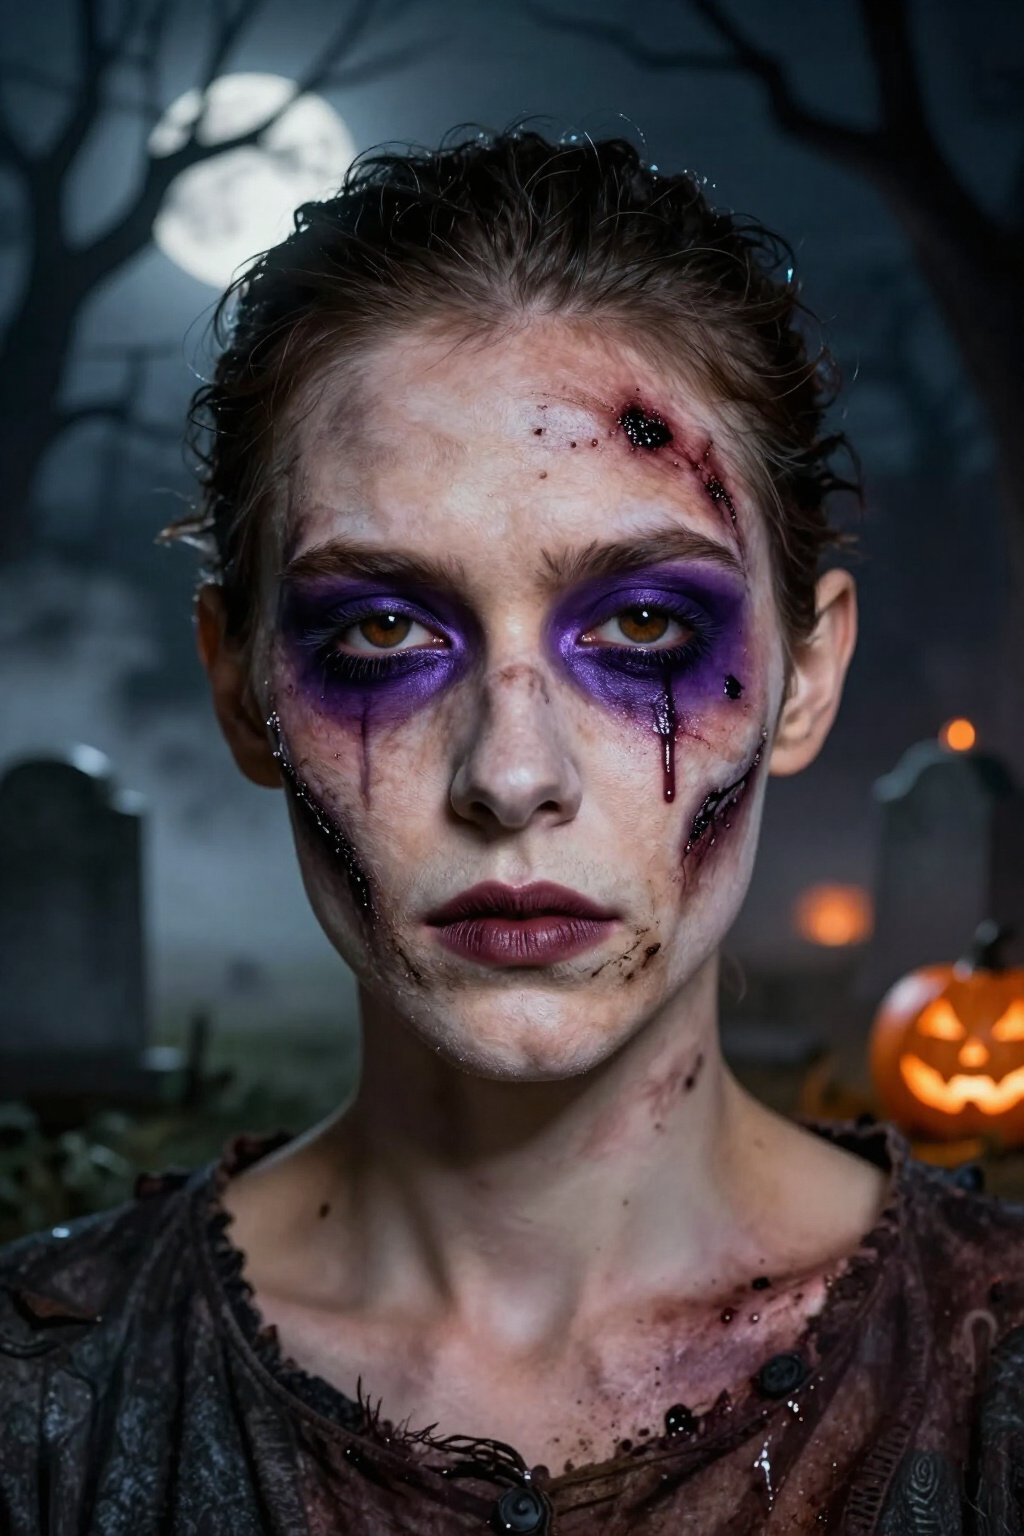
Start with a foundation two shades lighter than your skin and mix in a drop of grey or green eyeshadow if you have it. The goal is not full coverage. Pat it on thinly so your natural texture shows through, then dust a little brown shadow over your cheekbones and temples to hollow them out. That alone reads as undead under party lights.
For the eyes, work purple shadow into the socket line and blend brown underneath the lower lash line, pulling it down slightly past where your natural crease ends. The sunken look comes from keeping the lid itself pale while the surrounding area darkens.
If you do not have latex, fake a wound with eyelash glue and tissue. Tear a small strip, lay it on the skin, and paint over it with thin layers of glue until it wrinkles. Once dry, dot red lipstick in the center and smudge black shadow around the edges for depth. The texture fools the eye from three feet away, which is all you need.
5. Mermaid
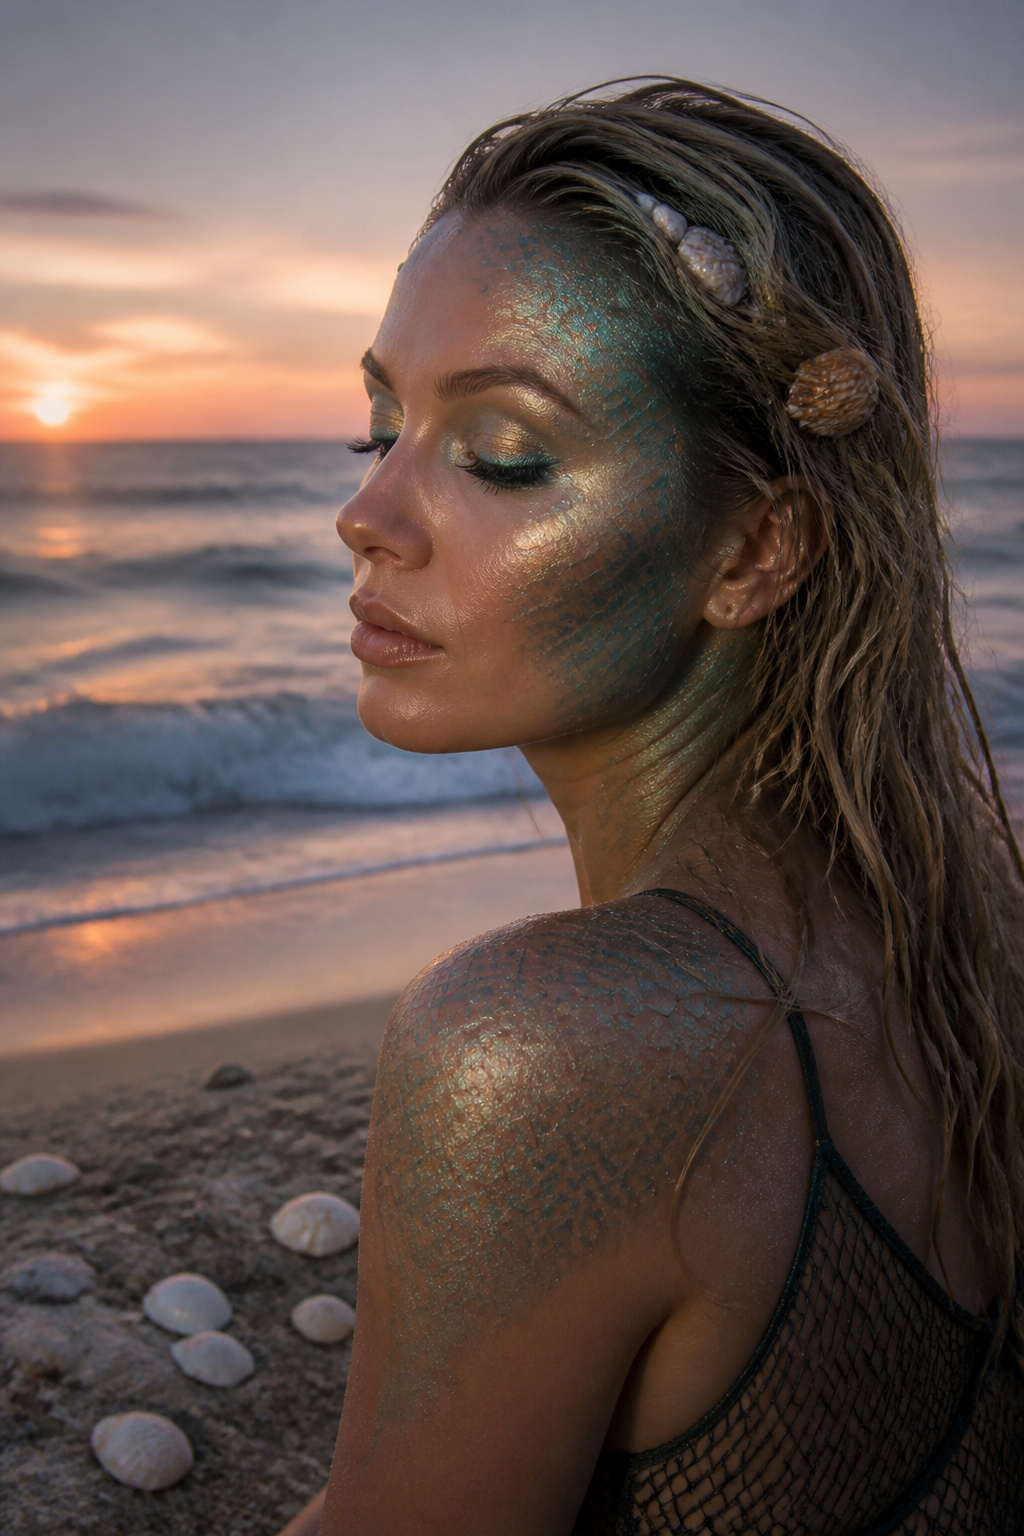
A mermaid look lives or dies on the scale texture, and fishnet stockings are the fastest stencil you will find. Stretch a piece across the cheek or collarbone, hold it taut, and dust iridescent shadow through the mesh with a fluffy brush. Lift straight up so the pattern does not smudge. The scales read instantly from across a room.
Placement matters more than product. Sweep a blue-green base from temple to jaw, then press a gold or pink duochrome just along the cheekbone and brow arch where actual light would hit wet skin. Skip the glitter. Loose particles read as craft-store sparkle; a pressed shimmer or cream pigment gives that wet, underwater shift without the fallout.
The throat and shoulders need the same treatment if your costume shows them, or the face floats disconnected from the body. Work in sections, moving the stocking stencil each time rather than dragging it across finished scales. A damp brush intensifies the pigment but will also blur the edges if you press too hard.
Where this goes wrong is density. Cover every inch and you lose the light play entirely; the eye needs negative space to register the effect. Leave the center of the forehead and the chin in softer, unscaled color so the shimmer has somewhere to rest.
6. Devil
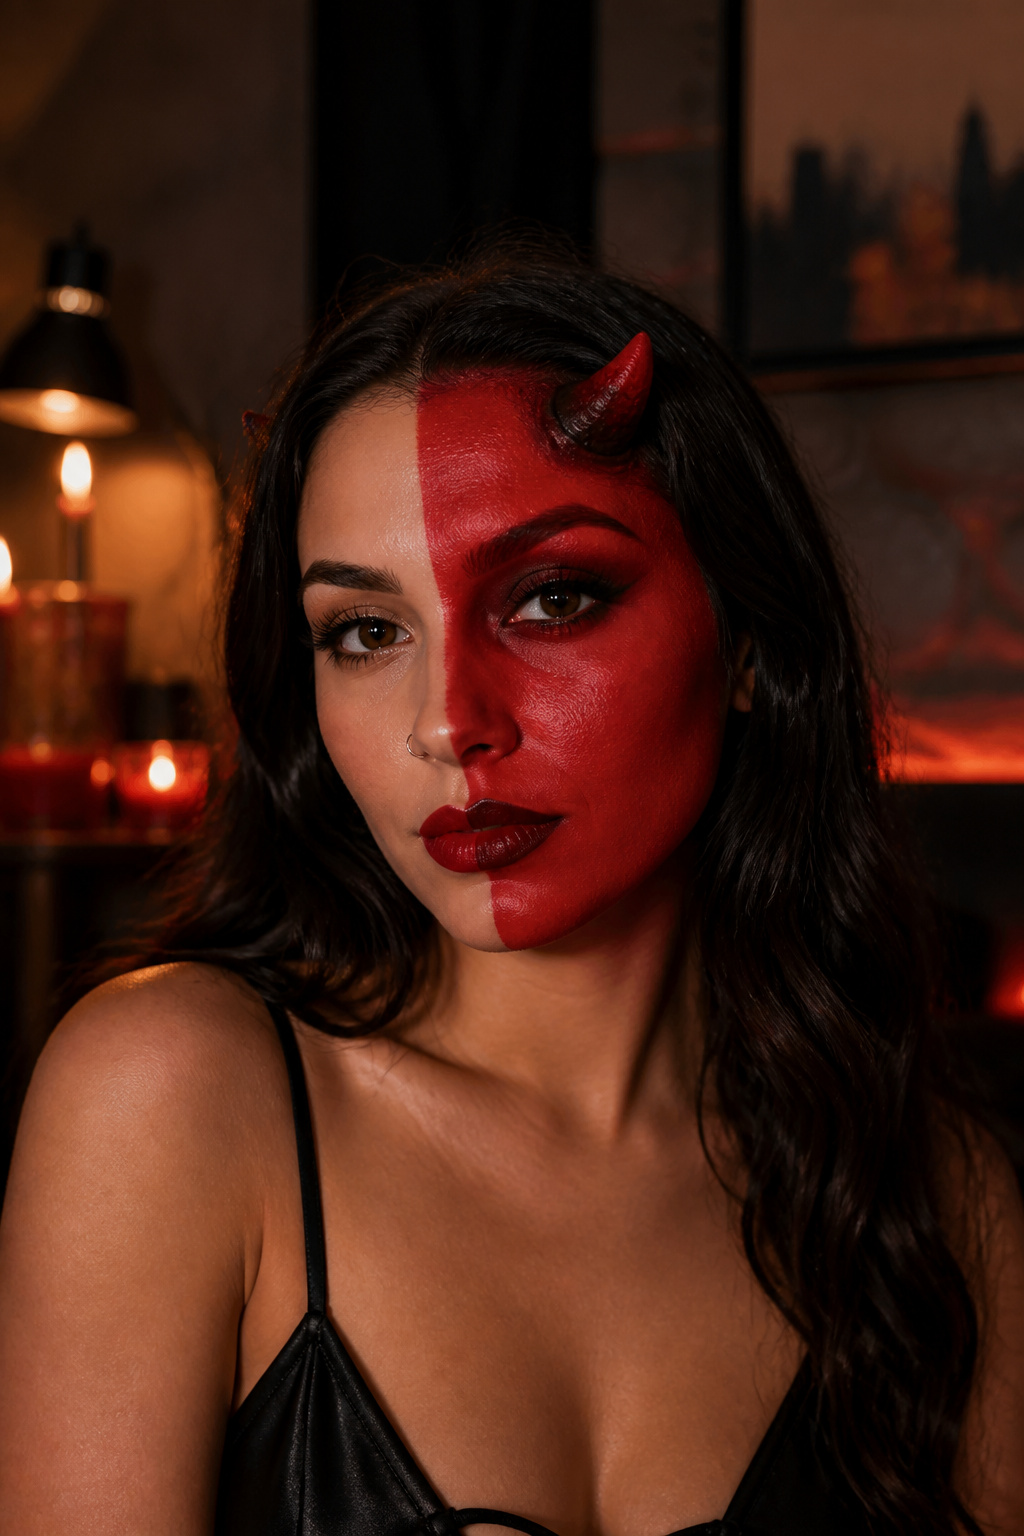
Start with a full red base from the U Can Be Athena Face Body Paint Oil Palette and draw on small horns at the temple, or pin on a lightweight pair you already own. Add a stroke of yellow paint across the brow bone to catch light and give the face dimension without extra props.
For something that reads from across a crowded room, paint only one half of your face red and leave the other bare. The split runs straight down the center: hairline to chin, clean as you can manage with a thin brush first, then filled in. It needs no costume piece at all; the asymmetry does the work.
Deepen the red lip with a darker liner underneath, then press a little lash glue at the inner corner of each eye and tap on loose red pigment so it catches when you blink. The NATASHA DENONA Berry Pop Lip Crayon lands in the right range if you are building from makeup you already keep around. Five minutes, maybe seven if you are fussy about that center line.
7. Fairy
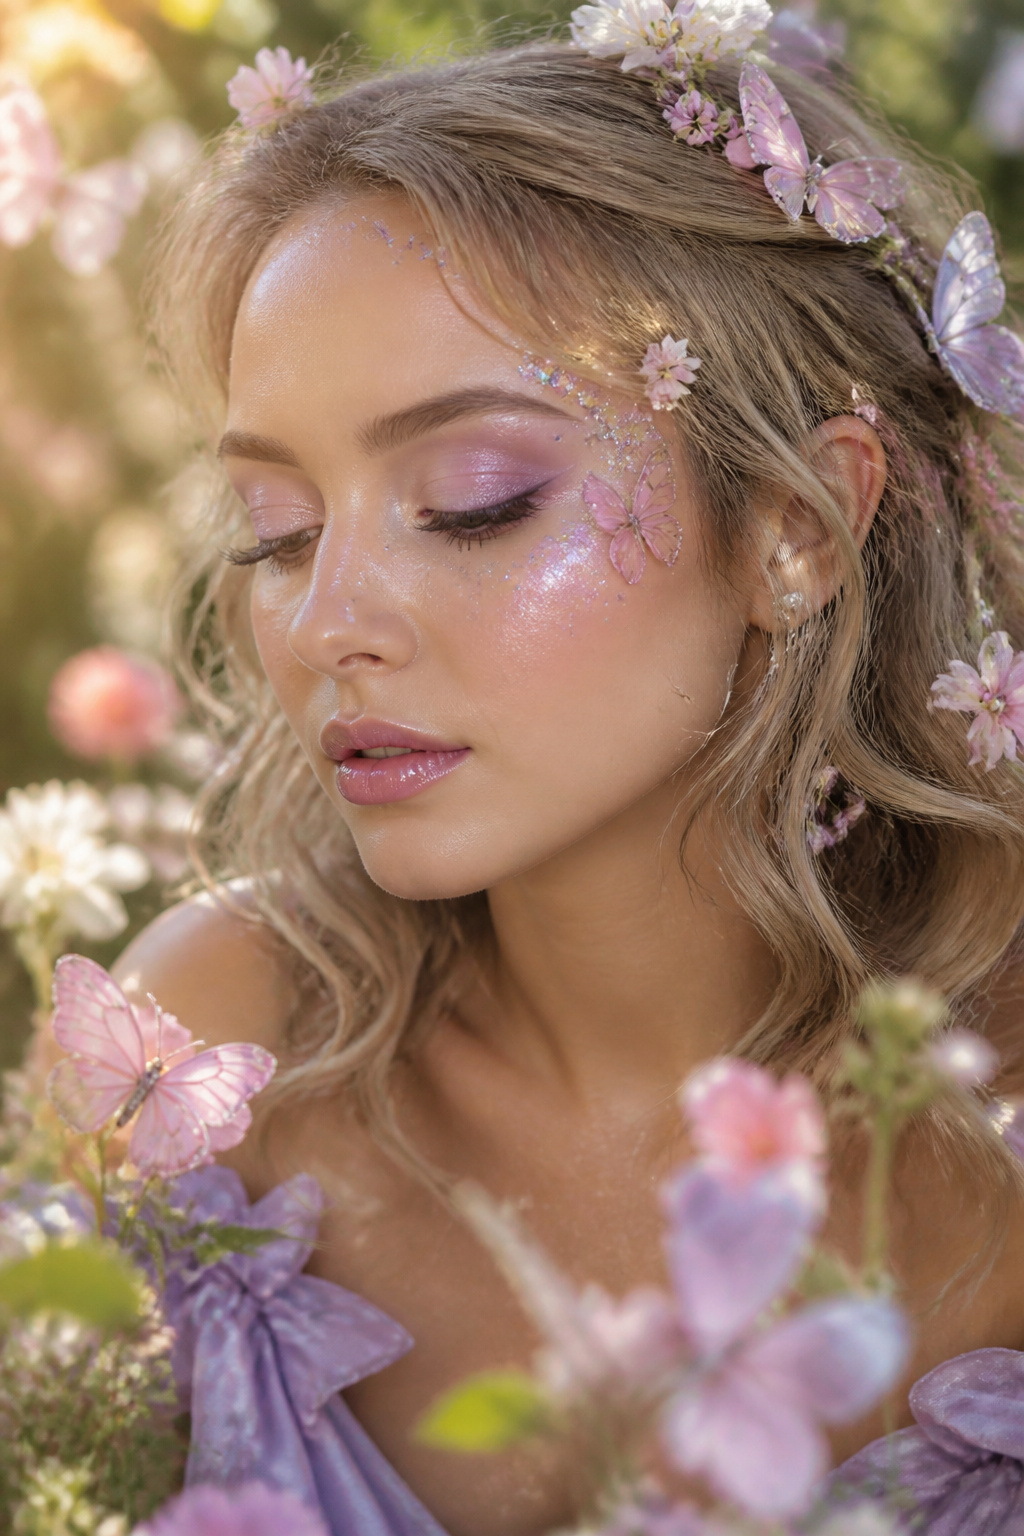
A fairy look lives or dies by highlighter placement. Sweep the pearlescent shade across the high points of your cheekbones, the bridge of your nose, and your brow bones, then blend a soft pastel shadow across your lids. The sources split on color direction: one path goes pink and iridescent like Glinda, the other frosty with purple liner. Either works, but do not skip the lash glue step if you want glitter that stays.
Loose glitter sheds onto every drink, every shoulder, every black coat in the room. The fix is dabbing it on with a glitter gel base or pressing it over still-tacky lash glue at the temples and along the brow arch. Fake butterflies or small floral pieces, attached the same way, finish the look without a full costume. You likely own the blush and highlighter already.
8. Sugar Skull
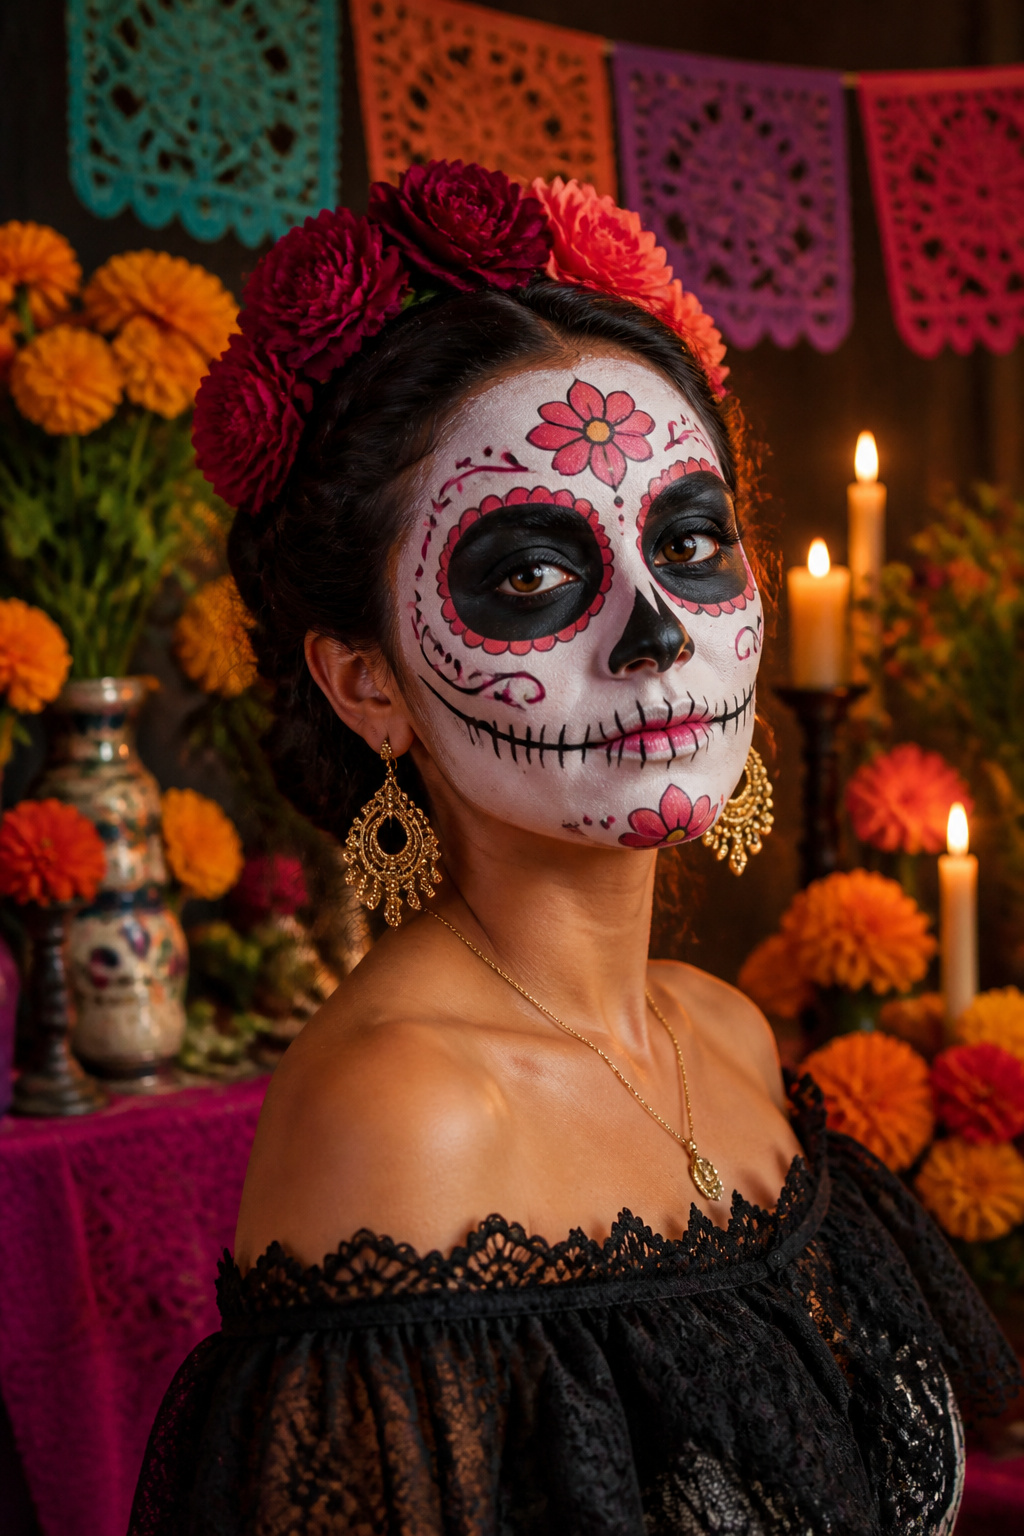
A sugar skull reads as finished the moment three elements land: the white base, the dark sockets, and a few marks of color around the eyes. Everything else is optional, which is how you compress a tradition into twenty minutes.
Start with a thin layer of white face paint or a pale foundation. Skip your usual base makeup; the white layer is doing that work. Set it with powder, even baby powder pressed on with a puff, so the surface stops feeling tacky and the colors you add next do not drag.
The sockets matter most for recognition. Draw a circle around each eye, then fill it solid black. A cream paint locked down with matching black eye shadow keeps it from creasing. The shape does not need to be perfect; slightly uneven circles still read as skull.
For the floral details, place three small petals above each socket and a few dots below. Use whatever color you have. A pink or red cream paint, set with the same shade in powder, gives enough contrast against the white without requiring precision. Swirls and filigree look impressive in photos, but a single row of dots along the cheekbone or a heart on the forehead signals the same tradition in a fraction of the time.
Lock the whole face with setting spray if you used everyday makeup, or leave the powder finish if you used pro-grade alcohol-activated paints. Those last until you remove them with 90% alcohol, but for a quick costume, standard face paint holds fine through one party.
9. Spider
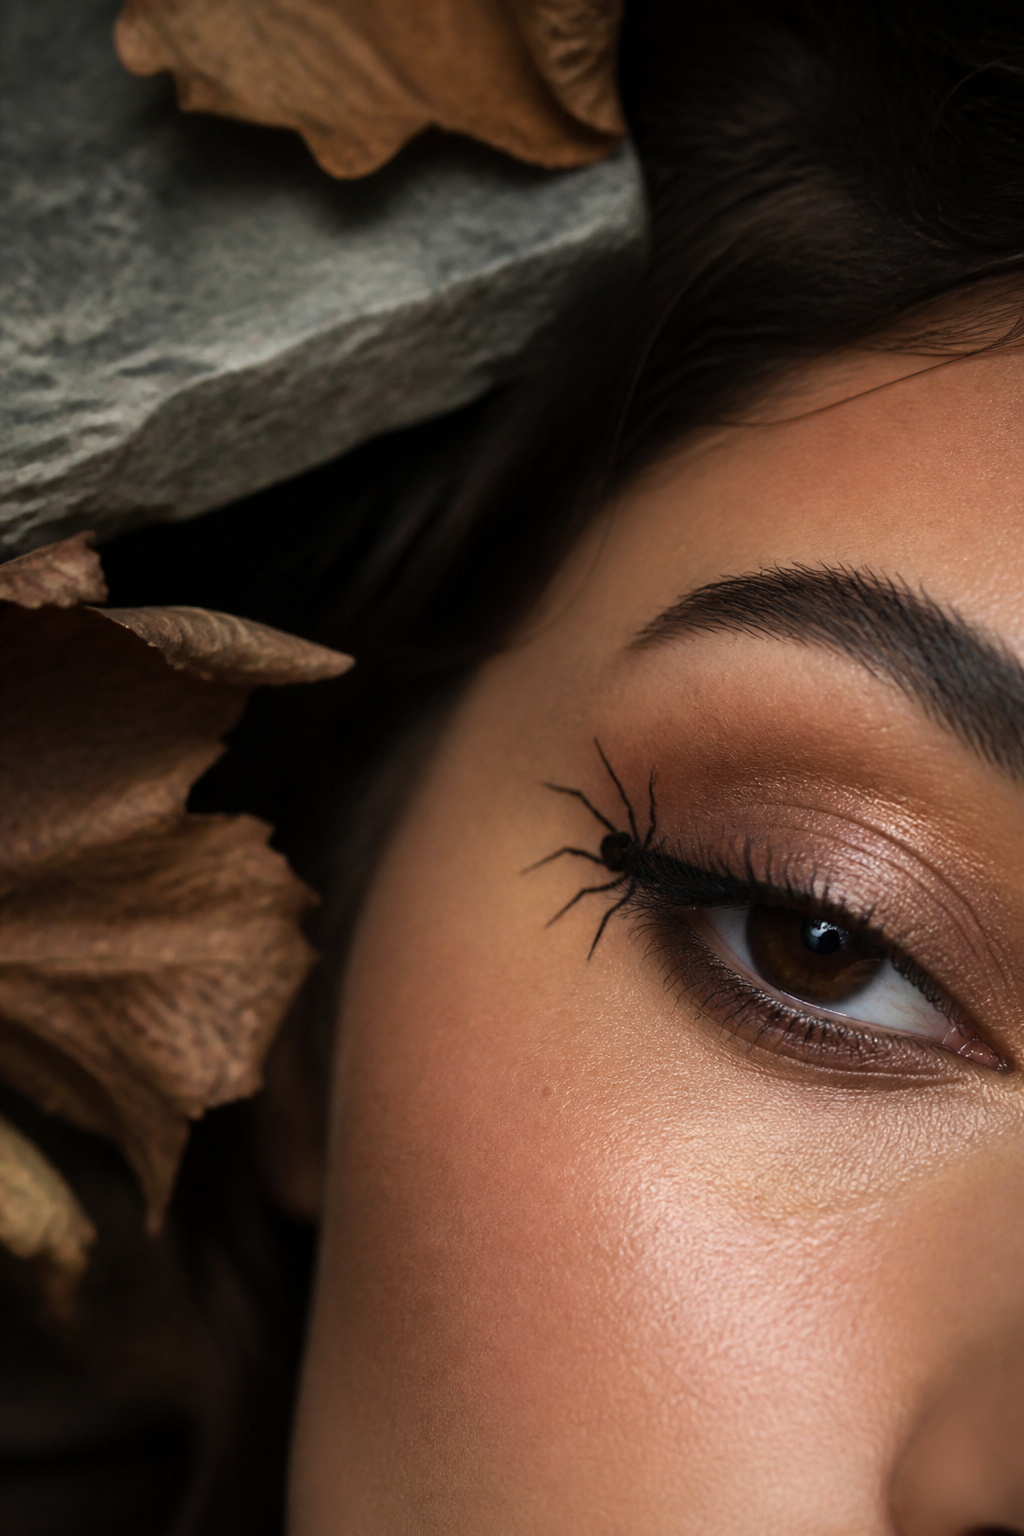
A web-eye look draws the spider’s legs across your eyelid and down toward the temple, which looks dramatic in photos but needs a steady hand and time you might not have before a party. A single small spider at the outer corner of your eye or on the temple takes about two minutes and reads immediately from across the room. You draw the body with one dot of gel liner, add eight short legs with a fine-tipped brush, and you are done. The fine tip matters more than the formula; a brush that splits will give you eight thick ticks instead of legs. Place the spider just above your cheekbone, not on it, or your smile will distort the shape every time you talk. Black liner on bare skin looks graphic and intentional; if you want color, a dark red body with black legs keeps the read clean.
10. Cat
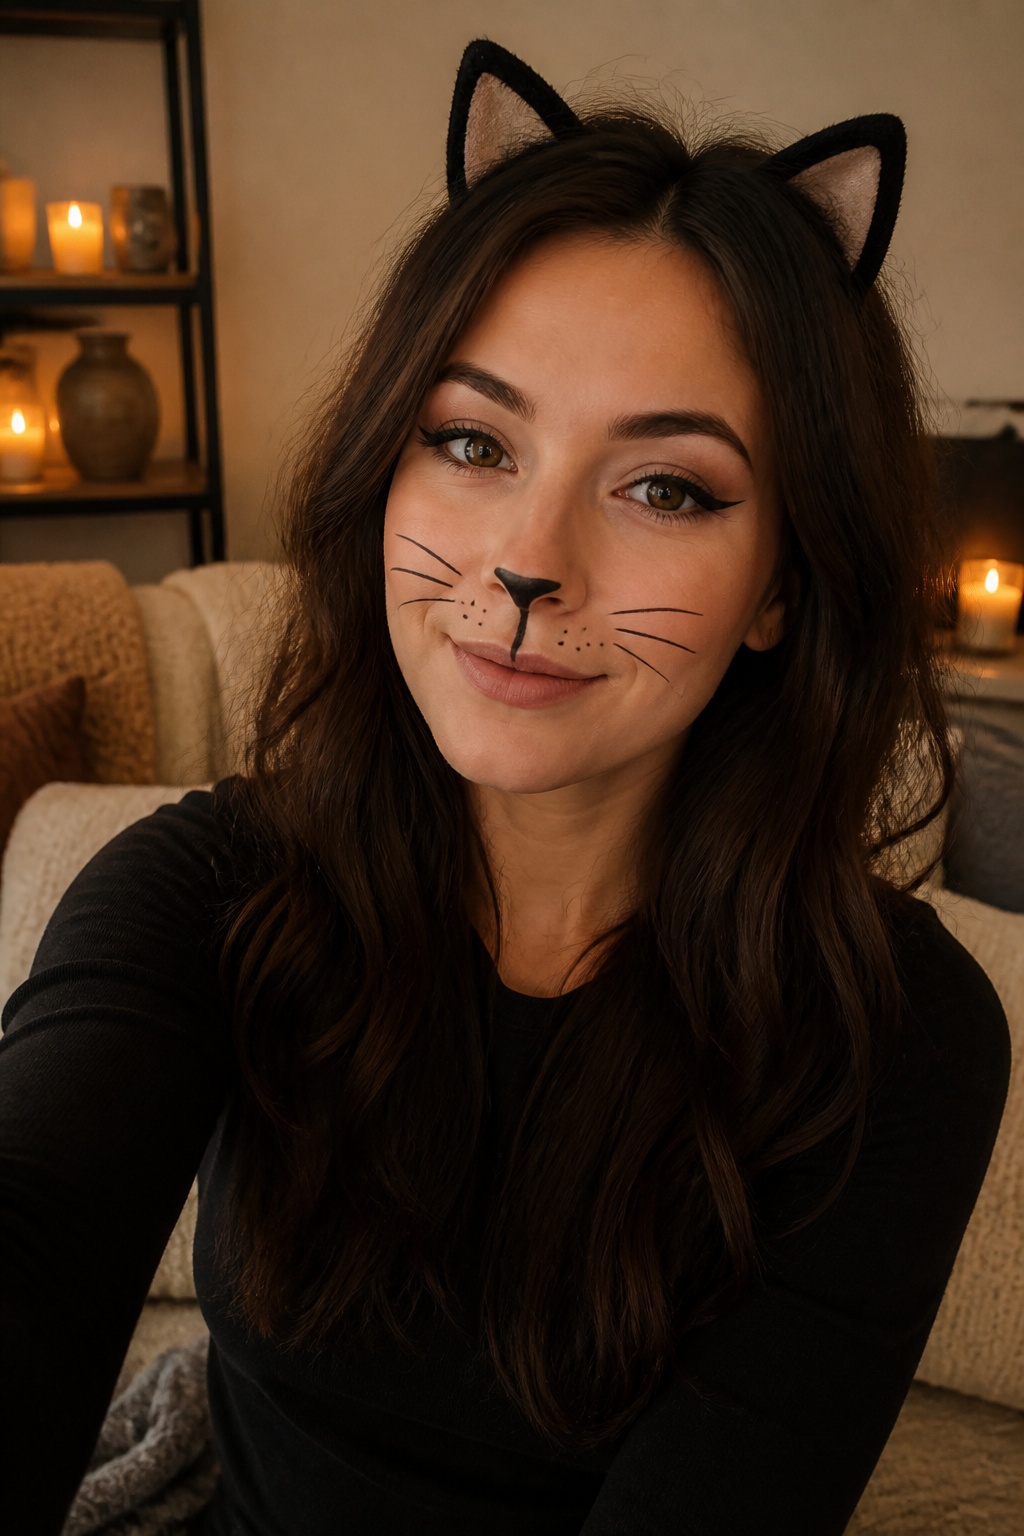
The cat is the look you pull out at seven fifteen when the party starts at eight and the costume never shipped. It still works because the shape is baked into everyone’s head: small nose, whiskers, ears that read as ears instead of geometry homework. Black liner stays where face paint sweats off, and that alone decides whether you are still a cat at midnight or a smudged raccoon.
Draw the nose with the pencil flat on its side for a soft edge, not a hard dot. Three whiskers per cheek, drawn with the lightest possible pressure, look drawn on. Press hard and you get war paint. For the ears, sketch the outline up along your own brow ridge and fade it out before the hairline; a triangle that stops short looks like a sticker, but one that follows your bone structure looks like it grew there. Add brown shadow through the crease and up toward the brow if you want more than liner, though the liner alone is enough. Pop on ears from a headband and you are done.
11. Princess
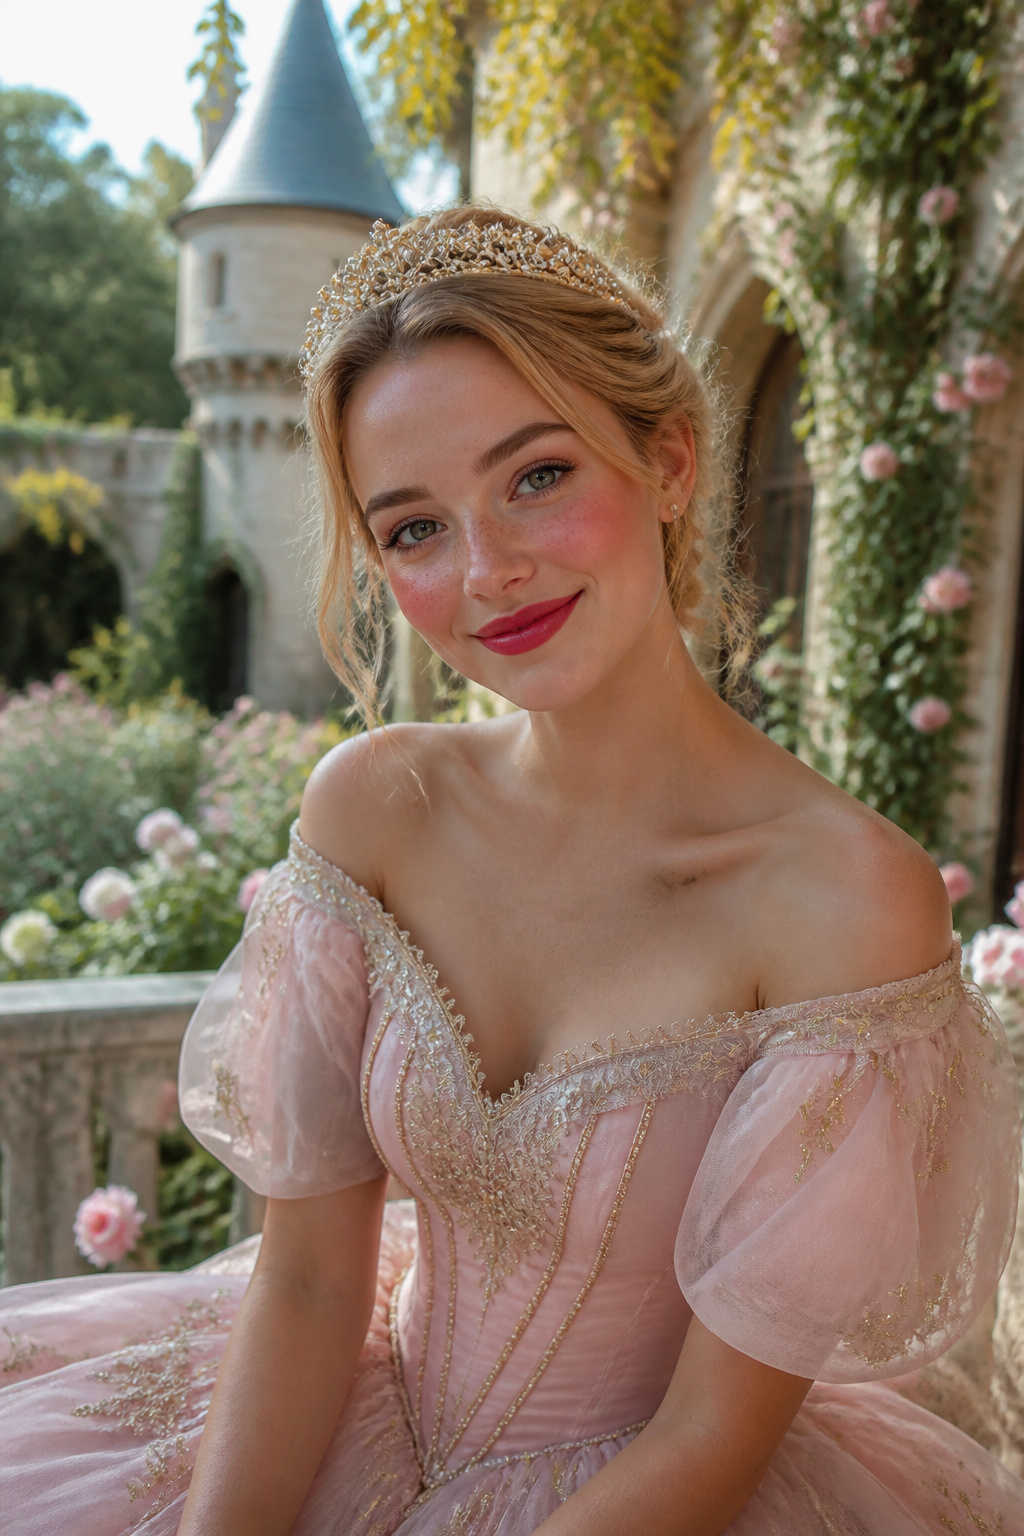
Load a blush brush until the bristles look almost dusty, then sweep the color across the apples of your cheeks and up toward the temples in a shape wider than your natural flush. You want the kind of pink that reads as healthy from twenty feet away, not a subtle contour. Dot freckles across the nose and cheekbones with the tip of a brown eyeliner pencil, pressing lightly so the marks stay irregular in size; five or six clustered close together sell the story better than a neat grid. A lip color in a true red or a hot pink, applied straight from the bullet without blending, finishes the look in under ten minutes. Skip the crown. Overbuilt cheeks carry the whole costume if you commit to the scale, and you will not spend the evening adjusting a tiara that slides.
12. Mummy
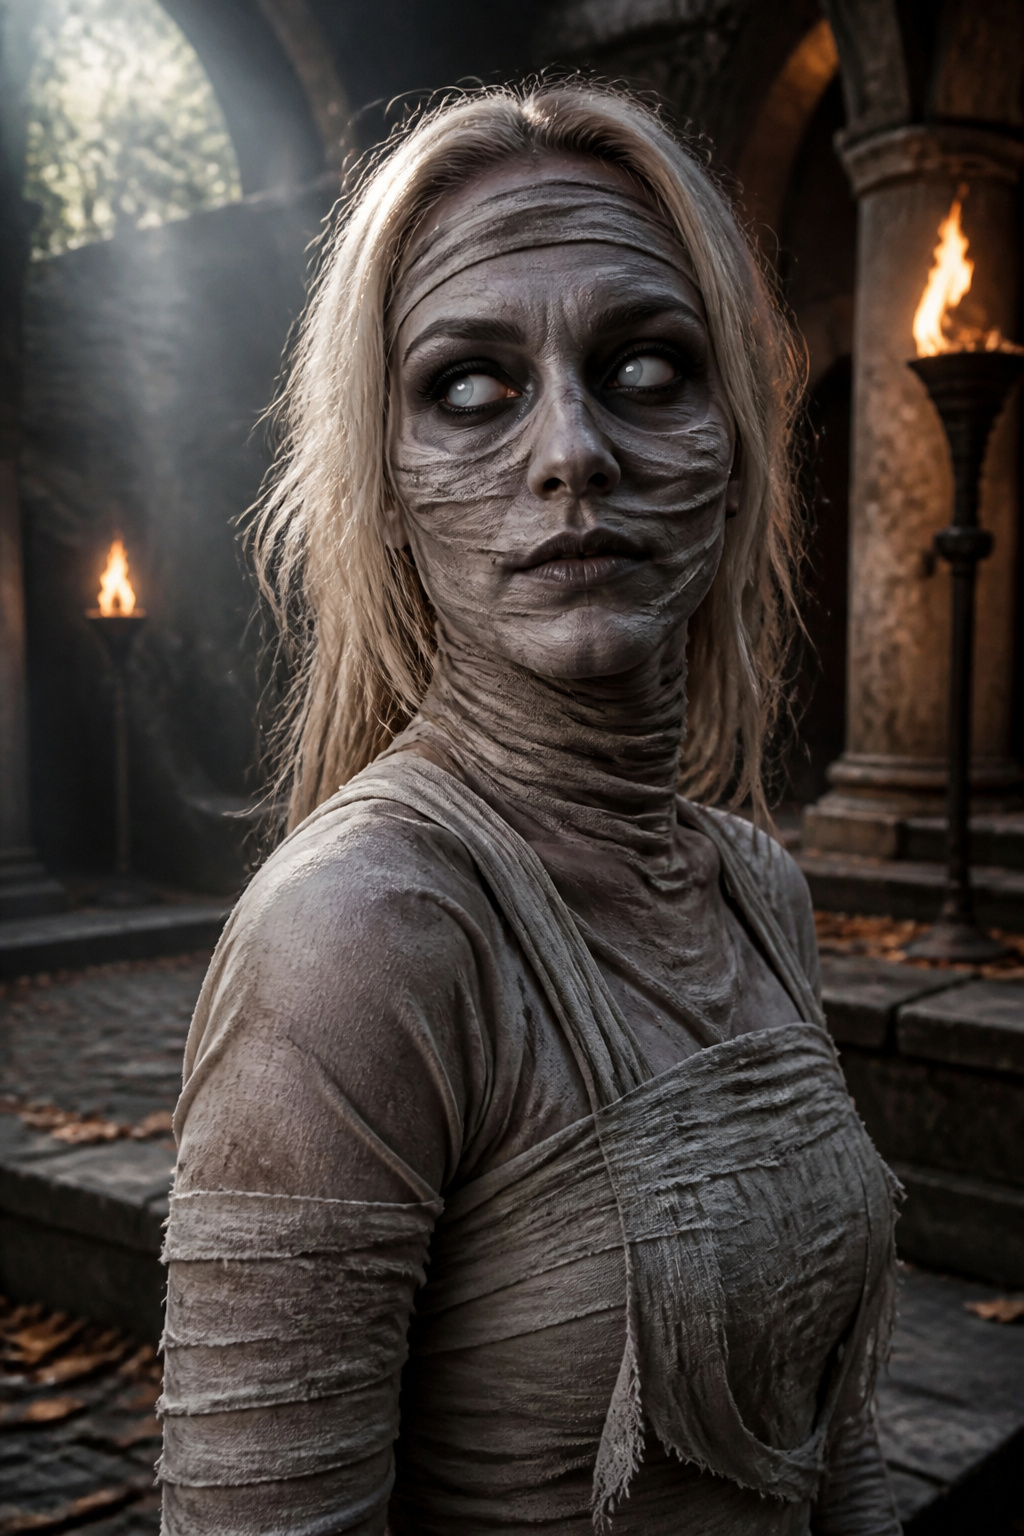
A full mummy costume means yards of gauze and the constant risk of tripping. You get the same effect faster by keeping the wrapping to your face and neck.
Start with a white cream base one shade brighter than your natural skin. Then take a grey shadow on a thin brush and paint lines where the bandages would cross: diagonal over the forehead, horizontal across the cheeks, one wrapping under the jaw. The trick is in the edges. Draw each line with a small wiggle so the border looks frayed, not ruled. Pat a touch of the grey along those edges with your finger to soften them into skin, so the "bandage" seems to sit on top rather than float.
For depth, add a darker grey shadow in the hollow where each wrap would tuck underneath the next, especially at the temple and the side of the nose. A loose coat of translucent powder keeps the cream from creasing if you are out more than a couple hours.
Skip the eyes entirely, or just rim them with a soft brown so they do not disappear. The wrapped look reads from across a room because of the pattern, not the detail work.
13. Day of the Dead
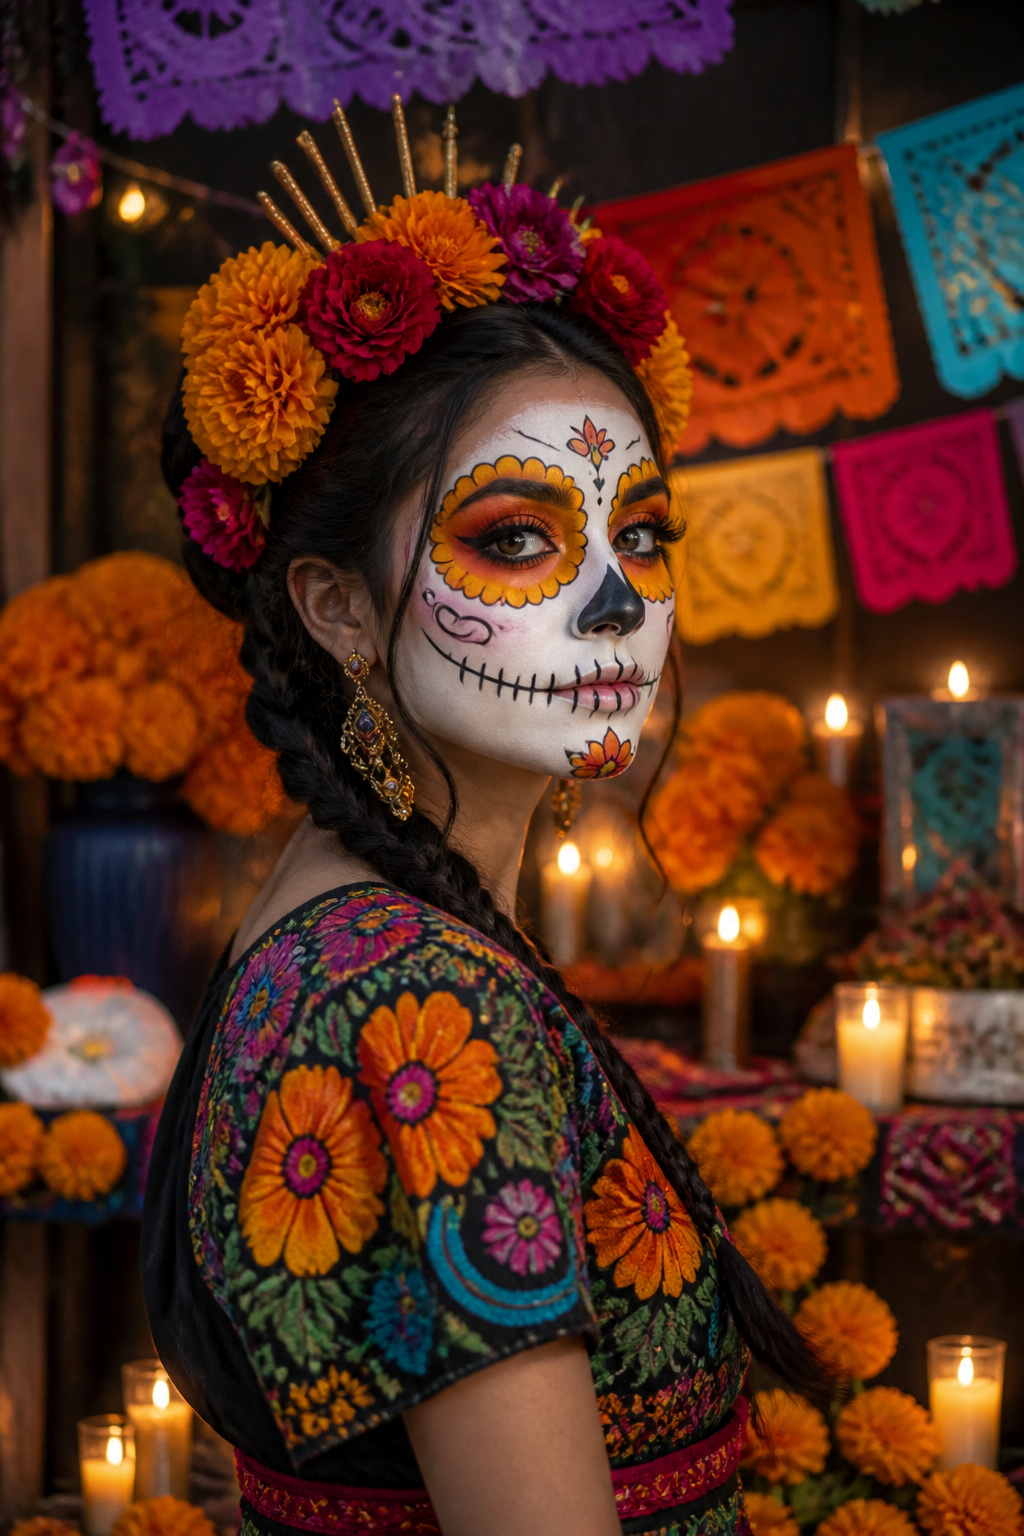
Day of the Dead makeup gives you room to go ornate without needing a full costume. The look centers on marigold-colored shadow radiating from the eyes in petal shapes, which reads as celebratory rather than macabre from across a room. Paint the face white, sketch the eye sockets in black, then layer yellow and orange cream shadows outward in rounded strokes. A fine-tipped brush and face paint from any craft store will do it; the shape matters more than the brand.
For a portrait-like finish, keep the jaw and neck clean rather than extending the skull pattern downward. Add a thin black line through the center of the lips, with small vertical strokes crossing it to suggest teeth. This takes forty minutes if you are laying down deliberate petals, or fifteen if you smudge the orange shadow into a halo and call the edges abstract. The full version photographs better; the quick version survives a party without touch-ups.
14. Pop Art
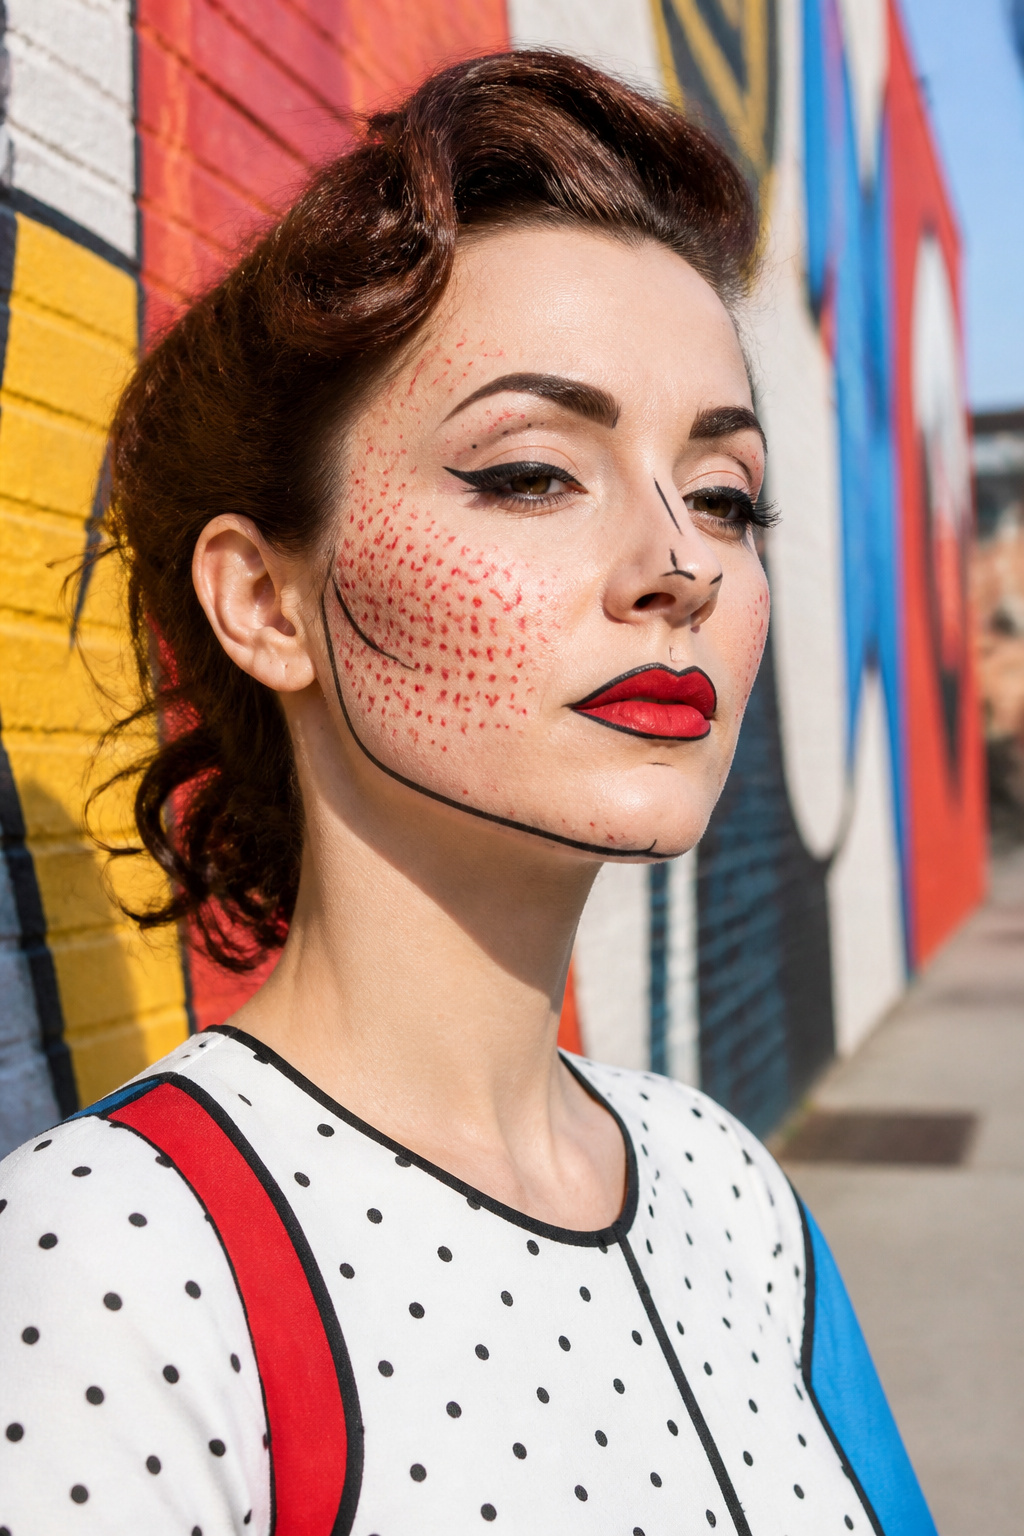
A steady hand matters more than artistic talent for the Lichtenstein look. The bold black outlines and Ben-Day dots reward confidence and punish hesitation, because a wobbly line reads as a mistake rather than a style choice. You want to outline the eyes, the jawline, and the Cupid’s bow of the lips. Those three features carry the whole illusion; fill in the rest with flat color blocks and you still read instantly as pop art.
The dots are simpler than they look. A pencil eraser dipped in red or blue craft paint stamps a uniform pattern across the cheeks or forehead. Let one color dominate and keep the dots evenly spaced; scattered or irregular spacing breaks the printed effect.
Start with the black outlines and do not stop to correct mid-stroke. Acrylic paint mixed with a little face-safe primer goes on opaque and stays put. Water-based face paint alone smudges when you layer, so the mix matters. If the line goes wrong, wipe and redraw rather than retracing. Building up thin passes makes the edge fuzzy, and fuzz ruins the comic panel crispness that sells the look.
This one takes forty minutes if you commit, an hour and a half if you second-guess the lines.
15. Alien
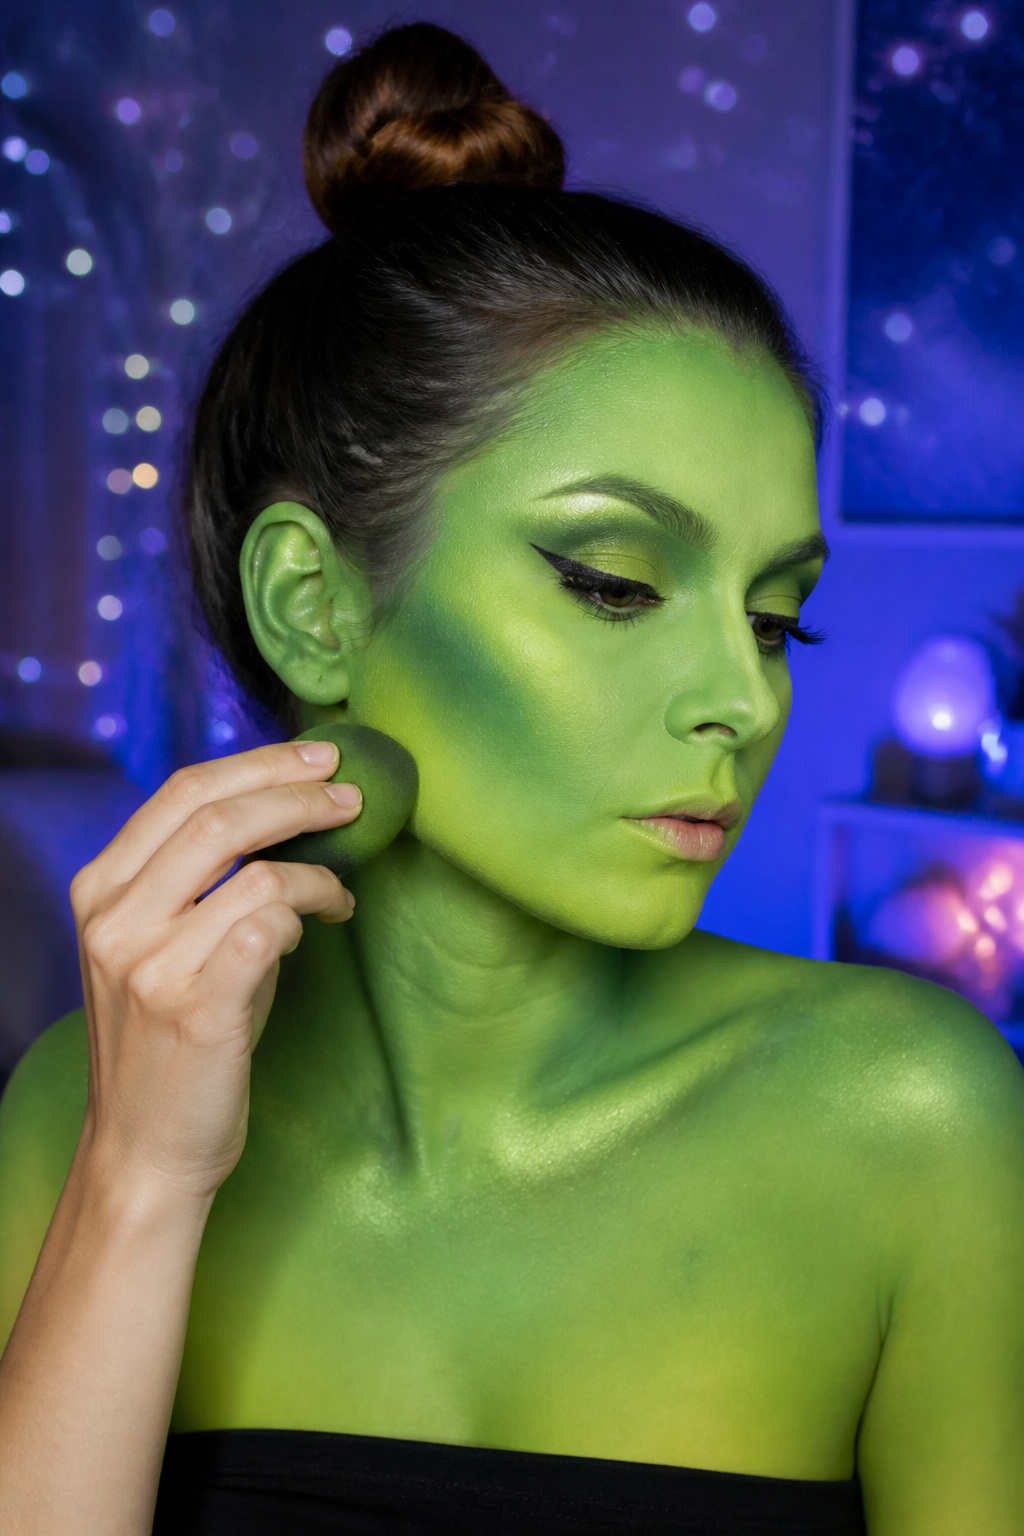
A single-color face is the fastest route to alien, and a cream base in electric green or icy blue does the work of a full costume. Spread it with a damp sponge, work it past the hairline, and you are already there. The problem is that some cream formulas shift as they dry, turning from mint to hospital-wall sage or from cobalt to dusty denim once they set. Test a stripe along your jaw, wait the full drying time, and check it in daylight before you commit your whole face.
If you have ten more minutes, draw the facial structure on top. A darker shade of the same base color, blended into the hollows of the cheeks and around the eye orbit, gives you depth without complexity. A fine brush with white cream pulled across the brow bone and down the center of the nose catches light and reads as bone structure from across the room. Skip the glitter and the stick-on gems; they read as craft project at 2 a.m. and you will pick them off by midnight.
16. Witch
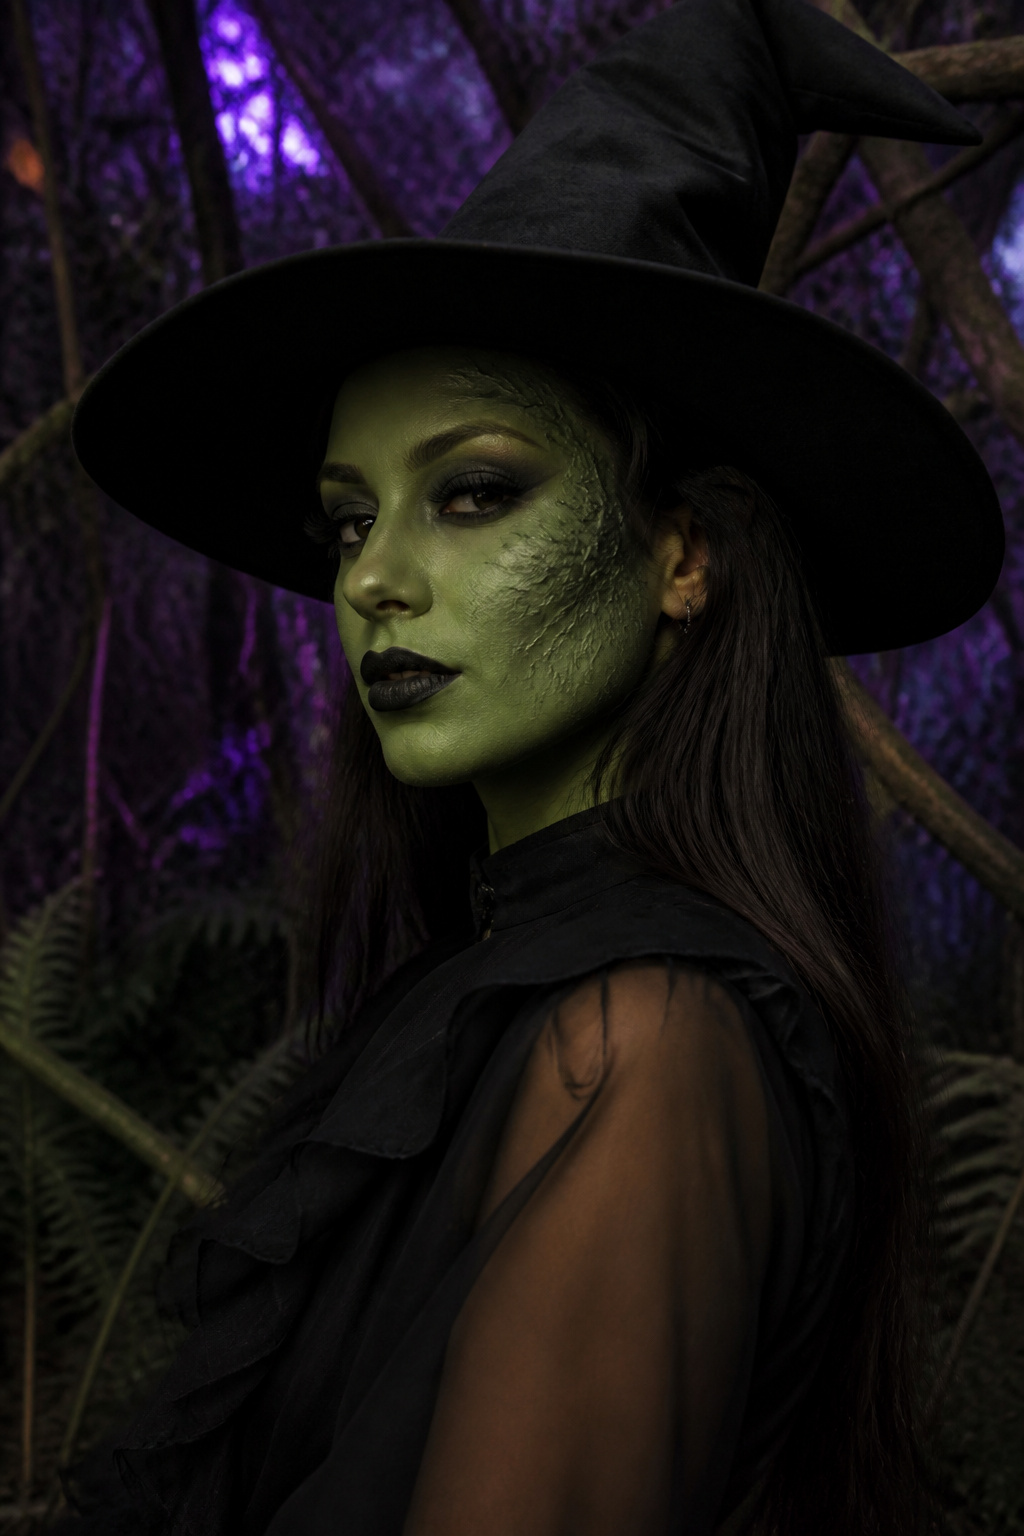
The green face is the first image that comes to mind, but it is also the first thing to go wrong. Snazaroo and similar face paints need full coverage to read at all, and any patch where the base coat thins will look like a bruise rather than a spell. You are committing to a product run, setting powder, and the risk of transferring green onto every collar you hug.
The modern take skips all of that. Sculpt your cheekbones with contour swept hard toward the ears, then layer a smoked-out eye until it is theatrical. You already own the shadows and liner. The look reads instantly from across a room, and it will not crack when you laugh.
Set cream paints with matching eyeshadow if you use them; otherwise, a standard setting spray handles everyday products. Powder is non-negotiable either way, even baby powder pressed on with a puff. The dark eye wins for speed, but the green face still works if you want the silhouette people remember from childhood.
17. Scarecrow
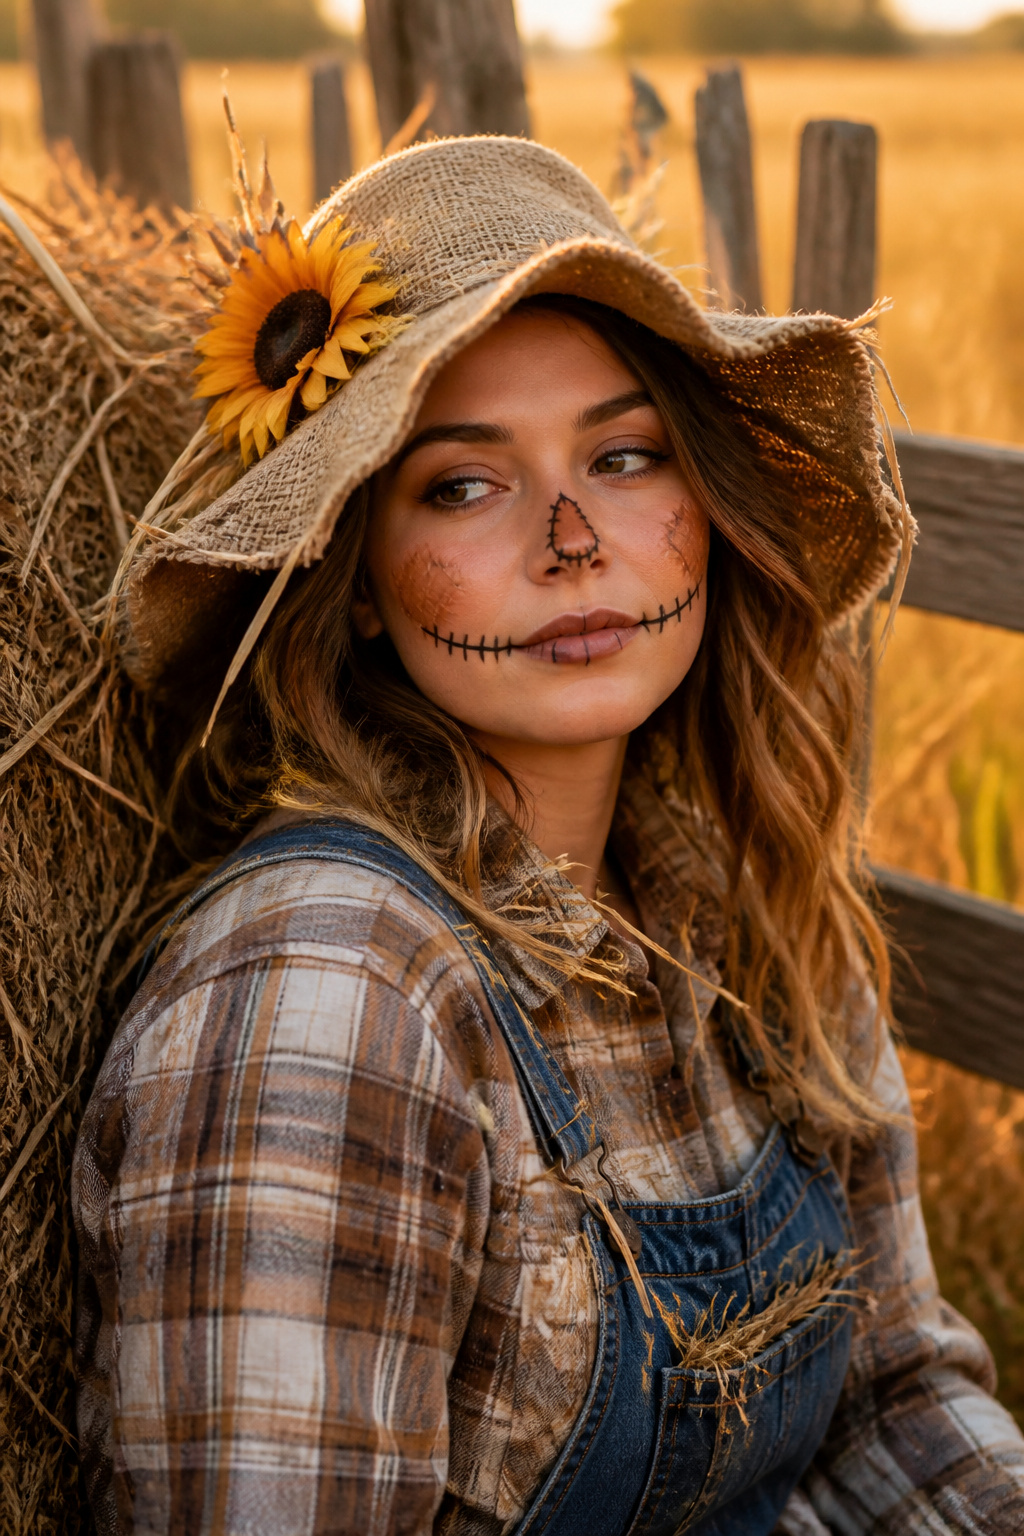
A scarecrow lives or dies on the mouth. Draw the stitched line first with a dark brown or black liner, running from each corner of your lips straight out toward the ears, stopping where a real smile would end. Add short cross-stitches every half inch or so; uneven spacing looks more like handwork than machine precision. For the burlap texture, stipple a mustard-tan shadow across the bridge of the nose and the high points of the cheeks with a dry sponge or a stiff brush, then go back with a slightly darker ochre to press small irregular patches into the same spots. Smudge the edges until the color fades into your skin tone rather than stopping at a hard line; the sun-weathered look comes from that softness, not from perfect coverage. Skip the full face of foundation if you are short on time. The patchwork effect reads faster against bare skin or a light moisturizer than it does buried under a mask of base coat. A touch of the same ochre shadow dragged across the eyelids ties the whole thing together without adding a single extra product.
18. Pirate

A pirate look lives in the weathering, not the eyeliner. Start with a brown or taupe cream shadow and tap it across the jaw and upper lip with a dry sponge until the color sits unevenly, like stubble grown in at sea. A few dots of the same shade pressed into the hollow of the cheeks adds the hollowed look of someone who has been rained on more than once.
If you want a scar, draw a thin line with a red lip pencil, then soften the edges with a fingertip so it looks healed rather than fresh. The real trick is the eyes. Darken both lids with charcoal or brown shadow, then go back and build a second layer on just one eye, blending it up toward the brow bone and out at the outer corner. The asymmetry reads as old injury, or as light hitting a face that has turned toward the sun too many times from the same direction. It changes your whole expression in a way symmetry never would.
Skip the eyeliner entirely for the waterline. Let the shadow do the work. The rougher the application, the more convincing the result.
19. Doll
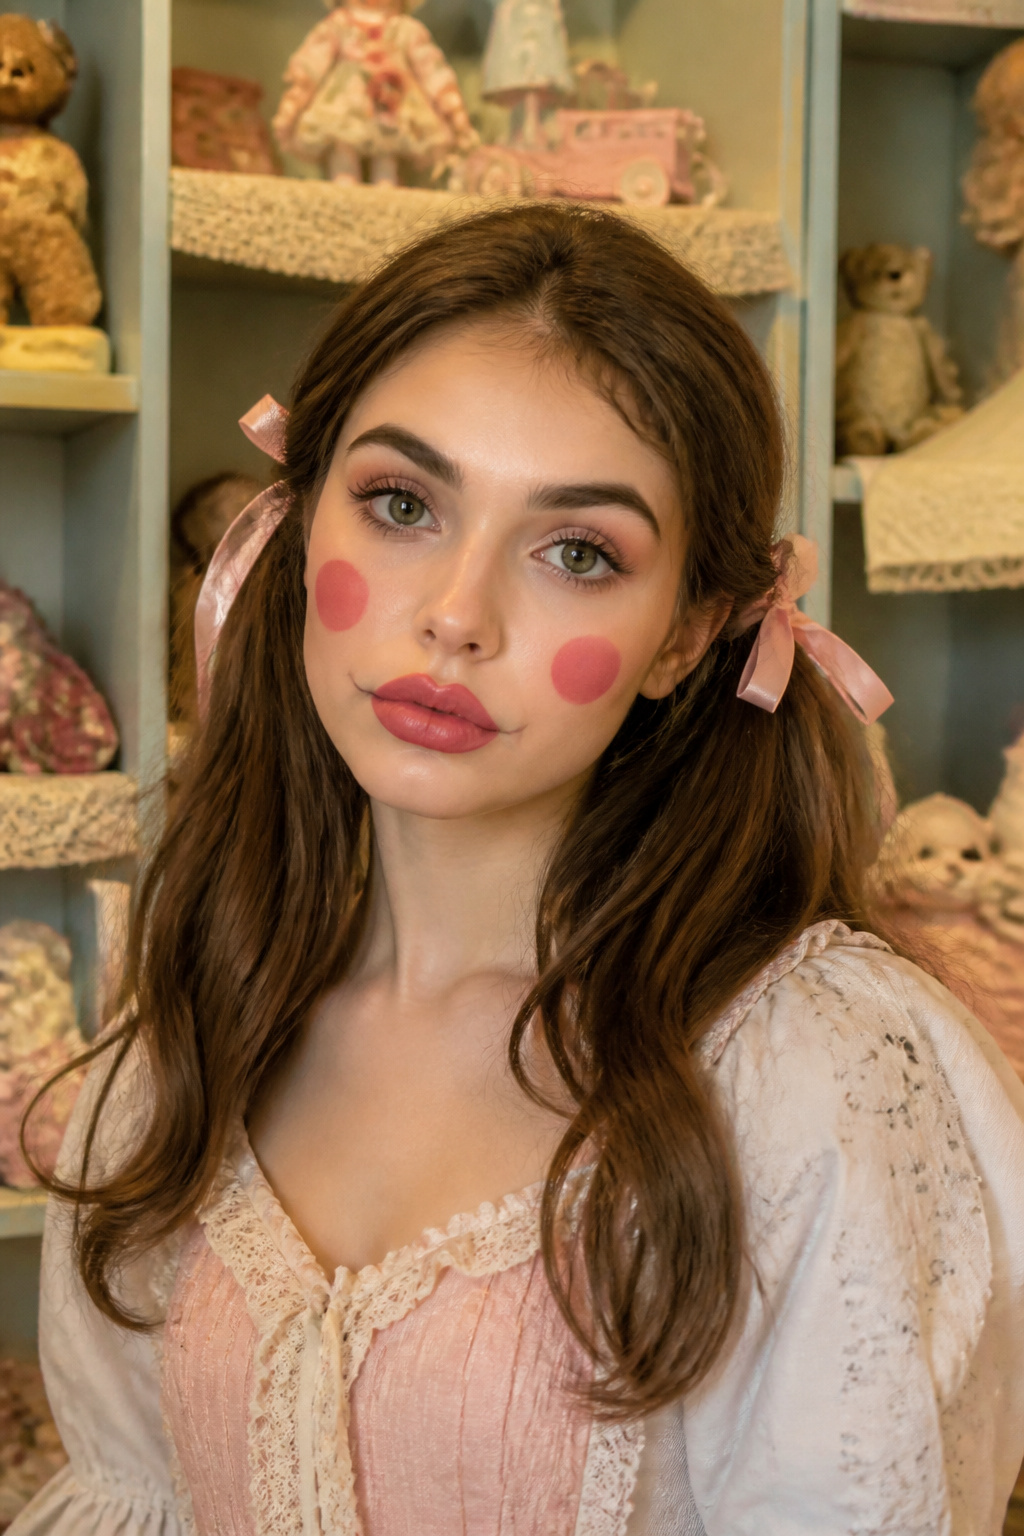
The uncanny valley is what makes a doll face read as creepy rather than cute, and you hit it with proportions that are almost right but slightly too perfect. Overdraw your lips at the center only, keeping the corners small, so the mouth looks painted on rather than grown. Blush goes in a perfect circle on the apple of each cheek, higher than real flushes ever sit, and you want it matte and opaque, blended to a soft edge but never feathered out to nothing.
Brows matter more than the lips for selling the effect. A real brow has random hairs and a soft tail; yours should be drawn as one even, slightly arched line with a hard start and a rounded end. Too thin looks vintage, too thick looks costume-shop, so aim for a width that would look wrong on you in daylight.
For the glassy eye effect without contacts, dot a tiny spot of clear gloss or balm right on the center of each lid, not the whole eye. It catches light in photos and from across a room, but it stays comfortable and you will not be blinking through fog all night. Draw the lower lashes as four or five short, equal strokes spaced too far apart; real lashes cluster, and their regularity is what makes the face feel manufactured.
Product Recommendations
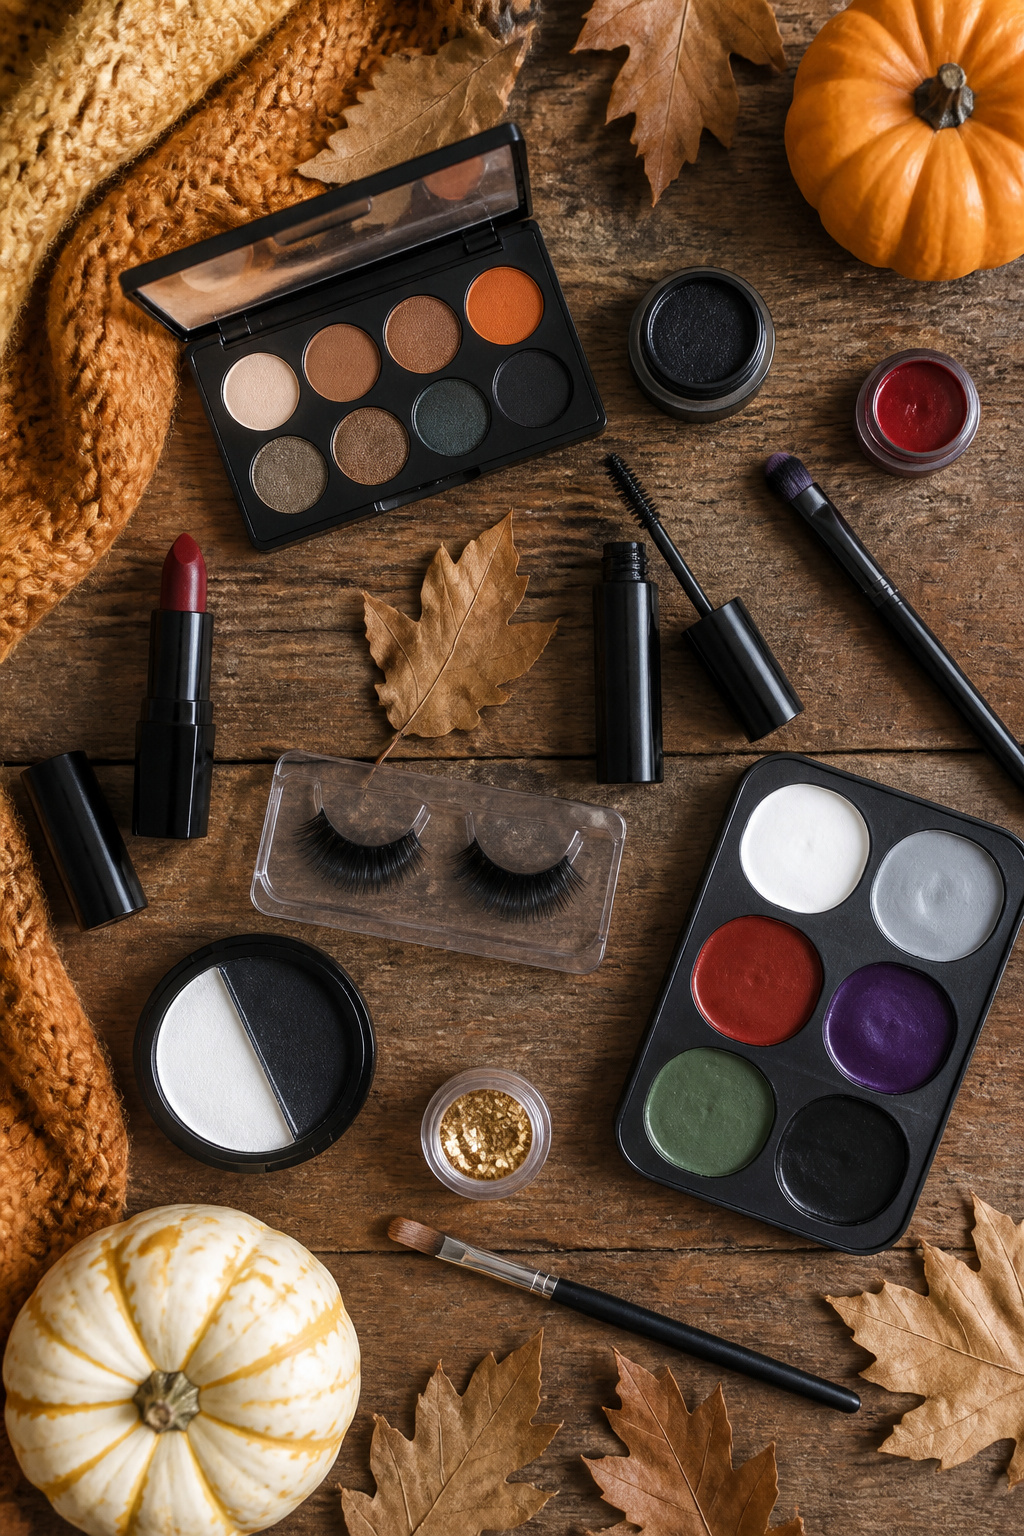
You do not need a drawer full of one-use products to pull off a solid Halloween look. A tight kit built around a few reliable items will carry you through most easy Halloween makeup ideas without the waste.
- Mehron Makeup Fantasy F/X Water Based Face & Body Paint is the paint sources reach for first; the green and purple Color Cups are pigmented enough to cover in one layer and wash off with soap and water. Use them for anything from a full face to accent details.
- NYX Epic Wear Liner Sticks run about $9 and last through a full night of sweating under a mask; the bold colors hold up where standard pencil gives out. Pair them with the Epic Wear Liquid Liner at $12 if you need a sharp wing or fine line that will not smear.
- The NYX Ultimate Color Shadow Palette in I Know That’s Bright sits at $20 and gives you the range to shift from witch to pop art to alien without buying separate singles. The brights are the draw; the neutrals fill in when you need shadow contouring, not just color.
- Ben Nye Color Wheels are worth adding if you want to do bruises, aging, or any look that needs depth rather than flat color. They mix down to skin tones better than most face paints.
- Skip the elaborate pre-packaged kits with twelve mediocre products. Buy one good face paint, one bright palette, and one waterproof liner. You will use them again.
Ease of Application
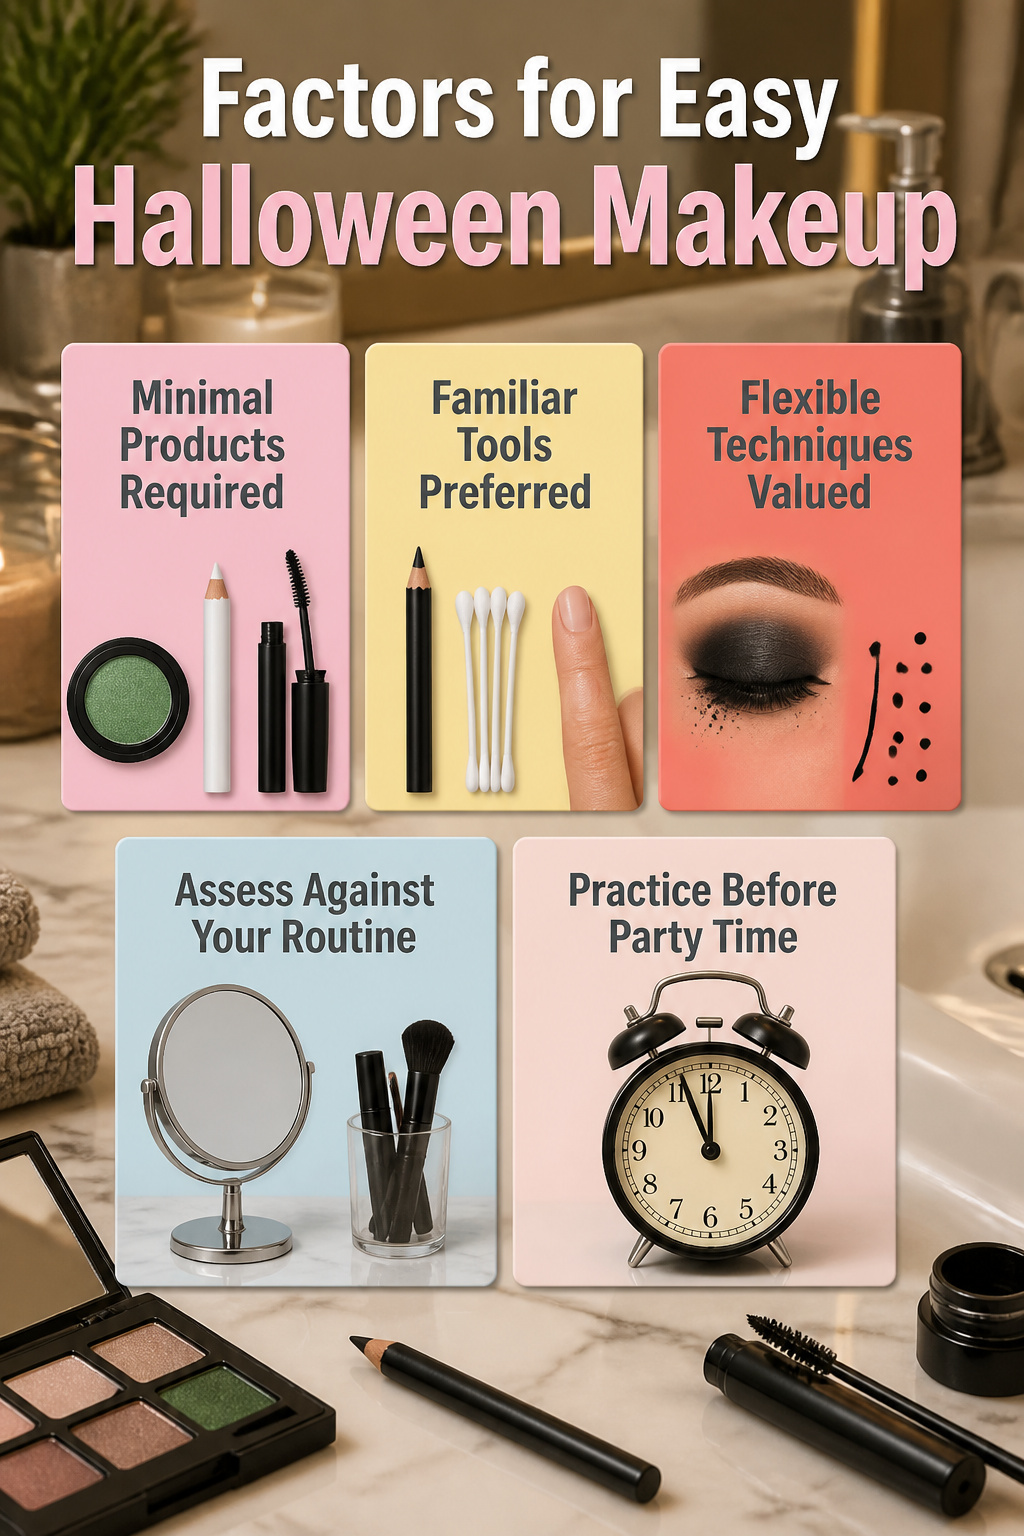
A genuinely easy Halloween makeup look lives or dies by how many products it asks of you. The alien tutorial that actually delivers on its promise needs only green eyeshadow, white eyeliner, and your usual base makeup. That is the threshold: if you are opening a new product, the look has already stopped being easy. Three unfamiliar items is a costume project; one unfamiliar item is a Tuesday.
Tools matter the same way. A cat nose and whiskers drawn with eyeliner you already own is a five-minute job. The same shape in face paint with a brush you bought for the occasion is a twenty-minute learning curve, and the first attempt usually shows it. Look for tutorials that work with fingers, cotton swabs, or the blunt side of a liner pencil. Those are the ones written by people who have actually rushed.
Forgiveness is harder to spot in a thumbnail. Pop art makeup with its dotted lines and hard contours will read as sloppy if your hand shakes. Goth eyeshadow and smudged liner only get better when the application is imperfect. The difference is structural: one punishes uneven lines, the other builds them in.
Judge a tutorial’s "easy" against your own morning routine, not the finished photo. If you do not wear foundation daily, any look that lists it as a "basic" is already starting ten minutes behind. If your usual eye makeup is a single swipe of mascara, even a two-shadow blend is a skill jump. The right tutorial for you is the one you could do with your bathroom lights dim and a party starting in fifteen minutes.
Family-Friendly Ideas
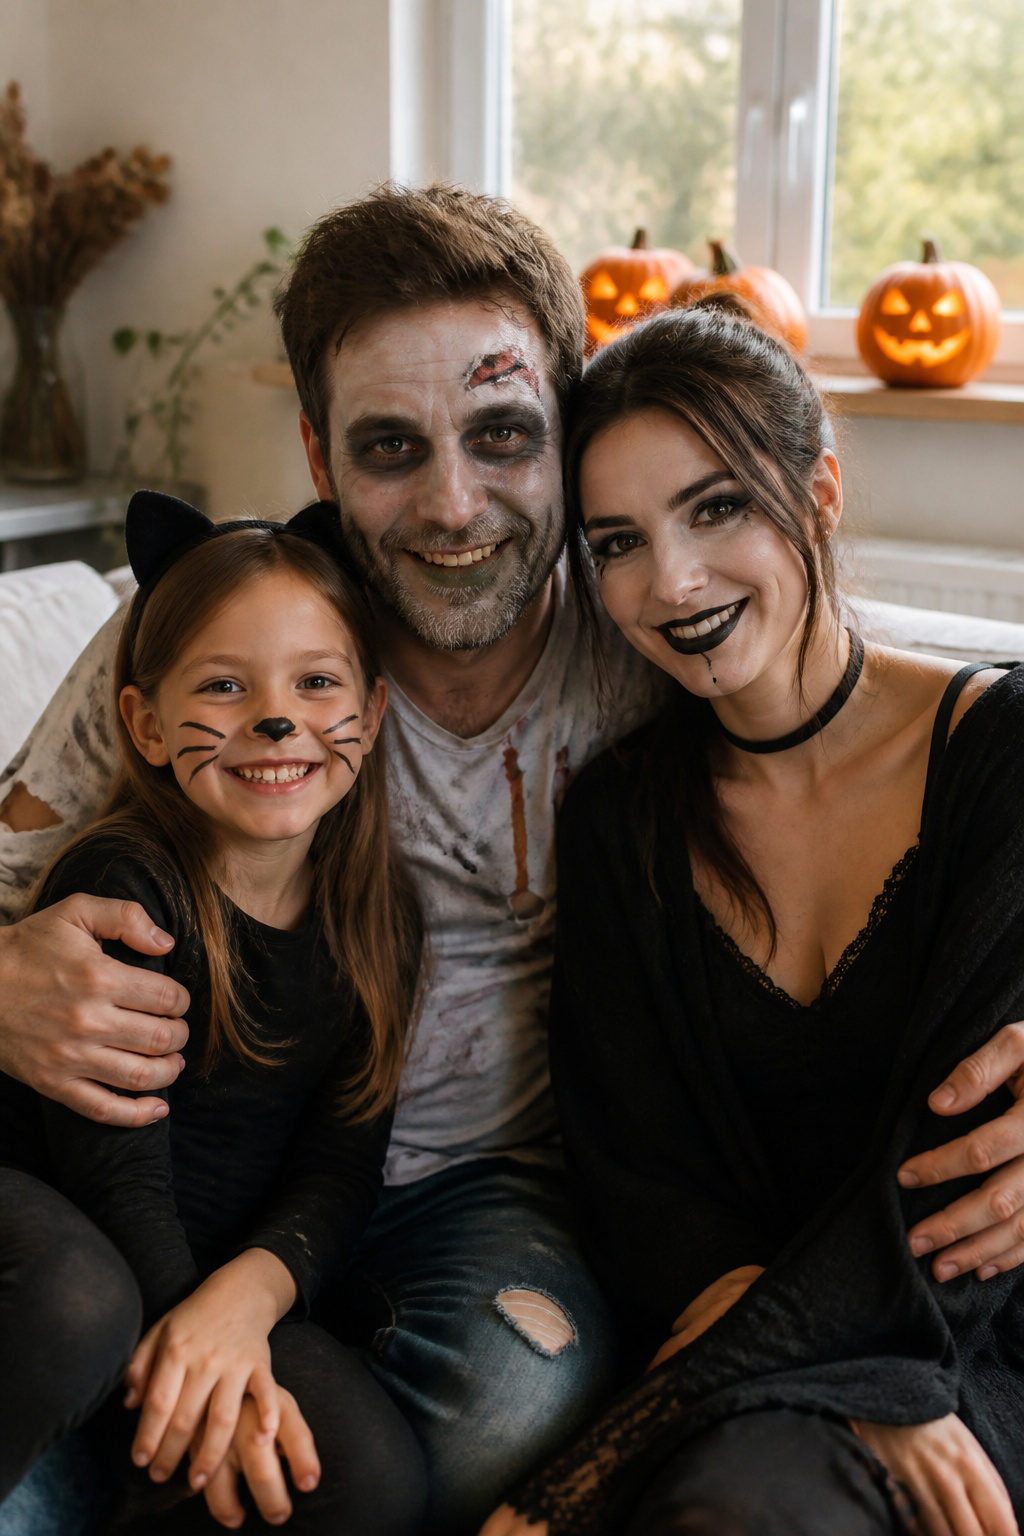
A look that works across ages keeps the evening moving instead of turning into a negotiation. The cat, zombie, and goth styles from the broader list all land here: they need only eyeliner, shadow, and a steady hand, nothing a ten-year-old cannot manage with a mirror and five extra minutes. Water-based face paints marked ASTM D-4236 are the safer bet for kids, since that standard certifies non-toxic formulation; cream palettes meant for adult skin should stay with the adults.
The zombie in particular splits the labor well. You handle the base tone and any fake blood, while the child dabs on their own torn-vein lines with a cotton swab. The goth look is even simpler: they can run the black mascara themselves, you clean the edges after.
Pop art and the possessed princess read as more involved, and they are, but the dot work and the dual-color lip are mechanical tasks a kid often enjoys. Save the sequin sea queen for older children or skip it; loose sequins near eyes and mouths mean supervision that cancels the "easy" part of the evening. If the whole family goes out together, matching cat noses or matching zombie pallor photograph better than mixed themes, and they take the same fifteen minutes per face.
Cultural References
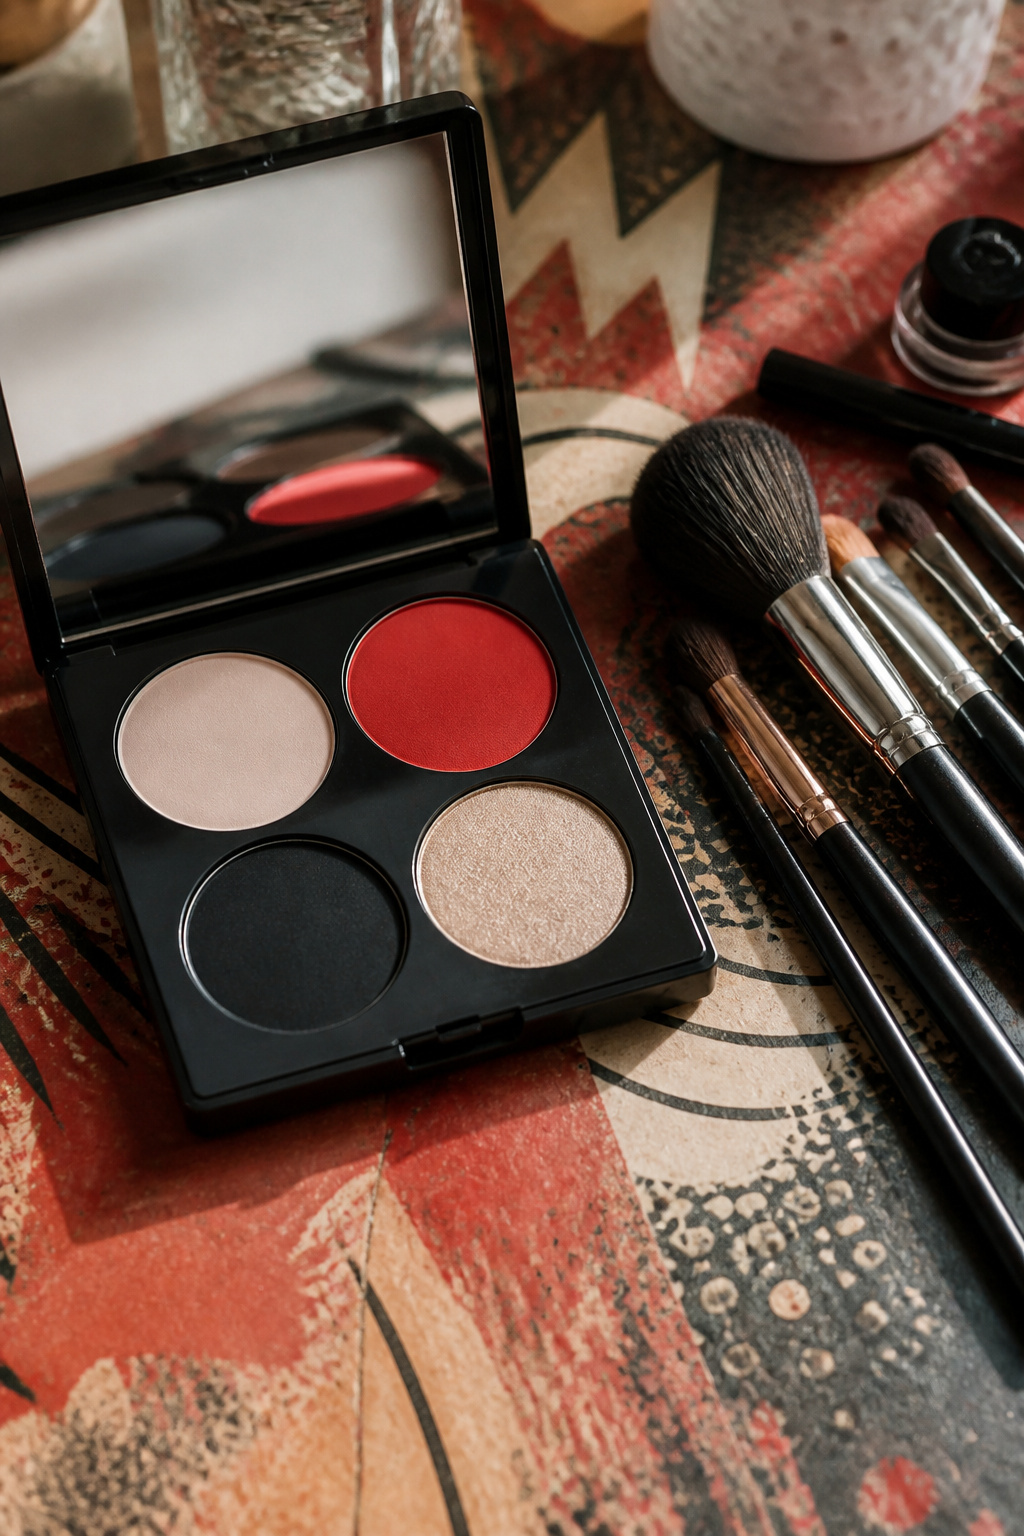
Pop culture faces only work as quick makeup if you keep the one trait that reads across a room. For Betty Boop, that trait is the upturned brow paired with a plush red lip — the doe eyes are secondary, and you can skip the full cartoon contour if the brow angle and lip shape are right. Draw the brows with a pencil lifted at the outer third, keep lids neutral, and press a blue-red cream into the center of the mouth with a fingertip so the color sits heavier there.
Katuss Everdeen runs on the same rule. Sources map the Capitol look as vivid shadow first, then black liquid liner to carve the edge. The metallic shade does the recognition work; the falsies are optional if your lashes already hold a curl. What makes it read as her is the severity of the liner against the color, not the complexity of the blend.
The mistake is trying both eyes at once and ending up mismatched. Do one eye completely, mirror that shape on the other, then clean edges with a cotton swab dipped in micellar water.
DIY Elements
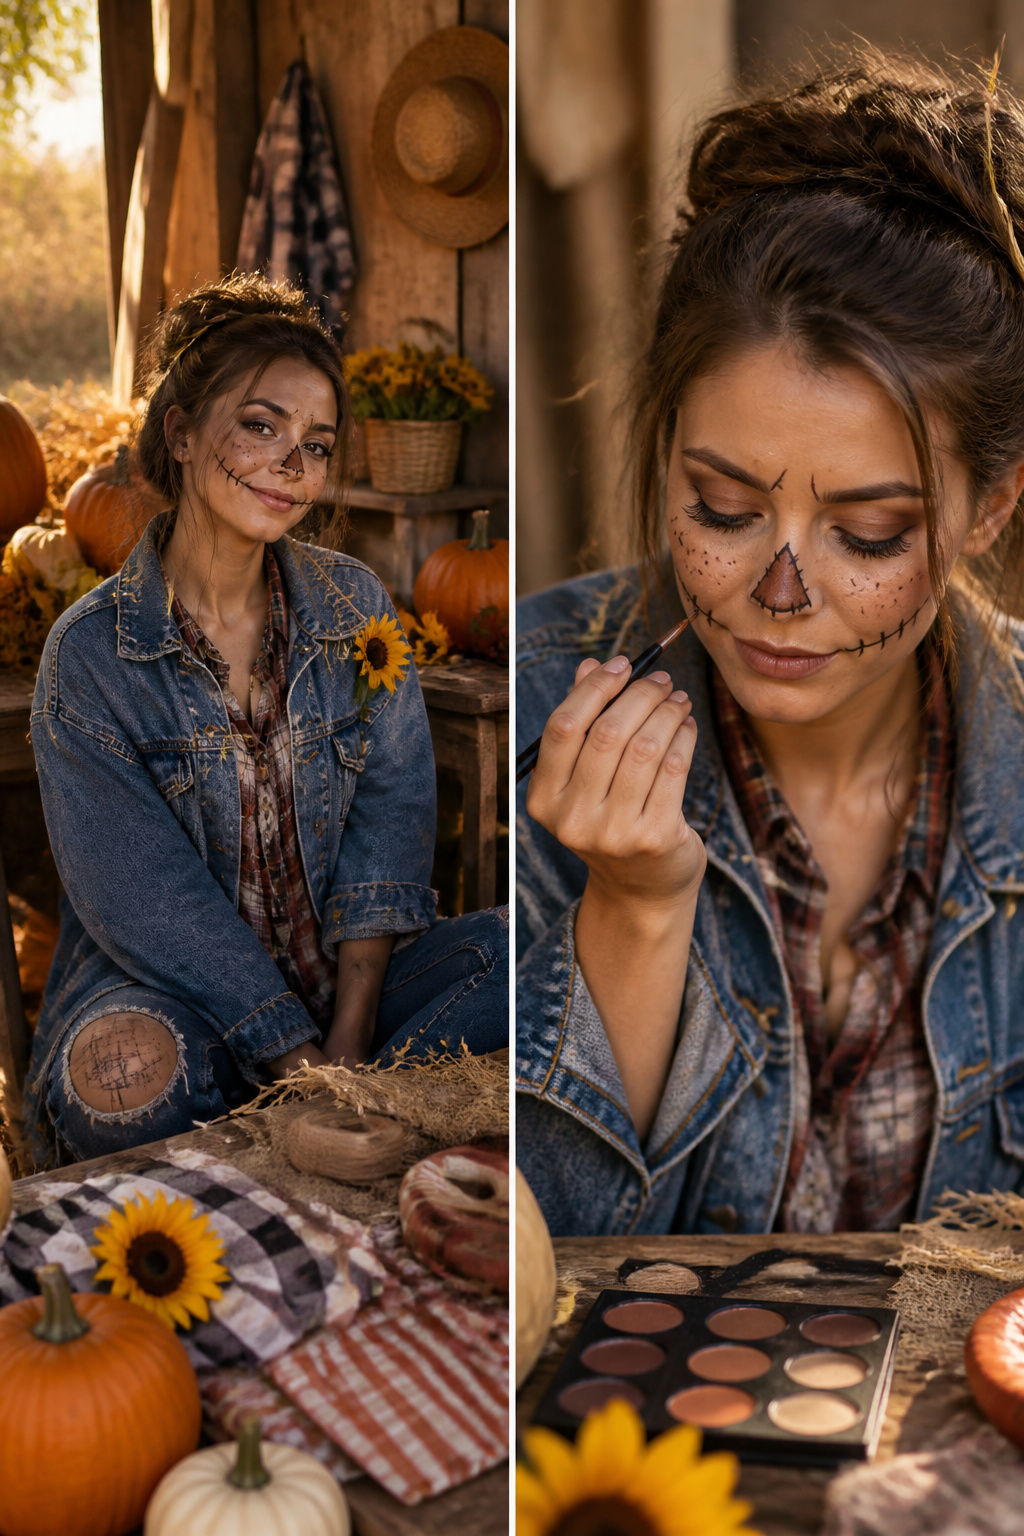
A straw hat and a flannel you already own turn nude-toned makeup into a full scarecrow faster than you might think. The hat does the work; the makeup only has to suggest stitched burlap or a weathered face, and suddenly you are not someone in base coat. You are the character.
The same logic holds for a garden fairy. Pearlescent highlighter and the pinkest blush in your bag build the face, but floral pieces pinned near the ears with lash glue finish the trick. No wings, no full costume, just one prop that reads as enchanted forest.
Bandage-like clothing paired with white and black eyeliner around the eyes makes a mummy in minutes. The wrapped look on the face does the heavy lifting; the clothing only has to hint at gauze. One drawn element, one borrowed accessory, and the viewer fills in the rest.
Frequently Asked Questions
What are some easy Halloween makeup ideas?
Goth, clown, vampire, zombie, mermaid, devil, fairy, sugar skull, spider, cat, princess, mummy, Day of the Dead, pop art, alien, witch, scarecrow, pirate, and doll looks all work with products you likely already own. Most take under ten minutes and rely on smudged liner, single-color bases, or one defining feature rather than precision work. The article breaks down each look with the exact placement and shortcuts that save time.
How can I do Halloween makeup without a costume?
Let your face carry the whole look by choosing makeup that reads instantly from across a room. A split-face devil, overblown princess cheeks, or a full alien base in electric green needs no props to land. The article notes that asymmetry, scale texture, or weathered stippling does more work than any accessory you would spend the night adjusting.
What products do I need for Halloween makeup?
Start with what you already have: black pencil or gel liner, berry or dark lipsticks, contour and eyeshadow palettes, and any white cream base or face paint. The article recommends adding only fishnet stockings as a stencil for scale looks and a pointed cotton swab for cleaning clown edges, with most looks built from everyday makeup rather than single-use Halloween kits.