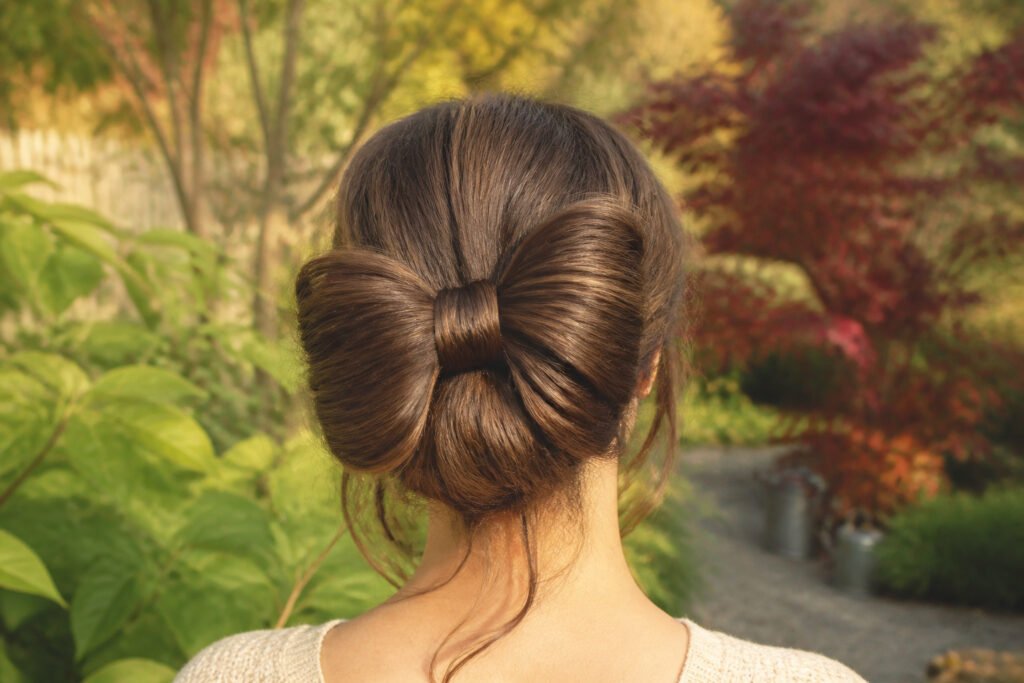
The right bow hairstyle depends on where you are going, not how much hair you have. A loop that droops after twenty minutes undoes the formal effect entirely, while the same collapse on a messy bow reads as intention by hour three. Pick the style to match the dress code first, then build the shape to hold.
1. Classic Bow
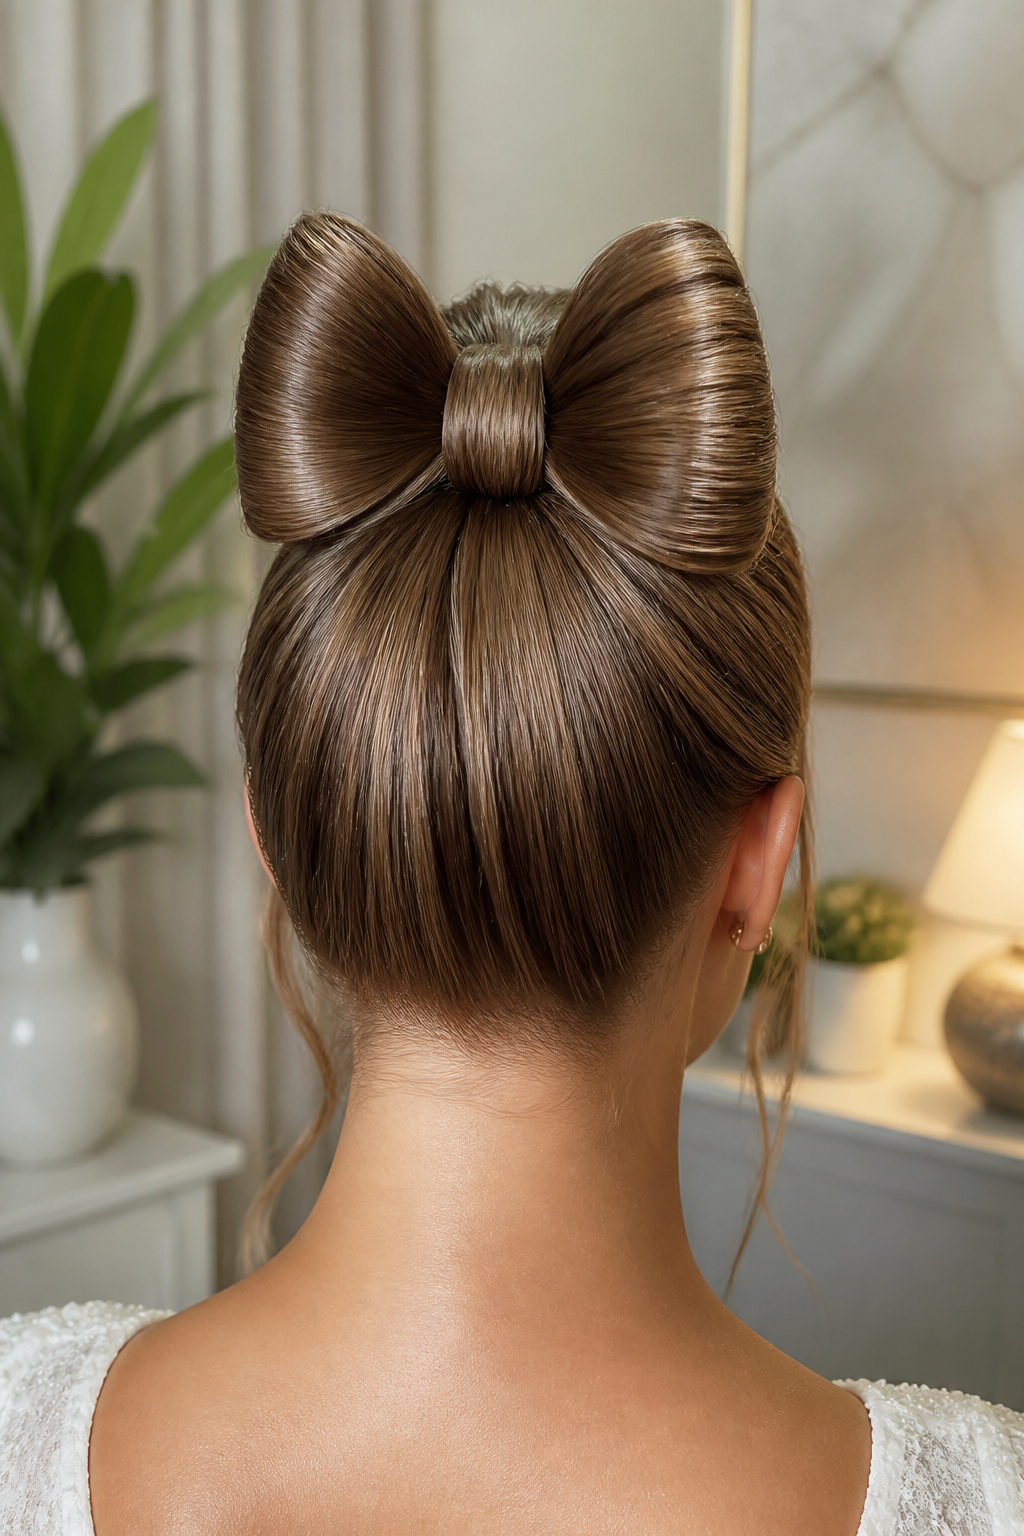
The classic bow sits at the crown or the back of the head, where the clean looped shape reads as jewelry rather than gimmick. You build it from a smooth ponytail base, twist the length into two even loops, and secure them so the profile stays flat and symmetrical. A mist of medium-hold hair spray before and after shaping keeps the loops from collapsing and adds the subtle shine that makes this style read as formal rather than casual.
This is the bow you see at weddings and evening events because it frames the face without competing with it. The placement at the crown lifts the line of the silhouette; at the nape, it lengthens the neck. Either way, the control matters more than the size. A loop that droops after twenty minutes undoes the effect entirely, so you need enough product to lock the shape without stiffness. The wrong spray leaves it looking shellacked; the right one keeps the surface touchable.
2. Messy Bow
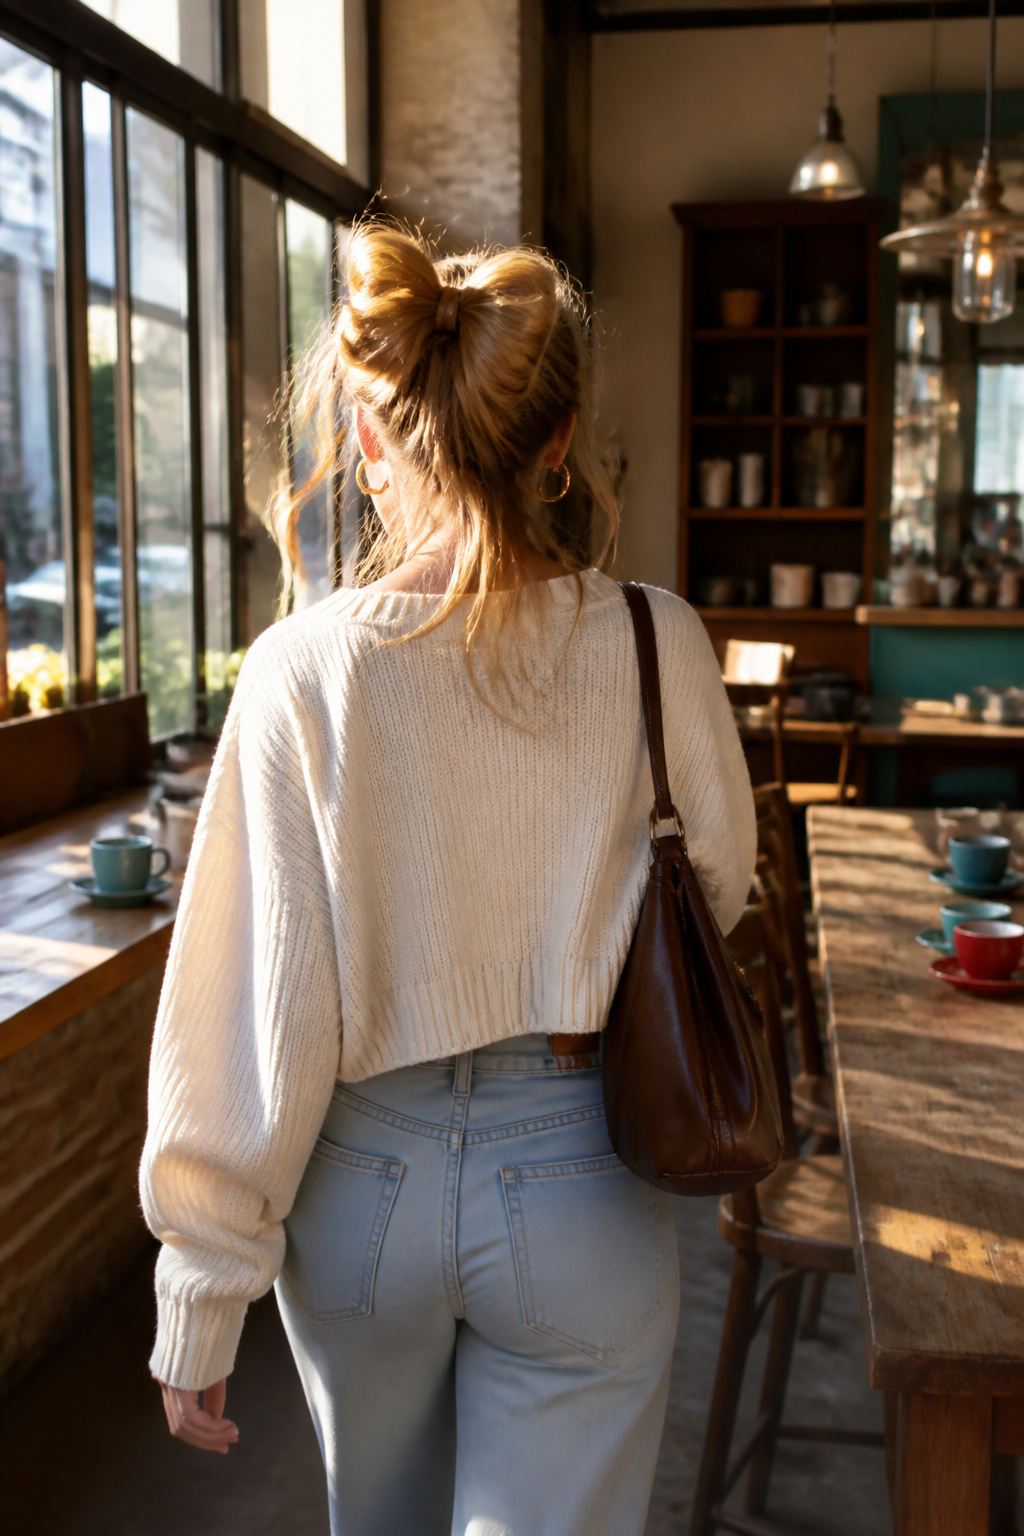
The messy bow keeps almost nothing of the classic bow’s precision. Where the classic pulls every strand taut and pins the loops into identical arcs, this version lives in the slack: hair pulled back with fingers rather than a comb, loops secured loose enough to shift when you turn your head, and ends left ragged instead of ribbon-cut. The tension that holds a gala bow crisp for four hours would give you a headache here. You build it by wrapping a ponytail or half-up section, letting the last loop fall where gravity takes it, and anchoring with a single pin rather than the classic’s three or four. Dress codes reveal the difference fast. The messy bow goes flat or lopsided by hour three, which disqualifies it from weddings and presentations. For grocery runs and coffee dates, that same collapse reads as intention. You look like you styled it once and lived in it, which is exactly the point.
3. Double Bow
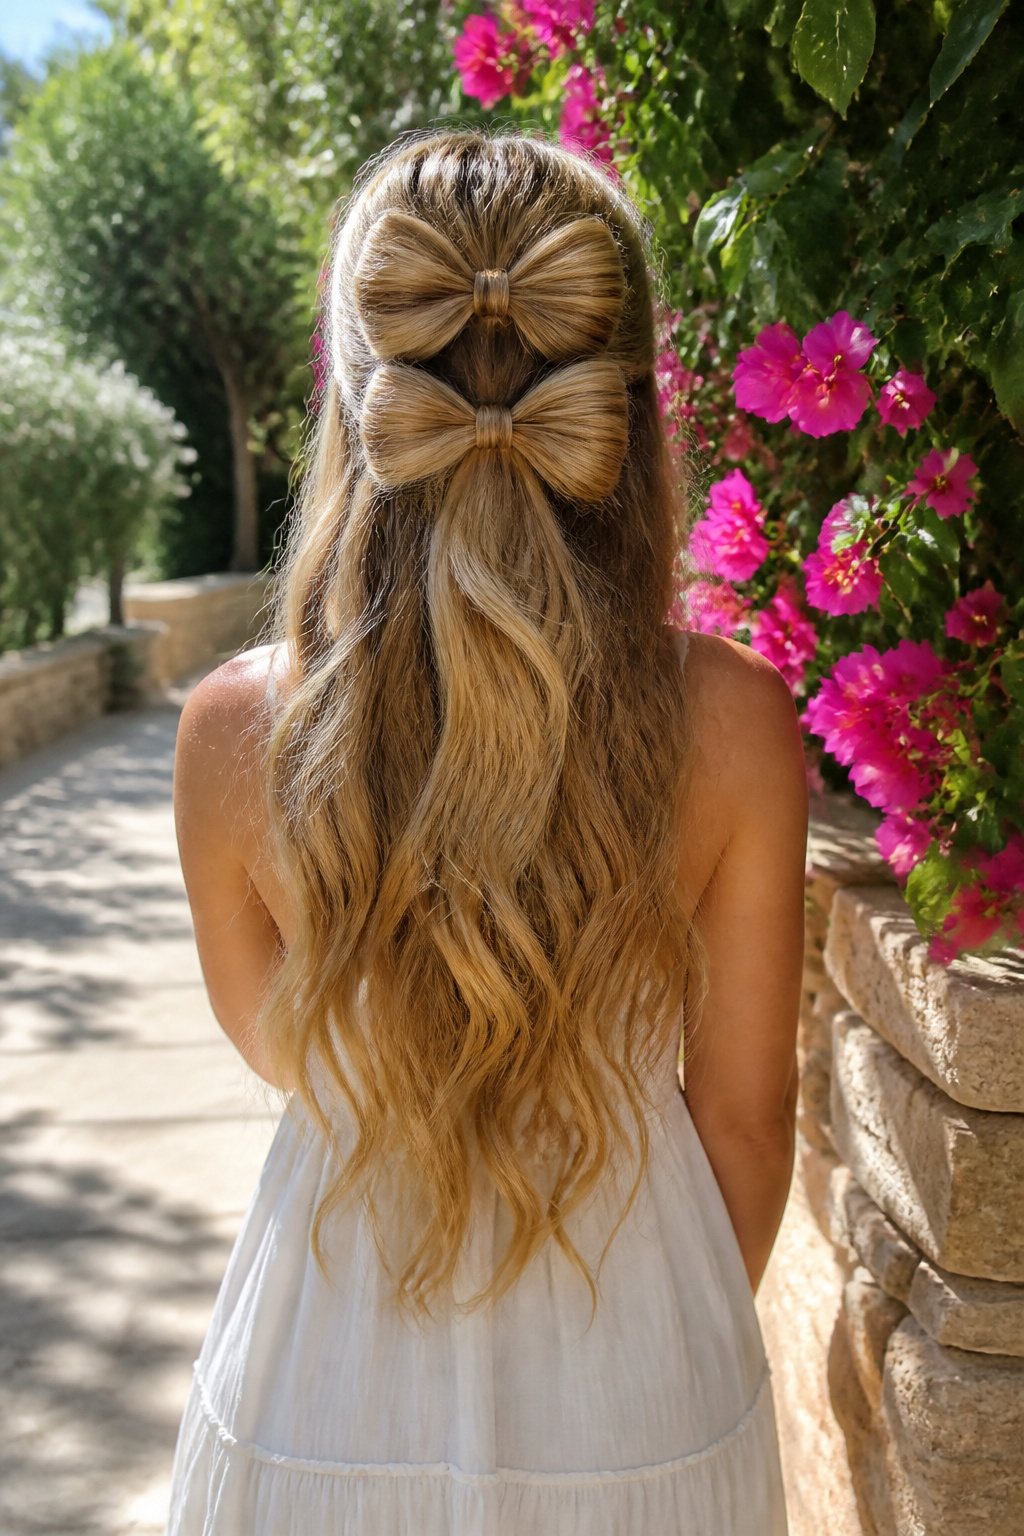
Two bows stacked together give you a shape you cannot get from one. The second bow sits directly on top of the first, pinned through its center knot so the loops of the lower bow flare out underneath like a collar. That layering is what builds the volume: from the front you read it as one wide silhouette, from the side you see the stair-step depth.
You need enough hair to anchor both bows without the top one tilting. Hair that reaches the shoulder blade or longer works best, and a medium thickness or above keeps the structure from collapsing into a flat pancake by noon. Fine hair can manage it if you tease the base and use smaller bows, but the effect stays fragile. The payoff is real presence, the kind of shape that reads across a room, though you will feel the weight by the end of the day.
4. Side Bow
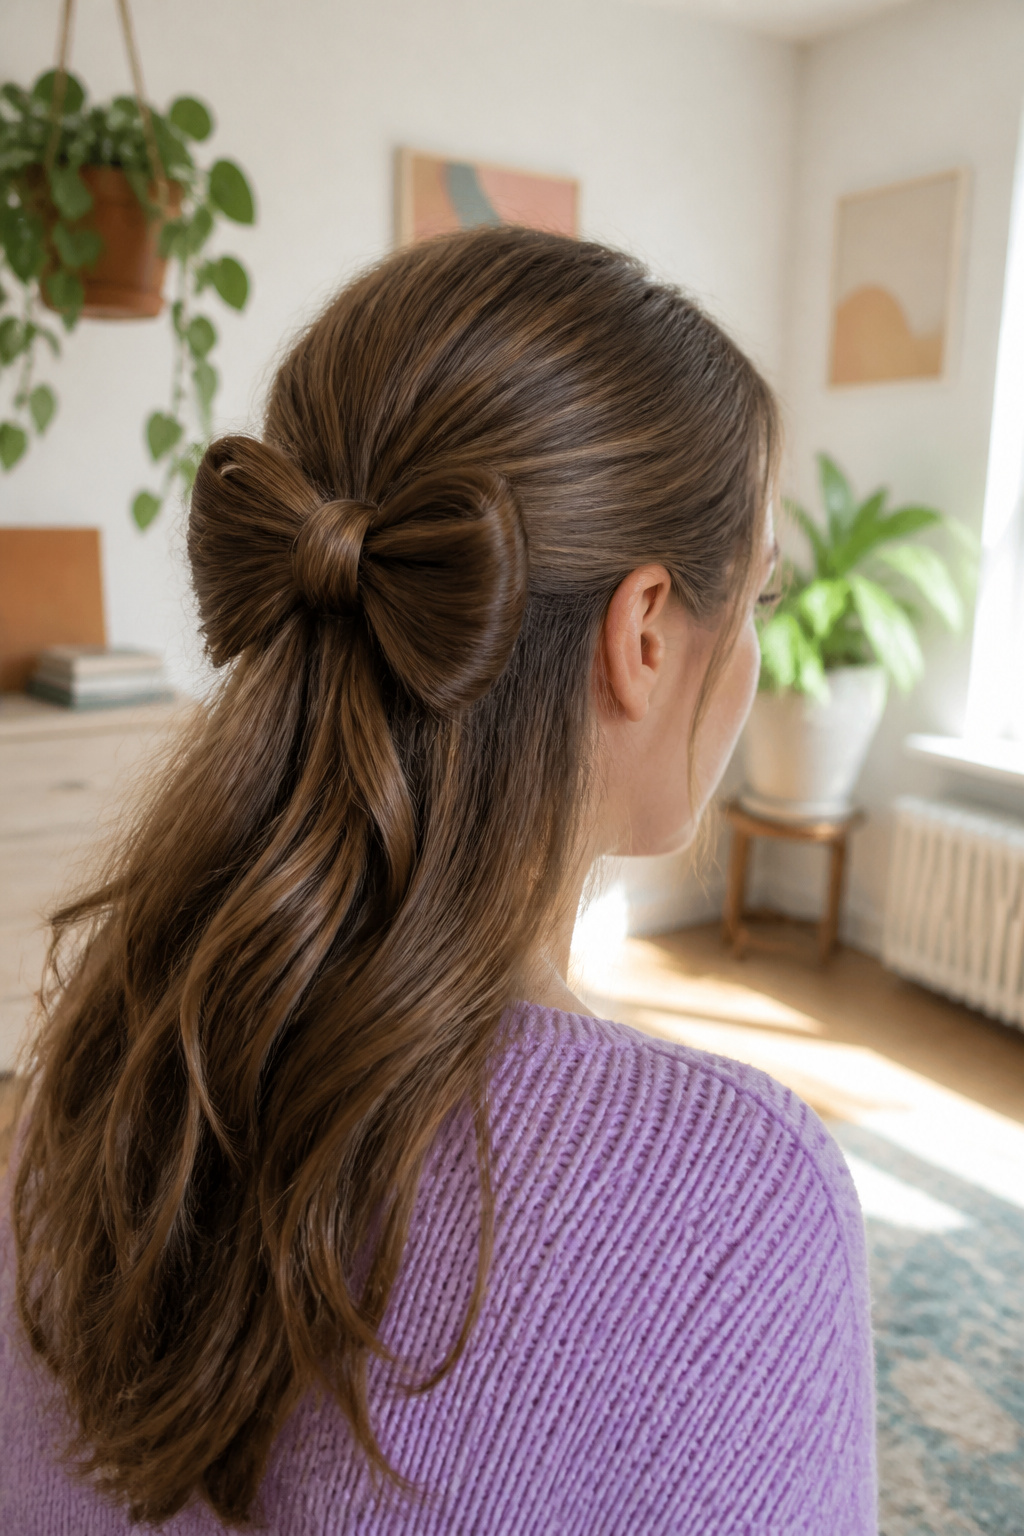
A bow set at the temple rather than the crown shifts the whole geometry of the face. The side placement draws the eye across, not up, which softens a strong jaw and adds width to a narrow face where a top bow would only lengthen it further. You will notice the difference in photographs immediately; most people have one side that photographs better, usually the one with a slightly higher eyebrow or more pronounced cheekbone, and the bow goes there. The asymmetry reads as movement, not mistake, but only if you commit to it fully. A side bow placed too far back toward the ear disappears; too far forward and it competes with the eye. The sweet spot sits just above and slightly behind the outer corner of the eyebrow, where it frames without intruding. For casual days this placement keeps the bow visible in profile and from the front alike, but it does mean the style has a clear left or right bias. You are choosing a look, not a neutral tool, and that is the point.
5. Braided Bow
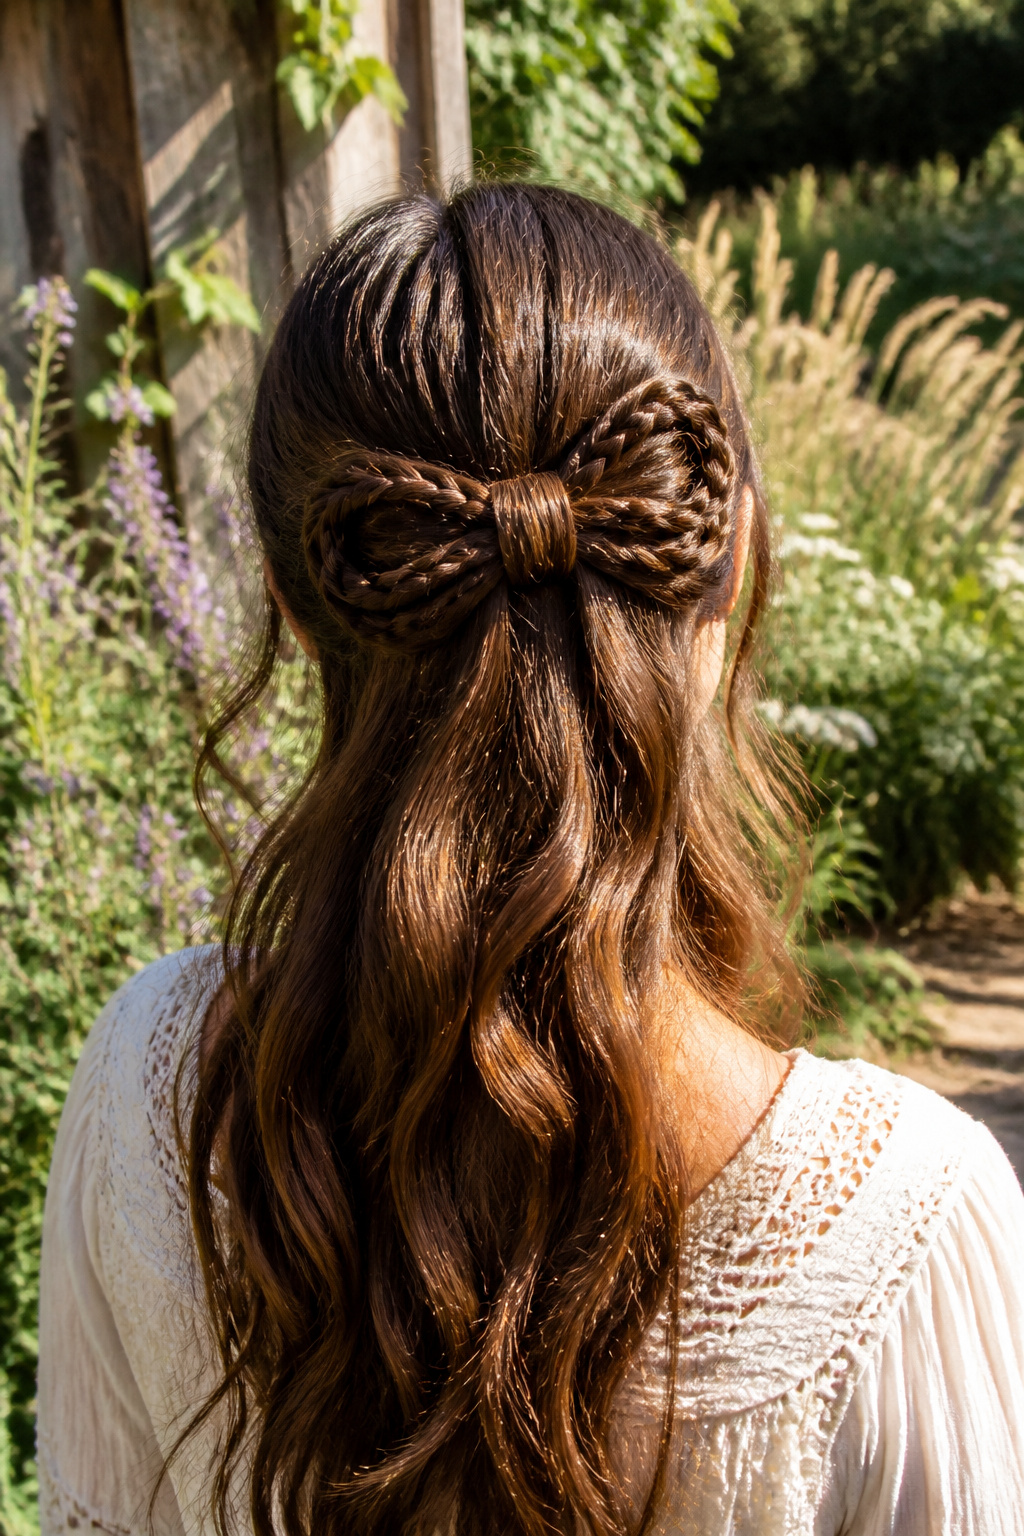
A standard three-strand braid woven through each loop gives the braided bow its structure, though a rope braid holds its shape longer without pins. The braid replaces the smooth fold of a classic bow with a ridged surface that grips against itself, so the finished shape stays put through an eight-hour day where a plain ribbon bow would loosen by lunch. That texture changes the silhouette too: the loops read as narrower and more architectural, less like fabric and more like ropework. Count on fifteen to twenty extra minutes to braid, secure, and weave the lengths into loops before you tie the center knot. The hold is worth the trade if your hair is fine or layered, since the braid gives the pin something to bite into that a flat ribbon of hair never would. A rope braid holds longer without pins if you are skipping the extra grip, but the three-strand is easier to thread through a loop without snagging.
6. Bow Bun
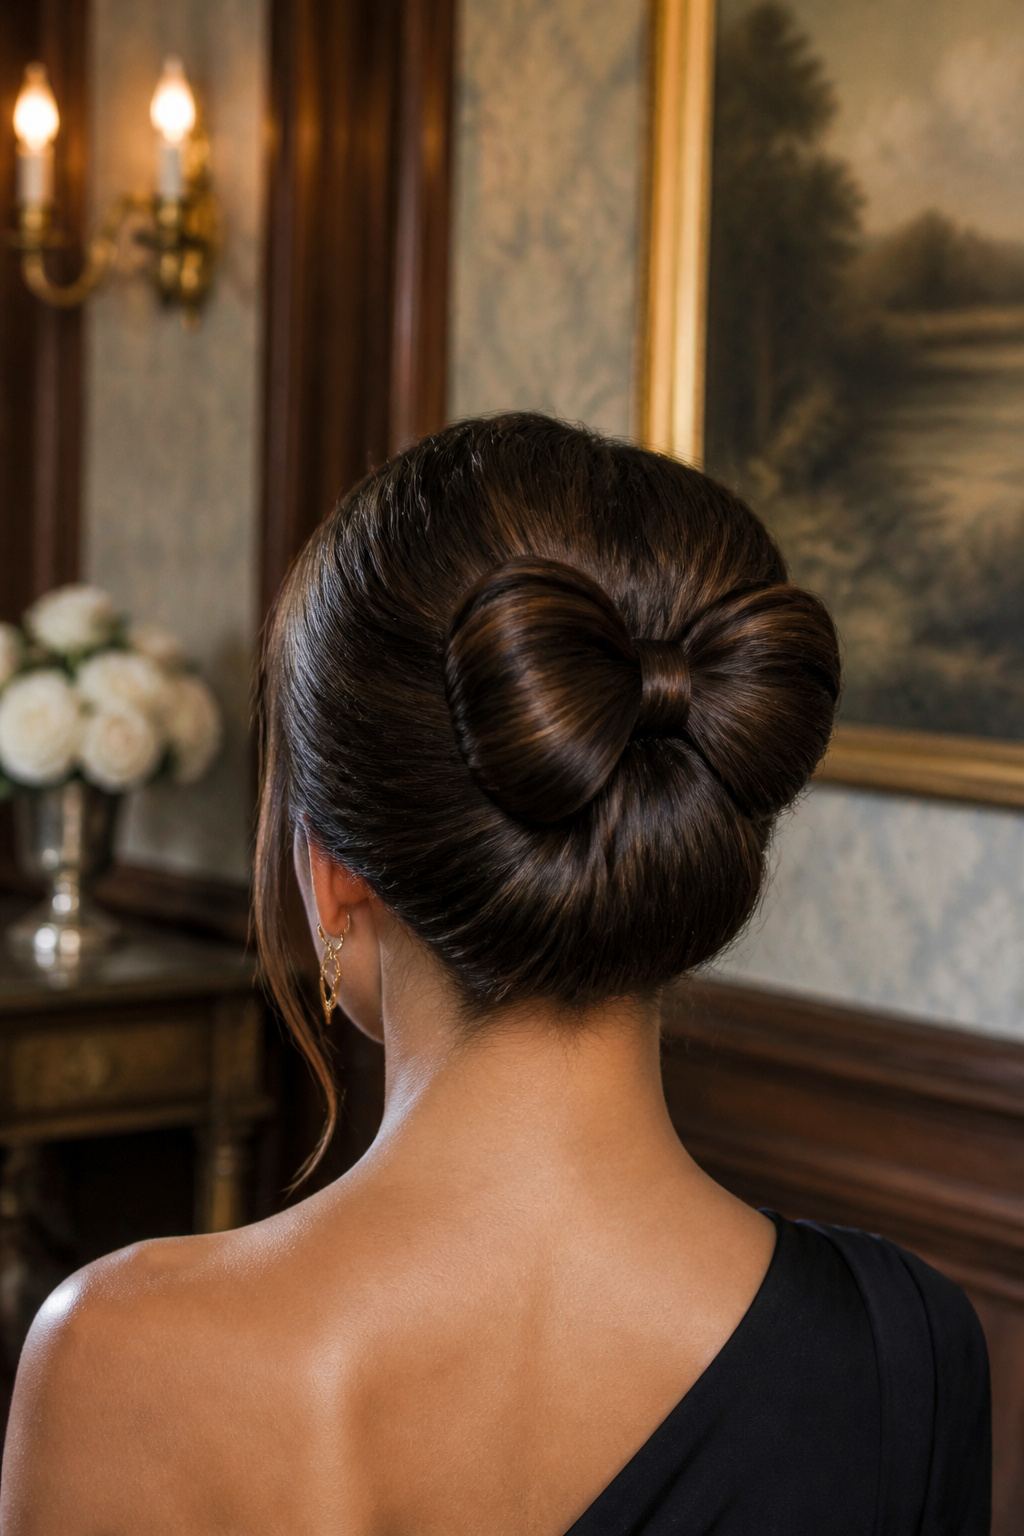
A bow bun works because the bow and the bun share the same anchor point. You form a standard bun at the crown or nape, then loop your ribbon around the base itself so the bow sits either flat against the scalp or perched on top like a finishing piece. That shared anchor is what keeps it from sliding; a plain bow tied over loose hair has nothing to grip, but here the elastic or pins holding the bun also secure the ribbon.
The style reads more dressed-up than a ribbon tied at the end of a ponytail because the bun already signals occasion. You see it at weddings and office parties where a plain bow would look too casual, but a bare bun would look unfinished. The bow fills that gap without adding another moving part.
Security is the practical win. A bow pinned to the side of your head works loose as you turn your head or pull a coat over it. The bow bun moves as one unit. If the bun holds, the bow holds. That matters on long days when you are not checking a mirror every hour.
7. Bow Ponytail
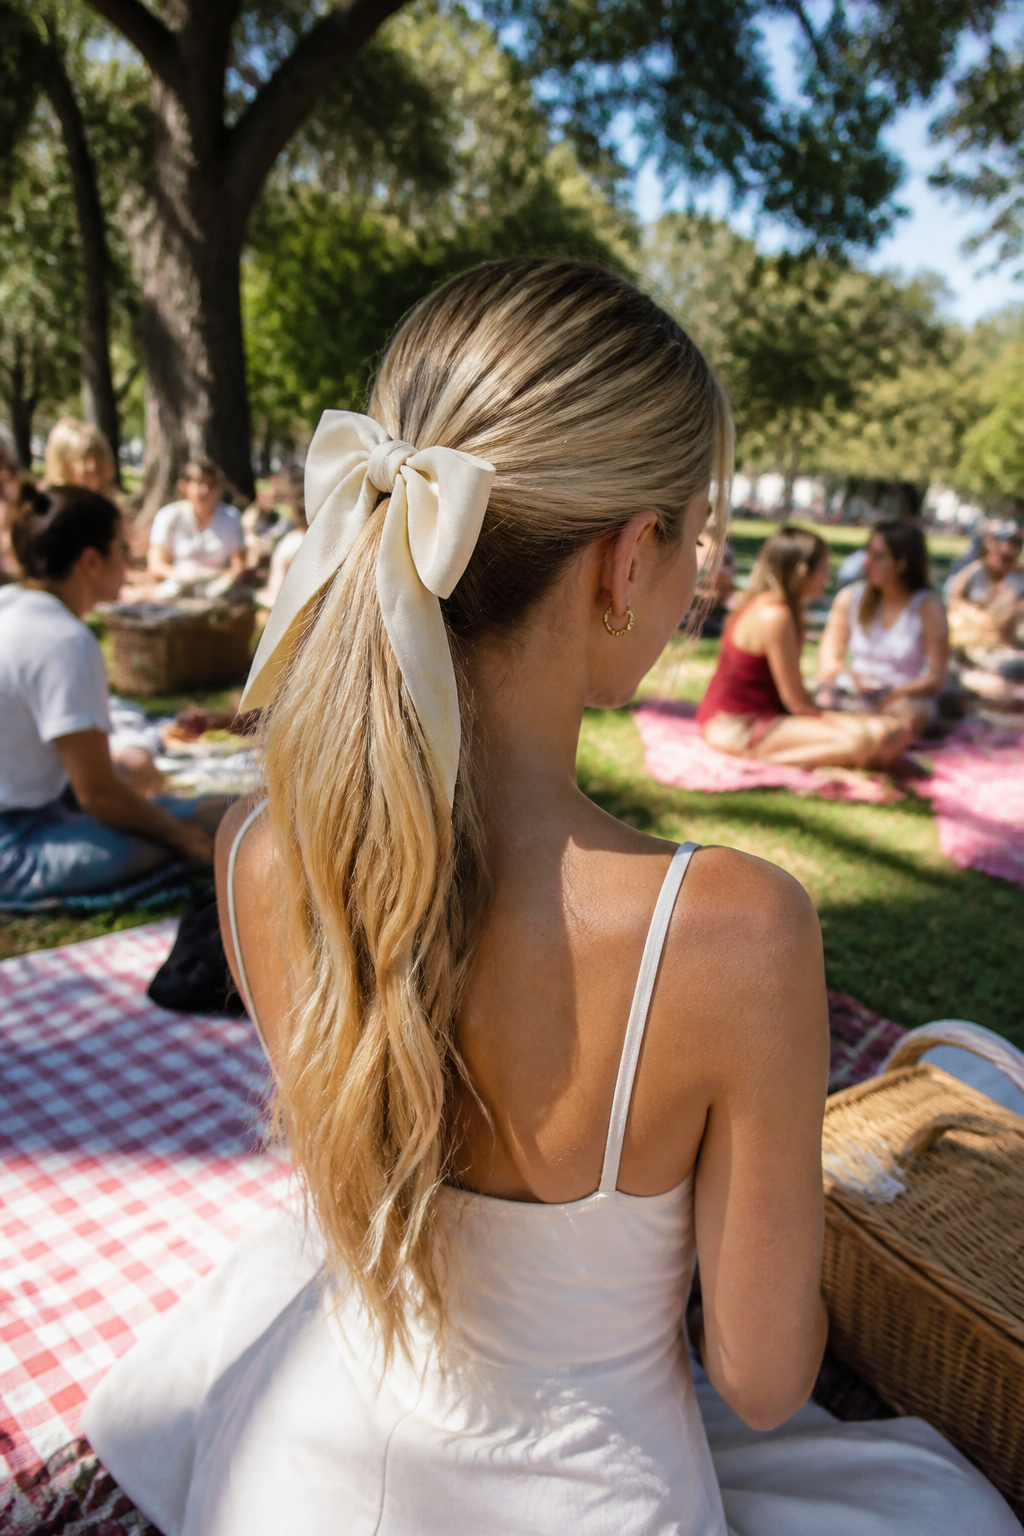
A bow tied at the base of a ponytail sits where the elastic would show, turning the fastest morning style into something finished. You secure the ponytail first, then knot the bow so the tails fall down the back or angle off to one side. Higher placement, up at the crown, reads sharper and more pulled-together; lower, at the nape, softens into something you could wear to dinner without feeling overdressed.
This is where you start if you have never worn a bow out of the house. You already know how to do a ponytail. The bow only asks you to hide the elastic and let the fabric do the work. Satin or velvet will read dressier than cotton or grosgrain, so match the material to where you are headed. The only real mistake is tying the bow too loose, so it slides and you spend the day adjusting it. Tight against the elastic, and it stays put.
What You Need
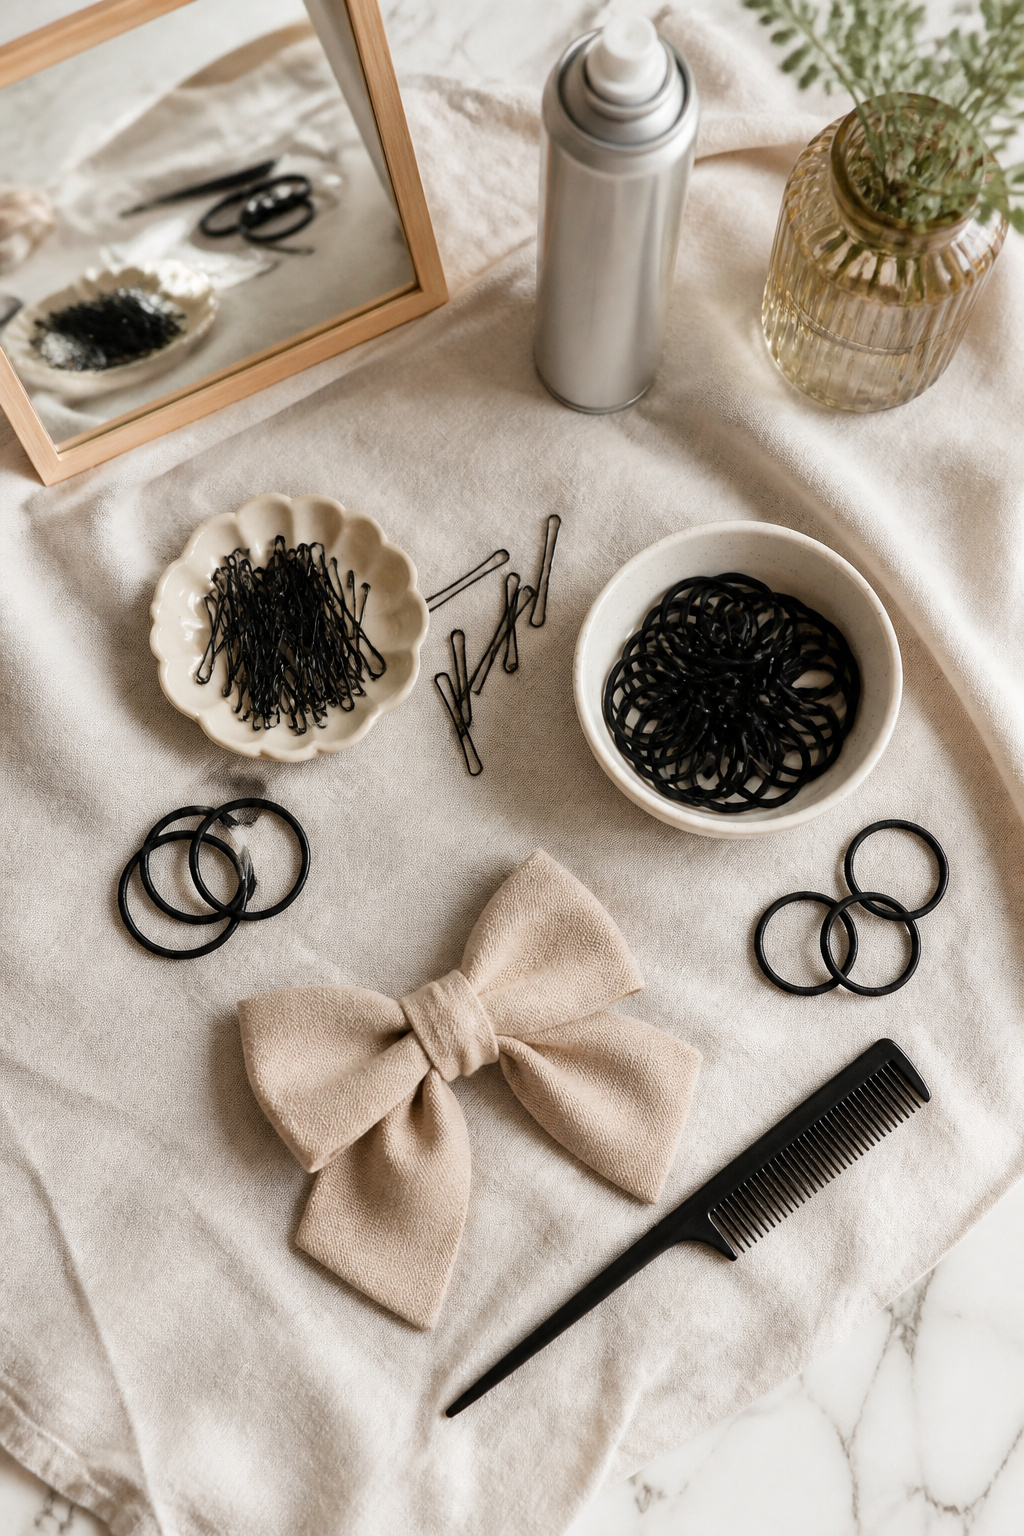
You do not need much to build a bow hairstyle, but the order in which you reach for things matters. A hair tie is your foundation. It anchors the initial ponytail or bun that the bow wraps around, and without that anchor the shape collapses before you finish. Elastic with no metal clasp is the safer bet; the metal catches and snaps strands you cannot spare.
Bobby pins do the actual sculpting. You will use them to tuck the loops, pin the tails, and correct the angle so the bow faces forward instead of sagging toward your ear. Decorative clips come in last, if at all. They are insurance: a clip at the base of the bow hides the mechanics and buys you an hour if the pins slip.
Hair spray is where most people stop, but shine spray is the item you forget until halfway through. You build the shape, step back, and notice the loops look dusty against the light. A light mist of shine spray fixes it, though by then you are spraying around pins rather than on clean hair, and the finish never quite evens out. Do both: spray for hold while you work, shine at the end.
In a pinch, a second hair tie replaces the pins for a looser bow, and dry shampoo adds grip if your hair is too clean to hold a shape.
Where Each Style Works
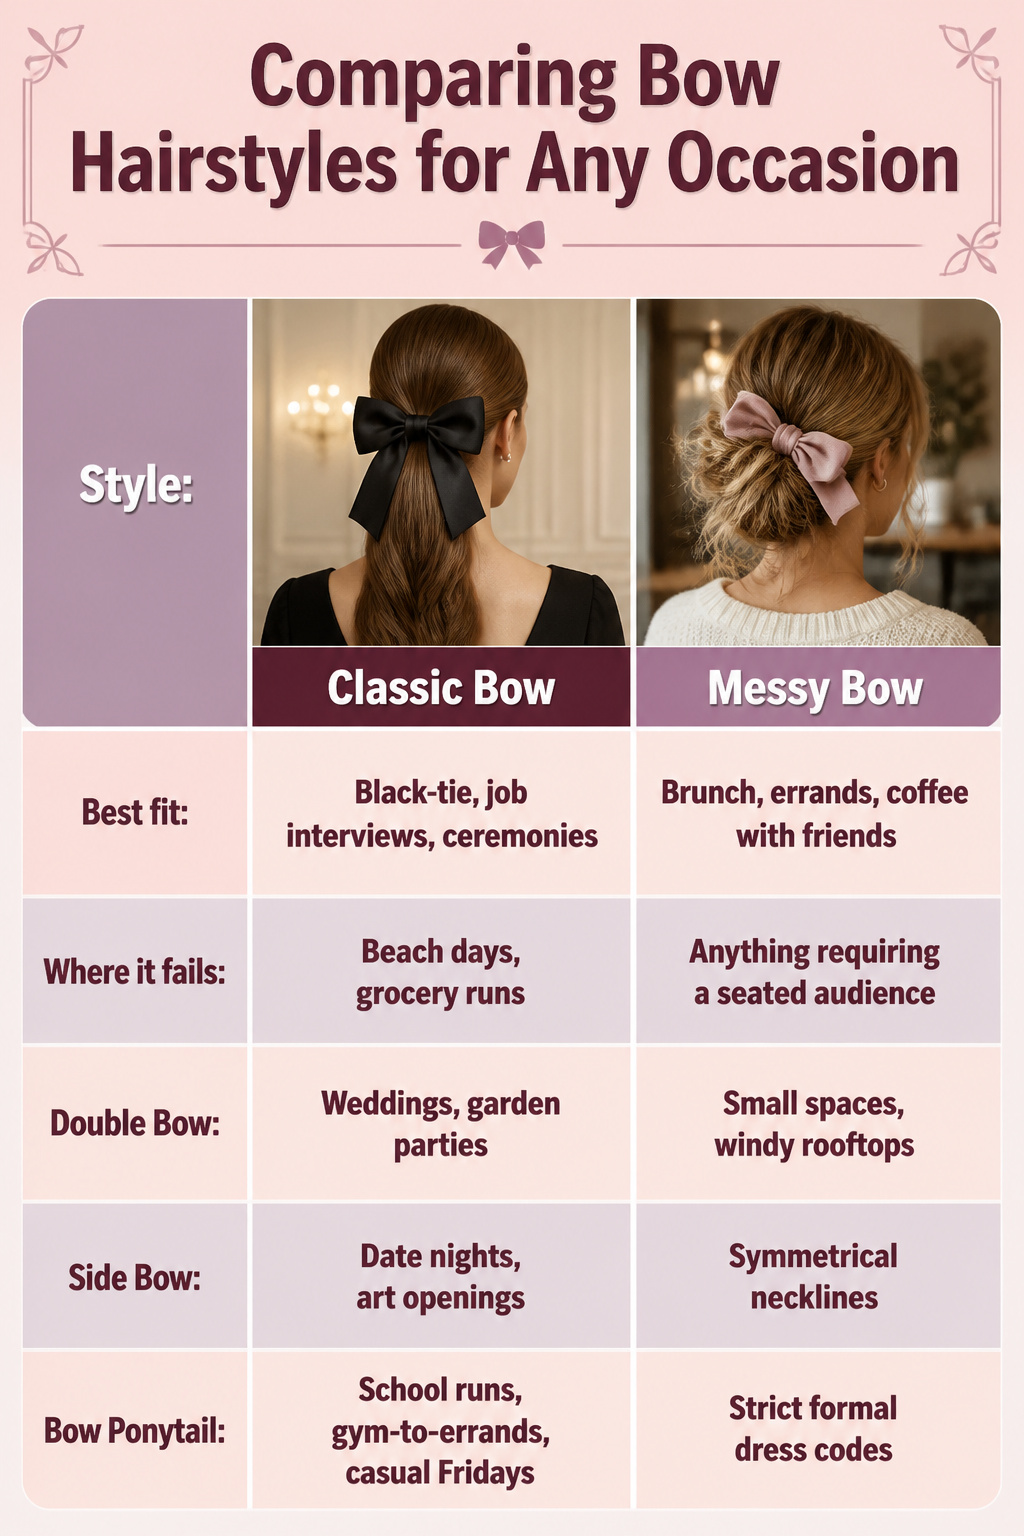
The seven bow hairstyles split cleanly across four kinds of days, and getting the match wrong is what makes the bow feel like a costume instead of a choice. You already know the two anchors: Classic Bow for formal events, Messy Bow for casual outings. The rest fill the gaps between.
| Style | Best fit | Where it fails |
|---|---|---|
| Classic Bow | Black-tie, job interviews, ceremonies | Beach days, grocery runs |
| Messy Bow | Brunch, errands, coffee with friends | Anything requiring a seated audience |
| Double Bow | Weddings, garden parties | Small spaces, windy rooftops |
| Side Bow | Date nights, art openings | Symmetrical necklines |
| Braided Bow | Outdoor weddings, music festivals | Rush-hour mornings |
| Bow Bun | Office-to-dinner days, funerals | Active afternoons, high humidity |
| Bow Ponytail | School runs, gym-to-errands, casual Fridays | Strict formal dress codes |
When your outfit and your hair disagree, the bow wins or loses the room. A sequined dress with a Messy Bow reads as unfinished; jeans with a Classic Bow reads as trying too hard. The fix is simple: whichever piece took less effort, adjust that one. Tousle the bow or sharpen it until both halves of you look like they came from the same morning.
How to Build the Basic Bow
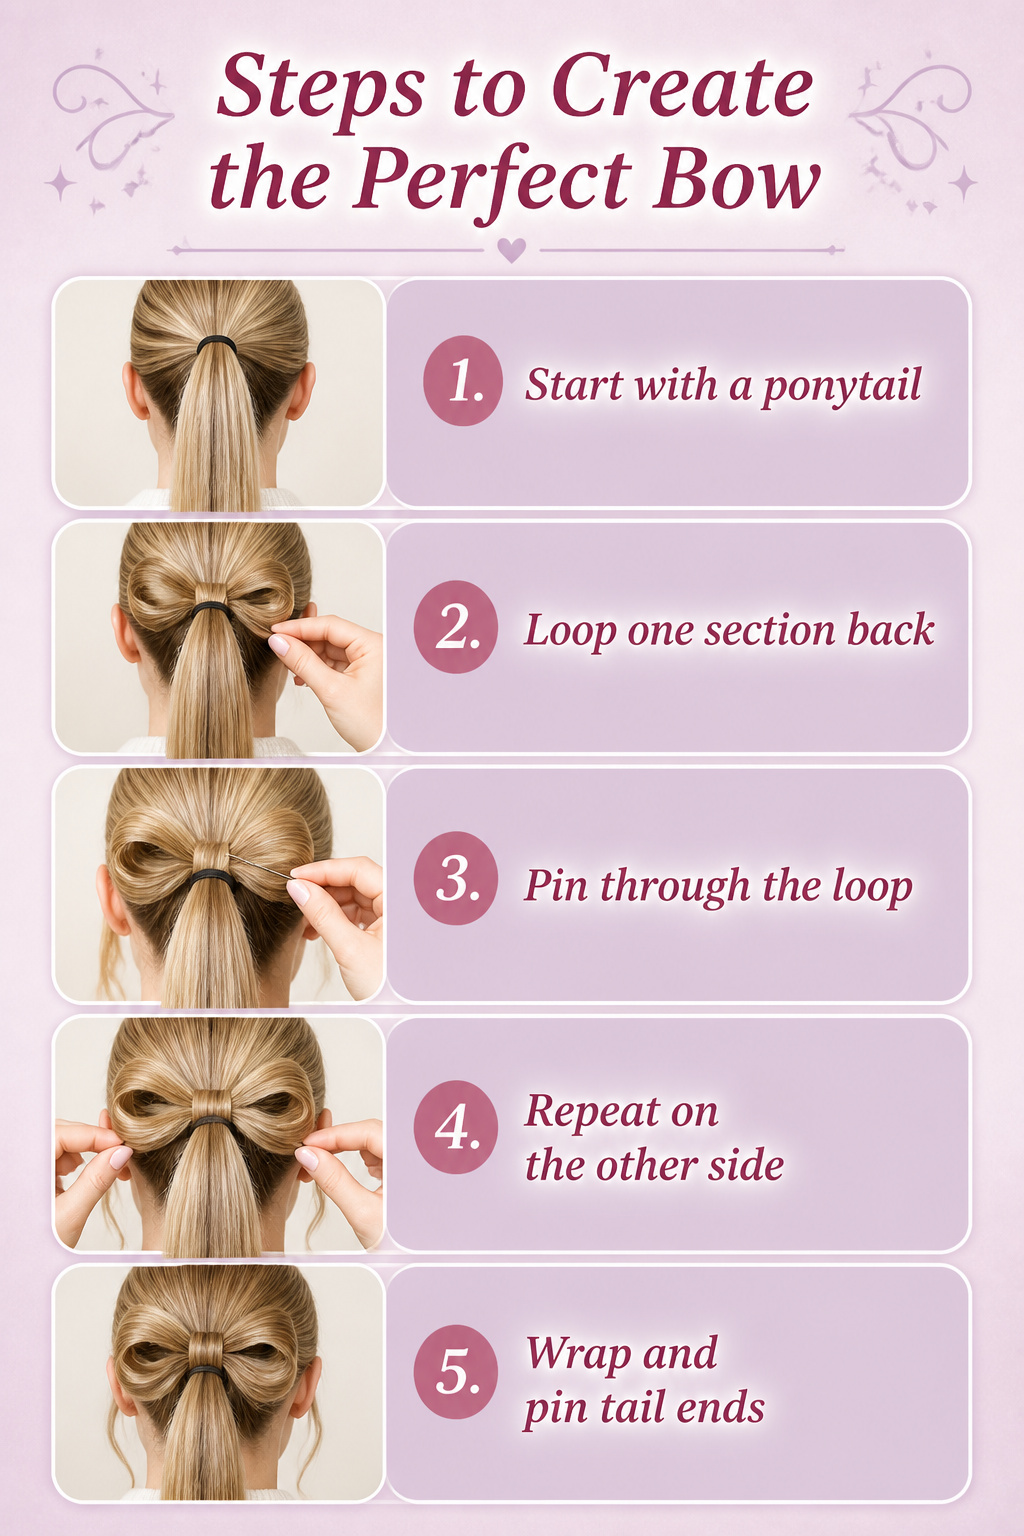
- Start with a ponytail where you want the bow to sit, high or low depending on the style you are building toward. Leave the elastic visible; it becomes the center knot.
- Split the ponytail in half. Take one section and loop it back toward the elastic, pinning the ends flat against your head so the loop fans outward. Do not pull this first loop tight against the scalp. Tension flattens the curve and gives you two pinned-down ears rather than a bow shape.
- The fixing point matters. Slide the pin through the loop where your finger naturally braces the fold, usually an inch or two from the elastic, and push it toward the center so the tension pulls inward, not down. This hidden angle is what lets the loop keep its height.
- Repeat on the other side and adjust before adding a second pin. The two loops should match in spread and sit at the same depth; uneven first loops are the reason most bows look lopsided in back.
- Take the remaining tail ends, wrap them around the elastic to hide it, and pin underneath. A few strands pulled free at this stage shift the look from costume to something you might actually wear out.
Frequently Asked Questions
What are some popular bow hairstyles?
The seven bow hairstyles to try are the Classic Bow, Messy Bow, Double Bow, Side Bow, Braided Bow, Bow Bun, and Bow Ponytail. Each one differs in placement, tension, and structure, so the right choice depends on your hair length and where you are headed. The Classic Bow sits at the crown or nape with smooth, symmetrical loops, while the Messy Bow keeps everything loose and finger-pulled for casual days.
How do you create a bow hairstyle?
Start with a ponytail where you want the bow to sit, then split the tail in half. Loop one section back toward the elastic and pin it so the loop fans outward without pulling tight against the scalp. Slide the pin through the fold an inch or two from the elastic, pushing toward the center so tension pulls inward, not down. Match the second loop for spread and depth, then wrap the remaining ends around the elastic to hide it.
What occasions are bow hairstyles suitable for?
Bow hairstyles work across the full range of dress codes if you match the style to the day. The Classic Bow fits black-tie events, job interviews, and ceremonies, while the Messy Bow belongs at brunch and coffee dates. The Bow Bun bridges office and dinner, and the Bow Ponytail handles school runs and casual Fridays. The only real mistake is pairing a crisp, formal bow with jeans or a sloppy one with a seated audience.